In order to avoid problems such as reduced field of view in dark time days, as well as increasing the danger for drivers driving on oncoming lane you need to properly adjust the car headlights.
Universal headlight adjustment instructions
This can be done manually, with the help of car service specialists or using the right equipment. If you want to save money but do it right this procedure, then independent headlights are adjusted in four steps:
- make markings on the wall;
- carry out the marking of the lamps;
- adjust the low beam;
- tune high beam.
When to Adjust Your Headlights
Every driver should know when to adjust the headlights. Therefore, if you are not one of them, then we will briefly recall this. This procedure is performed in one of the following cases:
- When replacing headlight bulbs. This applies to devices with both single and separate optics.
- When replacing one or both headlights. This may be caused by its failure, an accident, the desire of the owner to install a more powerful or technologically advanced lighting device.
- If you feel that you are uncomfortable driving with existing light and what needs to be adjusted.
- In the case when, when driving at night, drivers of oncoming cars blink at you high beam, thereby signaling that you are blinding them.
- When installing fog lights. As a rule, only PTF is adjusted.
- After performing work related to changing the stiffness of the suspension.
- When replacing discs or rubber with similar products with different diameters.
- In preparation for the passage of routine maintenance.
- before traveling long distances.
Monitor the light emitted by your car's headlights and adjust if necessary. Remember that an incorrectly set light brings discomfort and a threat not only to you, but also to the drivers of oncoming cars.
Two universal ways to adjust the headlights
Before proceeding with headlight adjustment, it is worth check the following options auto:
- Tire size difference.
- The condition of the springs in the suspension.
- Full distribution of various loads.
- Tire pressure level.
If there are malfunctions here, then the angle of illumination will be incorrect, which, in turn, will certainly affect the quality of the adjustment itself. Naturally, in order to adjust the light correctly, you will need meet some important conditions. The first of these is the presence of a vertical, even wall with sufficient space for a car - a length of at least 7.5 meters.
For direct marking, either chalk or adhesive tape can be used. Since each car has its own dimensions, the markup for it is purely individual. However, there are several standard values, which can be used for almost all cars.

The first way to adjust the headlights
We find a flat area, the side of which should rest against the wall. The wall, in turn, should be without protrusions, corners, various irregularities and strictly vertical. We drive close to the wall and mark the center of the car, as well as the central axis of the lamps.
To correctly mark the wall, you need to mark the distance from the floor to the lamp and from the marked lamp to the center of the car. Then it is worth drawing another line on the wall, located 5 cm below the first. Further we move away from the wall by 7.5 meters and draw a horizontal line on the wall that will connect the center points on both lamps.
Then we draw vertical lines through the central points of the headlights. Another vertical line should be drawn through the center point of the machine. This line should be 7.62 cm lower than the one that connects the center of our headlights.

Adjusting screws for adjusting the headlight beam
Having carried out the markup, we turn on the near one and make a direct adjustment, in which the angle of inclination of the lamps completely coincides with the horizontal line. And the place where the light begins to rise up must necessarily coincide with the intersecting drawn lines.
As a result, in order to get the desired beam of light, one should tighten the adjusting screws, which are located under the hood of the car on the back of the headlight.
Perfect the right option is when the light is slightly below the headlight center mark.
If the car has a combined high and low beam, then only the high beam can be adjusted, and the low beam will be adjusted automatically.
If your car has a separate high and low beam system, then each beam of light will have to be adjusted in turn. And the marking of the wall will also be slightly different - the low beam is adjusted according to the method described above. And the high beam must be placed so that it exactly falls on the central marking of the headlights. In this case, it is better to use special equipment, without which ideal adjustment will not work in this version.
The second way to adjust the headlights
You will need the same even wall as in the first case, but the car must be placed at a greater distance - 10 meters. To make the adjustment as accurate as possible, pre-prepare the car: inflate tires, refuel full tank gasoline, put behind the wheel of a person who is as suitable as possible in weight to the driver.

How to adjust headlights without instruments
On the wall we mark the places that correspond to the center of the lamps, as well as at the distance at which they are located in reality. We connect these two points horizontally, then drawing two more horizontal lines:
- 12 cm below;
- 22 cm higher.
After finishing the markup, set the lighting width control to zero. The upper border of the light spot of the main headlights should be the second line, and the third line will be the upper border of the fog lamps.
But the intersection of all light fluxes should be at the intersection of our lines numbered 2 and 3 - below the center of the lamps by 12 and 22 centimeters, respectively. The driver must also ensure that additional screw was intact, and if there is a hydraulic corrector, it must be adjusted according to the load received - the position of the car with one driver, without passengers.
PTF adjustment
Adjusting the fog lights, albeit slightly, is still different from the method described above. Before adjusting the PTF, you need load the car at 70 kilograms - anything will fit and fit in your car.
We also refuel a full tank and set the car so that it is located on the most even horizontal surface, 10 meters from the light of the resulting screen. However, many experienced drivers They say that 5 meters is enough.

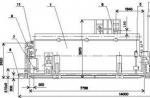
Fog lamp adjustment diagram
We draw lines on the wall, indicating important points with their edges. The bottom line is the size from the ground to the foglights, the top line is the same, only twice the distance.
We also note the distance to the center of the car, looking at it straight to the centers of both fog lights. The result should be a lined screen canvas with two points of the centers of the lamps, there will also be restrictions on the lower and upper borders of the light.
After drawing the lines, we set the car at a distance of 10 meters from the wall and, using a screwdriver and adjusting screws on the headlights, we achieve the focus of the beam of light from the lamps at those points where the centers of the headlights intersect.
Adjustment of lensed headlights
Before adjusting lensed headlights, you need to know that there are two types of them - adjustable and non-adjustable. The latter are quite cheap, and we do not recommend using such lighting fixtures. One example of such a headlamp is marketed under the brand name Depo. Some headlights are equipped with an automatic control. However, it often fails, so this is also not the best option.
To adjust the lensed headlights, there are also special regulators, as on conventional ones. lighting fixtures. IN this case It is not possible to make unequivocal recommendations because different cars and even in different headlights adjustments are made by various means. Typically, this is used adjusting bolts, or handles. But after reading general instruction by adjusting the headlights, you can cope with the task.
Headlight adjustment

Headlight adjustment by instrument
At service stations, headlights are usually adjusted using special devices. Their purchase for an ordinary car owner is impractical, since such a device costs a lot, and you do not have to use it so often. Therefore, knowledge on how to adjust the headlights with the device will only be useful to you in order to check whether the service station worker is acting correctly.
The verification algorithm will be as follows:
- Align the longitudinal axis of the device with the vehicle. After all, it is not a fact that the car drove strictly perpendicular to the box. This is the basic condition. To perform it on the device in its upper part there is a mirror with a horizontal line drawn on it. On it, you can easily set the device so that it stands strictly perpendicular to the body and headlights.
- Align the device strictly horizontally. Usually, in the design of its body, a level with an air bubble is provided for these purposes. This is a simple but reliable tool that allows you to achieve the desired results.
- Adjustment angle setting. It can be displayed on various devices various methods(one of these options is a swivel caster). An angle value of "0" means that the headlights will shine directly in the direction of the car. The angle can vary by tenths of a degree. The value of the angle at which you need to set the headlight, you can find in the reference literature for your car.
- The axis of the adjusting device and the axis of the headlight must match.
Remember that you can not strongly "lift up" the beams of the headlights. Indeed, in this case the value luminous flux can decrease by 20...30%, which is a significant indicator. In addition, this way you will blind the drivers driving towards you.
Instruction
It should be noted right away that it is necessary to configure in without fail. This is necessary not only for proper illumination of the road, but also so that those traveling towards you are not blinded. The block itself xenon and install in a specialized center to avoid incorrect installation. Headlight adjustment can be done. To do this, you need to find a flat wall. It is also necessary that the front of the wall be flat. For this purpose, a wall in a car service is best suited, since the asphalt on the street can be uneven.
Fit close to the wall. The distance between the bumper and the wall should be as small as possible. You can attach a piece of foam rubber to the bumper so as not to inadvertently damage it against the wall. On the wall with a felt-tip pen or crayon, mark the center and center of each of the lamps with vertical lines. Make sure the lines are perpendicular to the bottom edge of the wall. Now roll the car exactly 7.5 meters away from the wall. Draw a horizontal line through the points of the centers of the lamps. Under this line, you need to draw another line that will be parallel to it and located exactly 7.62 centimeters lower.
Now turn on your car's headlights. On the back of each headlight, find . By changing their position, it is necessary to find the optimal position of the light beam. You need to ensure that the top edge of the central light beam touches the bottom line. In this case, both beams must be symmetrical about the center of the lamps. The adjustment procedure must be carried out in or with minimal lighting in order to clearly see the location of the light beam on the wall. If you are adjusting the light on the street, then wait for the onset of darkness. The high beam will adjust automatically if you have set the low beam.
When driving a car in conditions insufficient visibility or at night, drivers often lack light. Xenon allows you to detect obstacles and dangers earlier, creating good illumination of the roadway.
You will need
- - a flat area adjacent to the wall;
- - roulette
Instruction
Find a horizontally flat area with a wall adjacent to it. Park your car as close to it as possible. Draw a vertical line on the wall opposite the center of the car. Then drive the car back from the wall by about seven meters.
Take a tape measure and measure the distance from the lamp to the ground. If the optics are separate, that is, the high beam lamp is separated from the low beam lamp, take measurements for each lamp separately.
Also find out what is the distance between the bulb and the center of the car. For separate optics, perform measurements similar to the previous step: separately for high and low beam lamps. Write down all the obtained values.
With chalk on the wall, draw a horizontal line, stepping back from the first measurement (distance from the lamp to the ground) 5 cm down. On this line from the center marked on the wall at the very beginning, draw two vertical lines at a distance equal to the result of the second measurement (between the lamp and the center of the car).
For separate optics, additionally draw a horizontal line to a height equal to the result of the first measurement for the high beam lamp from the ground. Then, in accordance with the second measurement for the high beam, draw verticals on this line.
Now that all the necessary lines are drawn on the wall, turn on the low beam and first adjust the headlights in a vertical plane. Make sure that the horizontal line of headlights is on the same level with the horizontal stripe.
In the horizontal plane, adjust the headlights so that the point at which the light begins to "leave" up falls on the drawn intersection. Make similar settings for separate optics. Line up the high beam headlights along the top line, and the low beam - along the bottom.
Proper adjustment of the headlights will allow you to see the road well in the dark. To get the maximum efficiency of the head Sveta you need to set the headlights correctly. Headlights should also not dazzle oncoming drivers and illuminate the roadside well. Any motorist at least once in his life was engaged in the replacement of lamps. After replacement, it is necessary to adjust the headlights. In the article we will tell you how best to do it.

Instruction
To begin with, we do a preliminary check of the state. We check the tire pressure, each lamp located in, etc. We replace defective parts with working ones. Before you start adjusting the headlights, you need to shake to the sides. This is done in order to accept working condition. The lighting width control can be set to zero.
The headlights are adjusted only in the dipped beam.
We draw the markup. You need two points that will correspond to the centers of the headlights. They need to be marked at the same height from the floor and at the same distance from each other as the centers of the headlights. Between them you need to draw line 1. Line 2 is parallel to line 1, while 12 centimeters lower. Line 3 should be 22 centimeters lower than line 1.
After that, you can do the headlight adjustment. Under the hood of the car, there are two screws that are designed to adjust the headlights. One screw adjusts the headlights horizontally and the other vertically. The car must be parked at a distance of about ten meters from the wall. The wall must be smooth and even. We completely cover one headlight with cardboard so that it does not shine on the wall. On the wall, in the light of the headlights there will be light ones. The upper border of the light spots should completely converge with line 2. The light spots from the fog lamps must converge with line 3. The point at which the horizontal and sloping sections intersect must be 12 and 22 centimeters below the point corresponding to the center of the headlights.
Related videos
Sources:
- How to adjust headlights in 2019
In order to install xenon light on Prioru”, choose the set of lamps that suits you best. For a brighter and closer to white light, aim for a color temperature of 5000 K. Prepare everything you need for installation.

Instruction
Start by removing the headlights. Open the hood, then unscrew the headlight mounting screw. Using a long screwdriver, press down on the two tabs on the headlight housing, then remove it from the mounting socket. Disconnect all wires from the headlight housing. Disconnect the large terminal with a small flat screwdriver. To do this, insert it from the side of the wire into a small slot on the terminal and put it on the edge of the handle. While doing this, press the screwdriver against the wire. Take care not to damage the plastic latch when carefully removing the terminal. The latch open signal is a lift in front of the lug terminal.
Choose a place to mount the ignition unit on the car body under the headlight housing in order to secure the unit. Holes for mounting screws are already provided in the recommended location. Fasten the block so that when installing the body into the metal bumper bumper, the block does not rest.
Find four wires inside the cover that supply power to the removed standard lamps. Note that the brown wires are negative and the white wires are positive. Keep in mind that xenon lamps may have a different wire color, where black is positive, blue is negative. Connect the terminals according to the polarity, xenon lamp put on regular place, and fasten it with the latch. Close the cover so as not to pinch the wires. Connect the terminals to the ignition unit.
Repeat all the described operations for the second headlight, install them in niches. Check their performance by connecting the power terminals. Fix the headlights if the test shows correct installation. When installing the headlights, make sure that the housing falls strictly into the mounting grooves. Further, after docking the guides, push the headlight in the direction of the passenger compartment so that a characteristic click appears, which indicates the closing of the latches. Close the hood only after tightening the fastening screw.
Sources:
- installation of xenon on the prior in 2019
The main danger when buying new xenon lamps is the danger of running into fake Chinese counterparts. In this case, you will not only be disappointed by unexpected Bad quality, but also financial disappointment - who wants to pay full cost for a low-grade copy? In addition, traffic safety also suffers if such lamps are used in headlights.

Instruction
Determining the originality or fake of xenon, start with the packaging. Both the packaging and the product itself should not arouse suspicion: the inscriptions must be clear, well-read, not greasy or smeared. The packaging must be clean both outside and inside. Company logo and code must be laser engraved. The price of the purchased lamp should not be too low. High-quality original goods will not be sold cheaply.
The base of the lamp should not have burrs and scratches from grinding, slots in the plastic of the base - only in two places, glass - without any defects. Take a closer look at the shape and size of the gas flask - the wrong shape and size most often give out a fake. The flask itself must be strictly perpendicular to the plane of the base and be evenly fixed in it.
When purchasing a xenon-type lamp, make sure that the color of the insulator on the side electrode is brown or green, the inner bulb has the correct oblong-elongated shape, there are only two mounting grooves. In addition, on the outer glass there should be a characteristic technological sign in the form of small embossed squares, and on the plastic of the base - the original inscription in a clear font.
On the coverslip near the burner of the original lamp, you will see three embossed squares: one on one side and two on the other. At the base of the glass of the lamp, in the place of its attachment to the base, there is an extruded ring. The base is made of dark gray matte plastic. A fake will definitely have glossy surface plastics, characterized by a variety of irregularities.
General information
First you need to know that xenon light has a very negative effect on the eyes of a driver driving in the oncoming lane. Such light can instantly blind a person, thereby provoking dangerous situation on road.
In order to reduce the risk of similar situation, together with a xenon kit, you should install an automatic headlight beam leveler and a headlight washer (if not available) on your car. The corrector is necessary in order to provide an instant deviation of the “beam” of light with each change in the road relief. The washer also helps keep the headlight glass clean, as a result of which the dirt accumulated on the glass will not “wash out” the powerful xenon light and blind everyone who moves in the oncoming lane.
When choosing xenon, you should give preference to the lighting kit that has the same type of base as the car's standard optics. Thus, by installing a xenon kit that is suitable in all respects, it will not be necessary to modify the car's standard optics.
Xenon connection
Before proceeding with the installation of the xenon light kit, you should carefully read the diagram of its connection. The manufacturer always attaches this diagram. The usual course of action is as follows.
Headlights and protective covers of halogen lamps are removed. For wiring xenon, a hole is drilled in the headlight housing, and the plastic chips formed as a result of drilling are removed. A rubber ring is inserted into the hole, xenon headlights are fixed.
The xenon wiring is connected to the ignition unit (sometimes this unit is called ballast). The wire from the ignition unit is connected to the car's wiring (to the halogen lamp cable connection socket).
The ignition unit is installed in engine compartment so that there is not much tension on the wires. The unit should be installed at the maximum distance from the engine, in a place inaccessible to moisture.
Important: the installation of xenon lamps should be done carefully. To avoid electric shock, it is advisable not to allow water or any other liquid to come into contact with hands.
Related videos
Related article
Every motorist in one way or another faced the problem of improperly adjusted headlights: they not only reduce the effective visibility zone at night, but also pose a real threat to motorists who are driving in the oncoming traffic. On this moment there are 3 solutions to the problem of incorrectly adjusted headlights: in a car service, with the help of special equipment and manually. There are many opponents self adjustment headlights Their main arguments are "handicraft" this method, inaccurate settings and non-compliance with the requirements for maintenance. But what about those who, one way or another, cannot purchase expensive equipment or use the services of car services?
The installation process can be conditionally divided into 3 steps:
In this article, Xenon-Shop specialists will tell you how on your own adjust and adjust the headlights. Check your vehicle before you start: the direction of the headlights depends on the condition of the suspension springs, tire pressure, tire size difference, load distribution, etc. All these faults can set the wrong angle when setting, which will affect the quality of the adjustment.
You will need:
Flat vertical wall
- horizontal section in front of the wall, not less than 7.5 meters
- something for marking the screen (adhesive tape, chalk ...)
First, you will need to mark up the screen for the upcoming setup. For each car, the screen layout is individual and depends on many parameters. There are also universal markup values that apply to most modern cars.
"Note":
Different companies one way or another stipulate the conditions under which the headlights are adjusted. Usually, a car must be filled with 12 tanks and loaded in a certain way. It happens that due to defects in the lamp itself, it is generally impossible to achieve good adjustment.
Note that there are 2 types of lamps: with combined low-beam and separate. For combined lamps, the headlights are adjusted according to the low beam, and the high beam is adjusted automatically. For separate lamps, you will have to adjust the beams of both high and low beams.
|
To adjust, you may need: |
|||||
|
Xenon lamp D2S Philips with D2S base. Lamp code 85122. Designed for installation in lensed optics. 1 300 rub. |
Xenon lamp D2R Original lamp (code 85126) for regular xenon with reflex optics. 1 400 rub. |
Philips X-Treme Vision H4 Halogen bulbs X-Treme Vision - 100% more light! Maximum brightness! Color 3500K. Plinth H4. 1 650 rub. |
dggd |
||


The process of marking the screen on the wall:
1) Having driven the car close to the wall, mark on the wall:
- machine center(M)
- the central axes of each lamp

2) Having driven away from the wall at a distance of 7.5 meters, approach the wall and draw a horizontal line connecting the points of the centers of the lamps (H). Draw vertical lines through the points of the centers of the lamps. Draw a vertical line through the center point of the car.
Draw an additional horizontal line 3"" (7.62 cm) below the line connecting the centers of the lamps (B-B). 
3) If you followed all the points correctly, then your screen should be marked as in the picture above. Now, all you have to do is turn on the DOWN headlights and adjust them as shown in the figure: 
Directly the process of adjusting the headlights is not particularly difficult - you will need to tighten the adjusting screws to achieve the perfect beam of light on the screen. The adjusting screws are located under the hood of the car, on the back of the headlights.
This setting method is suitable for lamps with combined low beam and high beam. By setting the low beam according to the system described above, your high beam will be adjusted automatically.
For headlights with separate system near-far light, you will have to adjust the light beam of each lamp. while the screen is laid out differently: 
When adjusting, the low beam lamps are adjusted as described above, and the high beam beam is an even circle centered on points D. 
If you followed all the steps in our guide, then your headlights are set correctly and will not blind the flow of oncoming cars. Note that you will never achieve a perfectly tuned light without using the special equipment used in specialized headlight adjustment centers.
In the Xenon-Shop you can always get advice from qualified specialists, choose the most suitable xenon kit and additional equipment. We recommend that you use the services of our official installation centers - this will save you the trouble of installing and configuring xenon yourself. Qualified specialists of Xenon-Shop installation centers will install and adjust the xenon light on your car in the shortest possible time.
Headlights are one of the most important components of a car, because at night they not only illuminate the road, but also warn other drivers of your approach. Now xenon is installed in most cars, since the xenon color better illuminates the road and hits more far distance. However, xenon requires correct setting. How to adjust xenon? Follow .
Adjusting the light of xenon headlights
marker,
It should be noted right away that xenon must be configured without fail. This is necessary not only for the correct illumination of the road, but also so that the drivers driving towards you are not blinded. The xenon unit itself is best installed in a specialized center to avoid incorrect installation. You can do your own headlight adjustment. To do this, you need to find a flat wall. It is also necessary that there is a flat area in front of the wall. For this purpose, a wall in a car service is best suited, since the asphalt on the street can be uneven.
Drive the car close to the wall. The distance between the bumper and the wall should be as small as possible. You can attach a piece of foam rubber to the bumper so as not to inadvertently damage it against the wall. On the wall with a felt-tip pen or crayon, mark the center of the car and the center of each of the lamps with vertical lines. Make sure the lines are perpendicular to the bottom edge of the wall. Now roll the car exactly 7.5 meters away from the wall. Draw a horizontal line through the points of the centers of the lamps. Under this line, you need to draw another line that will be parallel to it and located exactly 7.62 centimeters lower.
Now turn on your car's headlights. Locate the adjustment bolts on the back of each headlight. By changing their position, it is necessary to find the optimal position of the light beam. You need to ensure that the top edge of the central light beam touches the bottom line. In this case, both beams must be symmetrical about the center of the lamps. The adjustment procedure must be carried out in the dark or with minimal lighting in order to clearly see the location of the light beam on the wall. If you are adjusting the light on the street, then wait for the onset of darkness. The high beam will adjust automatically if you set the low beam correctly. Now you know how to adjust xenon, start setting up the headlights.
 How to register a car without registration
Xenon is an inert gas that is odorless, tasteless and colorless. One of its features is that during the passage of a discharge through it electric current this gas becomes the strongest source of light. There are several reasons why xenon has gained immense popularity among motorists.
Xenon lamps are very bright daylight, and this is more familiar to human vision. They have a high light output and allow a wider view of the road in front of the car.
Xenon lamps are durable, very economical and resistant to physical influences. In addition, they are quite easy to install in cars instead of regular lamps. It is this process that we will consider below.
How to choose a good kit
To date, on automotive market a huge variety of xenon lamps are presented. This variety complicates the choice a little, and we will try to figure out which xenon better fit for a specific vehicle.
Most xenon kits consist of:
- xenon lamps;
- ignition blocks;
- wiring and fasteners.

Xenon lamps have a special marking - 6000K, 5000K, etc. It refers to the color temperature - the brightness and color of the light that the lamp shines. Xenon marked 4300K shine white with a slight yellow tint. They are often installed in fog lights and in the headlights of the main light of the car. They are best suited for driving on wet pavement.
Lamps 5000K shines in a shade that is closest to white. The power of their light output is the highest, and the light is normally perceived by the human eye. lamp light 6000K has a slightly bluish tint, and is inferior in power to the two previous types, as it has the lowest light output. However, this type is the most popular in the Russian and Ukrainian markets. 
Leaders automotive industry install xenon lamps in their cars, the color temperature of which is in the range of 4200-5000K.
The ignition unit is a device that supplies the right voltage to the xenon lamps needed to ignite them. The more complex and “smarter” this block is, the more processes it controls. High-quality ignition unit ensures long-term and high-quality operation of lamps, since during their ignition and glow, the lamp parameters are within acceptable limits.
It will be useful for each driver to know what the fine is for driving without insurance or with an expired OSAGO policy.
Airbrushing is an original way to decorate your car. We have prepared for those who want to highlight their car from the gray mass.

Which xenon is better
 First, it must be understood that not necessarily the most expensive xenon will work most efficiently. The cost of well-advertised products includes the cost of advertising, so there is no point in overpaying.
Also, in order not to overpay, you should select an ignition unit that matches the functions of your car. For example, if a module that controls the voltage of the lamps is not installed in the car, then it makes no sense to buy xenon with the so-called "tricks". This will save money and not lose quality.
It also makes no sense to buy thin “slim” ignition blocks if you have enough space under the hood to install a standard block. Good slim blocks are more expensive, while very cheap ones often have low quality materials and assembly.
The most popular manufacturers of xenon lamps:
- SHO-ME;
- APP Digital Ultra Slim;
- XENOTEX;
- MITSUMI.
Before purchasing xenon lamps, it is important to clarify which base is used in your headlights. It will be frustrating if you cannot install the lamps due to an unsuitable base.

The installation process itself is quite simple and every motorist can handle it. Briefly, the xenon connection scheme can be described as follows: we install light bulbs, ignition units and connect them using the wires that come with the kit.
What we need to install:
- xenon kit - (lamps, ignition blocks, wires and fasteners);
- scissors;
- Phillips screwdriver;
- double-sided tape or clamps.
You may need a drill and a 25 mm cutter, as well as some keys.
We install xenon with our own hands
 Do not neglect the safety precautions when installing xenon, as you can not only ruin the equipment, but also seriously injure yourself. So make sure your hands are dry and oil-free.
It is also forbidden to touch the bulb of the xenon lamp with your hands. In case of contact with it, it is necessary to degrease the surface with alcohol.
Before starting installation, be sure to disconnect the positive battery terminal. It must also be remembered that xenon at the time of launch gives a voltage of 23 thousand volts!
After you are convinced of the safety of the process, you can proceed directly to the installation. First of all, we will remove the old halogen lamps and replace them with xenon lamps. For this you need to remove protective cover with headlights. 
Disable contact wires from the lamp and pull it out. 
In order to safely remove the light bulb in some cars, it is necessary to depress the spring that fixes it. 
We carefully remove the new xenon lamp from the protective bulb and insert it into the hole. Remember not to touch the flask with your hands. If you had a spring that fixed halogen lamp, then it must be accepted. The fact is that the wires from the xenon lamps will need to be pulled through it and then brought out through the plug into the engine compartment. 
On the battery side, this will be a little more difficult, since it will partially block access to the headlight. Therefore, it is better to remove it. After installing the bulbs, we connect the terminals from the ignition unit to them. 
The next step is to make holes in the headlight plugs for pulling wires. There are two types of plugs - rubber and metal. We cut a hole in rubber with scissors, in metal we will have to drill. 
For drilling, it is better to use a milling cutter. The optimal hole diameter is approximately 25 mm.
The stage of installing the bulbs was the most difficult and time-consuming. Next, you need to choose a place to install the ignition unit. It should be in close proximity to the headlights. so that the wires are not stretched. 
It is better to choose a place that is protected from moisture, pollution and heat. In general, high-quality ignition blocks should be airtight, but some manufacturers care little about this. If you still can’t find a protected place, then simply wrap the block with electrical tape or tape. This will increase its security, albeit partially. The ignition unit itself can be fixed with clamps, double-sided tape or attached with screws. 
Next, we connect the wires from the ignition unit and from xenon lamps. Here, each wire has its own color, so it will be difficult to confuse. Also you need to connect the ignition unit to the standard electronic system
. To do this, we draw another wire from the ignition unit to the connector where the halogen bulb was connected. 
We repeat the procedure with the second headlight, the process is similar - we install xenon lamps, an ignition unit and connect the wires. We fix all the wiring with clamps so that it does not hang out. We twist the excess wire into a ring.
It is better to check the correctness of the connection according to the diagram, which will definitely be in the instructions. You can also use this xenon connection diagram: 
Some difficulties arise when installing do-it-yourself xenon on cars with on-board computers. If xenon does not function correctly during ignition or during glow it is recommended to install a voltage relay. It will stabilize the load to the wiring at the moment when the headlights flare up.
This video shows how to install xenon lamps with your own hands. Lamps manufactured by IL-Trade, color temperature 4300K with H7 base.
Bixenon installation
 Bixenon is the same lamp filled with an inert gas, only equipped with a special electromagnet. It controls the focus of the lamp, which allows you to create "near" and "far" light. A conventional xenon lamp shines constantly on full power, and the power of bi-xenon lenses is controlled by a solenoid (electromagnet).
The principle of installing bi-xenon with your own hands is about the same. It differs only in the presence of a voltage controller, which is connected to the lamp, battery and ignition unit. Its main function is to control and stabilize the voltage in the wiring.
How to install xenon yourself, we wrote above. And now just consider the connection diagram of bi-xenon lenses and analyze some of the nuances. 
- High-voltage wires from bi-xenon lamps are connected to the corresponding wires from the ignition unit.
- The controller is connected to the power connector of the ignition unit.
- The third wire on the lamp is the electromagnet connector that controls the intensity of the light. It also connects to the controller.
- The connector from the controller is connected to the standard lamp power connector. It has 3 contacts.
- We connect the controller to the battery power, “+” and “-”, respectively.
After installation don't forget to adjust your headlights so as not to blind drivers in the oncoming lane. Remember that well-adjusted headlights will ensure the safety of all road users.
According to statistics, heavily tinted cars are more likely to get into accidents. You can find out what norms for tinting the front glass according to GOST on our website.
A good battery will last much longer. Useful tips for choosing a battery for beginners and experts.
Today, there are many different radar detectors on the market for automotive gadgets. On this page you can find out /tuning/elektronika/radar-detektor-kak-vybrat.html what parameters you should pay attention to when choosing a radar detector.

To install xenon in fog lights, xenon with a color temperature of 4300 and 5000K is best suited, as it shows itself best on wet road and in the fog.
Fog lights are often located under the main light, so to install them, you first need to remove the bumper. You can simply unscrew the bolts that secure the front wheel arches and the sides of the bumper. 
Next, turn off the standard fog lights from the power supply, take out the old bulbs and insert the xenon ones. Remember not to touch the xenon bulb with your hands (you can use gloves). After that, we connect the xenon lamp to the power supply of the foglights and to the ignition unit. 

It is better to immediately check the performance of the system. Start the car and check if one fog light is on.
Installing xenon in the PTF and checking the performance of the lamps before the final installation.
The second lamp is installed in exactly the same way. The scheme for connecting xenon in fog lights is the same as when connecting xenon in the main headlights. Now you need to install the ignition blocks. Of the most popular installation locations, one can note space under the front bumper and under the hood. They are attached using double-sided tape, clamps or special fasteners (if they were included). Try to choose the most protected place. 

And here is the actual result. 
You may be interested in watching a video on installing xenon in Lada Priora fog lights.