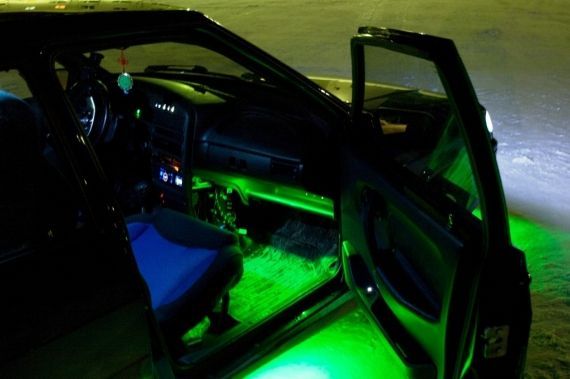
In almost every car, the manufacturer has provided a backlight that turns on manually (when a special toggle switch is turned) or automatically (when one of the doors is opened). But this is not enough. I would like not only to give the interior functionality, but also to make it more vivid and unusual.
Yes, in last years increasingly popular installation LED backlight in the cabin. Why not? On the one hand, the original tuning improves interior lighting, and on the other hand, the car interior becomes more solid and interesting view. At the same time, the installation of the LED strip will not cause you any difficulties. How to do this work correctly, we will consider in the article.
Mounting the backlight: step by step
The main thing - do not be afraid of such alterations. You will see for yourself that there is nothing complicated here. Moreover, such a tuning will bring great pleasure, because you transform with your own hands favorite car. So let's go:
- Decide on a place for mounting (this work should be done even before buying a tape). A lot depends on the design and features of your car. Take a close look engine compartment, area under the glove compartment, air duct nozzles. You must clearly plan where it will be installed and secured new backlight. For example, one of the best options is to stick tape directly under the seats. In this case, the space under your feet will be perfectly illuminated.
- Decide how the lighting will turn on. There are three options - using a button (tumbler), when one of the doors is opened ( luggage compartment) or when the ignition is switched on. The best option- turn on the LED backlight from the button. In this case, you can use the features of the ribbon only in dark time days, which will save the resource of LEDs.

- Decide on your preferred light bulb color. Here, already focus on the color palette of your salon. If covers are made in blue color, then LEDs can be bought with a similar glow. After you have decided on all the nuances listed above, you can move on.
- Buy (prepare) necessary material. Here you will need pliers, a regular soldering iron (60-100 W), rosin and tin (this is logical), a terminal block (wires will be fastened in it), a sharp knife, contact groups(required to connect the button to the wires). In addition, buy a button (you can use a regular toggle switch), a degreaser, a small piece of cable (preferably two-wire with black insulation), Moment glue, a multimeter (necessarily with the possibility of dialing), indicator, insulating tape, special heat shrink and LED tape.
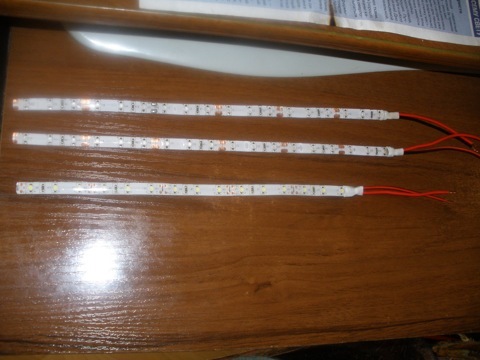
- Cut the tape into pieces of the required length. To do this, measure the areas where gluing will be carried out. Please note that there are special marks on the LED strip in the form of ovals or circles. This is done in order to properly cut and not damage the integrity of the device.
- Using a soldering iron, tin and rosin, solder the prepared wires to the contacts on each side of the LED strip. Be sure to check the strength of the contact connection and treat it with electrical tape (preferably heat shrink). Immediately put special terminal blocks on the wires on the other side (you prudently bought them in the store). Make connections taking into account the colors: black - "minus", red - "plus".
- Treat with a degreaser the place where the LED strip will be glued. This is very important point, unless, of course, you want to trample the newly installed LEDs with your feet in a few days. After processing, give the surface a well-chosen place. Glue all other pieces of tape in the same way.
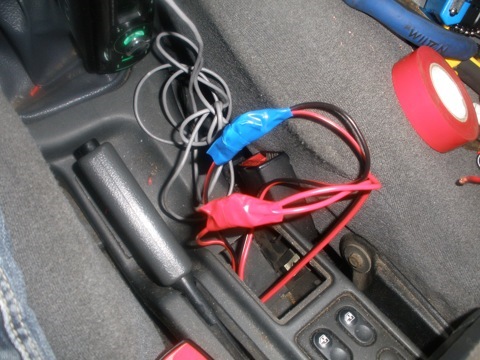
- Bring the wires from one and the other tape to the armrest and connect them in parallel using the terminals. Connect according to colors: combine red and black wires.
- Connect the cable wires to the tape contacts connected in parallel (we follow the colors) and pull it under the floor to the button installation site. The circuit itself is very simple. "Plus" from the block fuse goes to the backlight button. Next from the button the wire goes to LED strips (red wires) connected in parallel. "Black" wires LED strips we sit on the body ("minus").

- Use a multimeter to find the contacts that will close when the button is pressed. To do this, move the device switch to the dialing position (diode), press the button and look for the necessary conclusions. Now solder the wires to the button. As we said, on one side there should be a "plus" (comes from the terminal block), and on the other side there should be a red wire that came from the LED strips.
- Connect the black wire from the LED strips to the "minus", and the red wire from the button to the "plus" of the block. Decide which fuse to connect to (for example, you can sit on the cigarette lighter fuse outlet). To make sure that the output has the power we need, use the indicator. On the one hand, connect it to the "case", and on the other to the fuse outlet. Now turn on the ignition. If there is food, then everything is fine.
Pay special attention to connecting the "positive" wire to the fuse outlet. There are two options here: the first is to pull out the already connected wire, wind it together with our wire from the button and put it back in place, and the second is to bite off the already connected wire a little lower from the clamp and connect it to the wire through the terminal.
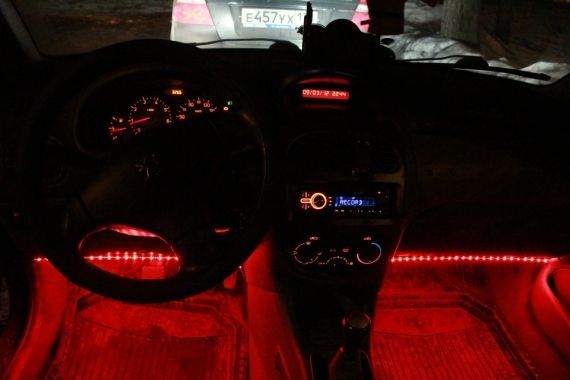
That's all. Now, when the ignition is turned on and the button is pressed, the lower part of the cabin will be illuminated with a bright light. The whole job will take you no more than 1-2 hours.
Conclusion
Do not be afraid to make changes to your car and do the tuning yourself. Try it once and see how easy and fun it is. Good luck.
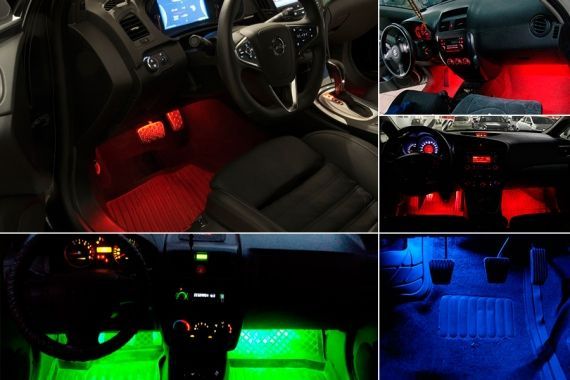
Many car owners are interested in the possibility, namely the installation of footwell lighting. After all, such a backlight can not only decorate, but completely transform even the most ordinary car. Properly selected color, well-installed lighting will give your car a perfect new look, will delight not only you, but also attract the views of others. Many tuning salons and auto repair shops today offer their backlight installation services. However, it is not always desirable to pay extra money. After all, the installation process itself is quite simple, almost everyone can do it on their own.
Consider how to make foot lighting.
It is not difficult to make footlights in the car. There are several ways to carry out this procedure.
What is needed for installation?
In order to make footlights in the car, you need a minimum amount of materials and tools.
From the materials you need to purchase LED or neon ribbon. Which one to take is up to you. Neon lighting, of course, looks much prettier, the light is more pleasant. However, it is more expensive and requires connection through the ignition unit, and for this you will have to interfere with the car's electrical system. That is why it is still better to take LEDs for illumination. They are easier to install, inexpensive and easy to install. Calculate the length yourself. It all depends on where you will install the tape, and what exactly you will cover: only the front seats or decide to illuminate the passenger legs. rear seats. It is also important to decide on the color of the tape itself. After all, the lighting should be in harmony with the interior design.
You will also need wire (up to 5 meters), heat shrink tubing and glue. If you want to tinker, you can additionally purchase a controller to control the brightness of the lighting, a control panel and a switch.
You will also need some tools, namely pliers, a 220 v soldering iron, a knife and screwdrivers.

Installation of LED strip
Before installing leg lighting, you should decide where you will attach the tape itself.
To illuminate the leg area, it can be installed below the seats, along the perimeter of the lower part of the front seats, under the instrument panel and under the glove compartment. It all depends on your imagination. Remember, when choosing a place for installation, it should be borne in mind that the installed lighting should be directed to the floor.
After the place is chosen, we measure and cut off a piece of tape of the required size. Do not forget that it may not be cut in all places. Cut should only be in places where there are contacts for soldering. Therefore, having measured which segment you need, it is better to take a little less than vice versa, so that later during fastening there will be no sagging.
Kia Rio 2017
DISCOUNT 190 000 RUB.
- Official dealer
- Loan 4.5%
- Installment plan
- Trade In
- 95% approval
- No down payment
After cutting to the edges of the tape, solder the wire and try to connect it to a power source. If it works, isolate the solder points. To do this, put a heat shrink tube on the junction, heat it with a soldering iron or even with a lighter. After insulating, fix the tape in the chosen place with a sticky layer, glue or even ordinary silicone ties.
In the same way, you make and install the lighting tape in other places in the cabin.
Connection
Depending on how and when the backlight will light up and work, choose the way to connect it.
For interior lighting
Most often, the illumination of the legs in the car is connected to the interior lighting. It will only work when the doors are open or when the lights are on.
In order to connect the backlight to the interior lighting, it is necessary to remove the cover (most often it is on the latches, although a screwdriver may also be needed to remove it). Next, you need to connect the wires. Connect plus to white, minus to red. Hide the reasons under the lining. The easiest way is to stretch them along the side rack. After that, connect the wiring of the LED strips at the feet of the driver and passenger and connect everything to power. Then once again check the operation of the lighting, and only after that isolate all the contacts, install the cover back. If you wish, you can additionally install a controller, then the light will fade smoothly, and not go out abruptly.

From the cigarette lighter
If lighting is connected from the cigarette lighter, the footwell lighting will light up exclusively from the side of the open door. This is very convenient, because often the backlight is needed only when disembarking and landing in a passenger car. The plus of the diode must be connected to the cigarette lighter, and the minus to the door limit switch. On the door, the wiring can be brought out through the same passage through which all the wiring goes to the door. However, in most cases, to do this, you will have to dismantle the panel.
Many inexperienced tuning enthusiasts are interested in how to make footlights in a car do it yourself. This great way turn the interior of any car into a work of art. The right color will not only give your car a new look, but will also be able to cheer you up. Ladies are attracted by the opportunity to find small things that have fallen on the floor without any problems.
During the day, this can be done easily, but at night it is difficult. This is where lighting comes in. It can be done at no great cost. Also for the manufacture of the most simple options no special skills required.
Types of backlight
How to make footwell lighting in a car with your own hands? First you need to figure out what it is. Typically, 2 types of lighting devices are used in cars:
- Neon lamps. They have a very pleasant light, but at the same time they cost a lot;
- . This is the easiest option for creating highlights.
There is also a division according to the time of the backlight. Most often they make a backlight that turns on when the doors are opened. There are options when the backlight is on when the ignition or dimensions are turned on. It all depends on your imagination and skills.

What do you need?
To create a beautiful backlight, you need a minimum amount of materials:
- LED strip - 1 meter;
- Heat-shrink tubing;
- Wire 3-5 meters (depending on the connection method);
- Controller to adjust the brightness (optional).
To work, you will need the following tools:
- Screwdriver Set;
- soldering iron;
- Pliers.
Tape placement
First, we select a place to place the tape. Ideally, it should not be visible. But, it should shine well on the mat. Having decided on the installation site, you can proceed to prepare the tape:
- First you need to measure the desired piece of tape. Please note that it can only be cut off in certain places. In connection with these, it is better to make it a little shorter than to allow sagging;
- Next, you need to carefully solder small pieces of four-wire wire to the tape;
- We test, for this you need to connect the resulting structure to a power source;
- If everything is in order, then isolate the connections. The easiest way is to use silicone sealant, but you can get by with ordinary electrical tape;
- We fix the resulting lighting fixture in place. To do this, you can use plastic ties or silicone glue.

Connection to interior lighting
- . To do this, on most models you will have to use a screwdriver. Sometimes it just snaps on;
- Plus is connected to the white wire, minus to the red. Just in case, before work, check with the diagram of your car. If you mix it up, nothing bad will happen, just the tape will not turn on. No closures will occur;
- The wire is pulled under the skin. The easiest way to do this is on the central rack;
- Connect the tape at the feet of the passenger and the driver with a wire;
- Connect the backlight to the power supply. Be sure to check out her work. If everything works, then you can insulate the connections, and put the interior lighting cover in place.
Independent backlight
With this connection, the lighting of the rug will turn on only from the side open door. This is convenient when boarding a passenger, when you need to illuminate a specific side. For such a connection, you will need a minimum amount of wire. It is enough to connect the tape on each side with a plus to the cigarette lighter, and a minus to the door switch.
To plug negative wire it is possible through a hole in the body, through which all the wires suitable for the door are passed. On some models, you will have to disassemble the panel to do this. This is done on both sides. This allows you to make the backlight as economical as possible.
From dimensions. In this case, the light under your feet will be on as long as you turn on the external lighting. So that this does not interfere with movement, it is best to make the lighting not very bright. Connecting here is also quite simple. Minus rushes to the body of the car. The positive wire is connected to the most convenient light bulb dashboard.
As a result, you will have the backlight turned on simultaneously with the inclusion of outdoor lighting. For greater convenience, it is desirable to provide a way to quickly turn off the tape. It can be a male-female connector or a small toggle switch located in a convenient place for you.
Conclusion. Many drivers make various tuning salon. Many modernize the "native" lighting system. Therefore, the question of how to make the backlight of the legs in a car with your own hands is not uncommon. In principle, this work is quite simple, it is enough to attach your hands and head to this process. The most difficult thing is to connect the backlight to the power supply, for this you will have to partially disassemble the casing in order to stretch the wires.


