For one reason or another, many car owners believe that their car just needs window tinting, how to do it yourself is described. However, not everyone has a certain amount Money to purchase factory tint. What to do then? Make a removable tint with your own hands. After all, the technology of its production is not so sophisticated, so as not to figure it out on your own (although the work is quite painstaking and not the easiest, so it is better to have an assistant in this matter). And if the desire to tint glass and at the same time be able to dismantle the tint so as not to attract problems with traffic police is very great, then you have definitely come to the right place.
So, you will need:
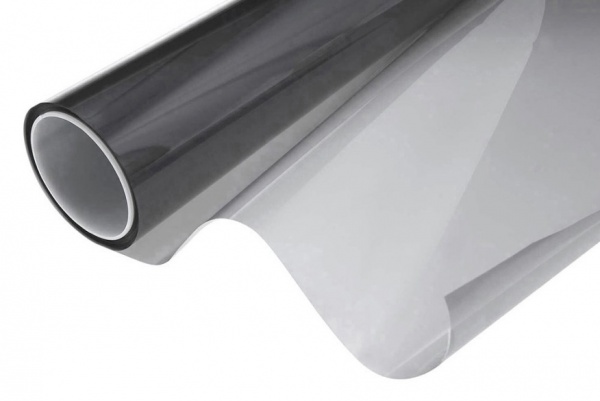
- polyester sheet 0.5 mm thick;
- tint film;
- knife + replaceable blades to it;
- pencil or other marking tool;
- metal scissors or those that can create a lot of pressure;
- distillation for smoothing the film;
- spray;
- a flat and clean surface (you can use thick glass, laying it on the table) for applying a film to plastic.
When everything is prepared, you can get to work.
Step-by-step instructions for installing removable tinting with your own hands.
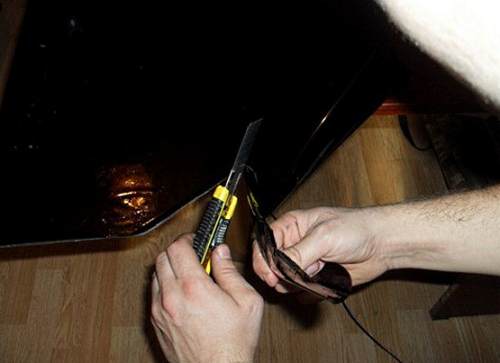
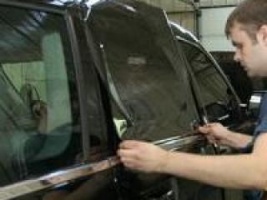
1. First of all, you need to remove the pattern from the glass. To do this, disassemble the doors and dismantle the glass. For patterns, you can use tracing paper. Attach it with double-sided tape to the glass, and then circle the outline along sealing gum. Next, cut out the pattern along the marked line.
2. The next step will be work on the manufacture of the template and blanks. You need to transfer the removed pattern to a sheet, for example, drawing paper or other thick paper and fit the resulting dense pattern to the exact dimensions of the glass by inserting the cut paper between the glass and the seals in the cabin.
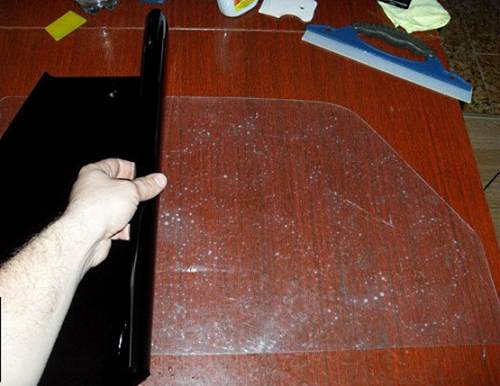
3. Having achieved perfect accuracy, cut out the plastic blanks using metal scissors, according to the pattern made. Treat imperfect edges with sandpaper or sandpaper.
4. Apply tinting to the resulting blanks. Cut out three contours of plastic blanks from the tint film (in case one of them is damaged). Remove protective layer on one side of the polyester and allow it a little time before the static effect disappears so that the film does not bubble.
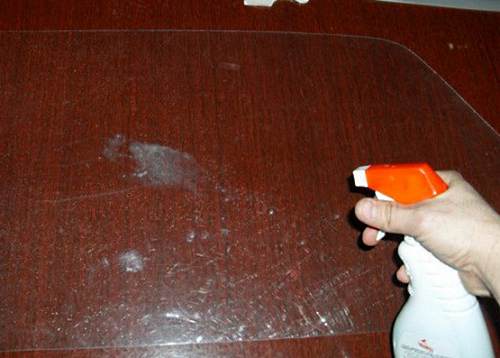
5. After 15 minutes, using a spray bottle, moisten the surface of the workpiece with soapy water. Do the same with the tinting film, removing the protective layer from it. Next, attach the tint film to the workpiece and smooth it over the surface with the help of distillation. Aligning, constantly moisten the surface of the film. Then, using a knife (drawing it clearly along the edge of the plastic), cut off the remaining film along the contour. In the same way, apply a tint film to all blanks. Dry the finished products for 2 hours. When the first side is dry, do the same procedure on the reverse side.
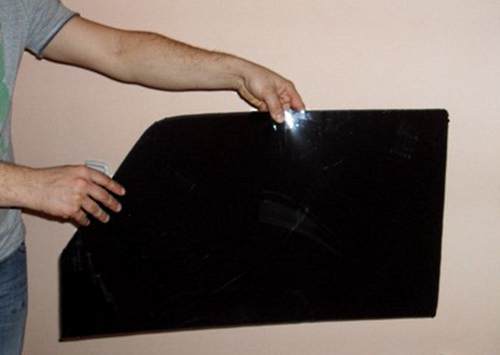
6. Woo required level light transmission when choosing a film for tinting. Keep in mind that by applying a film with 35% light transmission on both sides, you will get 15-18 percent light transmission. And further. Before use, let the removable tinting stand for several days so that the film sticks as firmly as possible. Otherwise, the service life of tinting will be significantly reduced.
IN modern world people do not have time to keep up with new inventions and technologies that are improving and overtaking each other at the speed of sound. The automotive industry is a field that never ceases to delight and amaze mankind with its new developments.
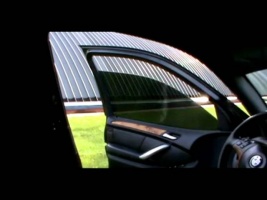
Comfortable and completely new is electronic window tinting. With its help, you can easily control the amount of light entering the car interior. Everyone knows that too dark or light tinting can create some discomfort and inconvenience for the driver and passengers.
What is electronic tinting
Electronic tinting is a universal film that consists entirely of liquid crystals, which, as a result of applying current, can change their structure. One has only to apply current, as the glass in an instant will become dull or dark.
See in the video:
Electronic video tinting
Advantages of electronic tinting
- Perfectly protects the interior of the car from the penetration of sunlight in a factor of up to 85%;
- does not need big expense electricity;
- comfortable adjustment glass transparency special remote control;
- in case of a minor accident or a small collision, the glass does not shatter, as the film helps to hold it;
- car glass can be washed with various detergents;
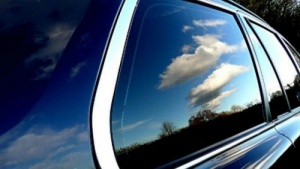
- beautiful view of the car, both from the passenger compartment and from the outside.
We do electronic window tinting

There are two kinds electronic tinting: regular and electrochromic.
Proceed to this species jobs are needed only when there are certain skills and knowledge in this area.
Warning: if you know nothing and have no practice, then you have every chance to spoil the final result. Time and money will be wasted.
Given all the subtleties of the process, we can say that at first glance it is simple. But that's not the case at all. For this you need to have:
- the usual set of tools for the car;
- tinting film bought in a store;
- stationery: knife and ruler, sponge and napkins.
The first thing you need is to measure the car window and unwind the purchased film. Make patterns according to the results of the measurement.
The second stage: you need to remove the protective layer from the cut film.
The third stage of work is the most important: carefully attach the film to the glass with inside car. You need to do it carefully, slowly, so as not to spoil the material. Otherwise, the work will need to start over.
At the fourth stage, you need to connect a regulator and an inverter to the film.
The fifth stage is the final one: you need to insulate the contacts and hide them under the door filing.
Electrochromic tint
![]()
The principle of operation is the same as with the usual one. It differs only in the type of coating used.
In this case, a special film is used, made of polymers, which, under the influence of outdoor lighting and temperature, as well as current, change their optical data.
There are two types of glass eclipses: PDLC and SPD. The difference between these two types is only that the first makes the glass frosted and lets the sun's rays into the cabin. The second type is more reliable: the glasses are frosted and the degree of penetration of rays is much less.
The advantage is that the first and second types do not need a constant current supply. This makes them practical and, of course, economical.
Important aspects when working
Before you begin, prepare all the necessary tools.
Important! Car windows must be washed special means and wipe dry.
In the process of cutting, make sure that the cut pieces are one to two centimeters larger than the car glass.
After the film is pasted, it needs to be smoothed out. Doing this is from the center in horizontal and vertical positions. In the form of a tool, you can take a lining. Result: smooth glass without unnecessary folds and irregularities.
When the work is fully completed, the excess material at the edges must be carefully cut with scissors.
Important aspects of connection coverage
There are a number important aspects when connecting the film to electronic system car. It is the connection that is an important procedure that only an experienced master can handle, so that in the future there will be no problems (short circuits).
During the installation process, you will need to work with plastic, cut out all kinds of places for buttons and controls. Only an experienced master can make everything more reliable and non-standard for better comfort.
The meaning of the usual email. tinting is that all car windows will change color in the same way, that is, you can only adjust general level eclipse. But there is another option: tinting can be done in such a way that you can adjust the level of eclipse of both one glass and several at the same time. This gives you the right to feel more comfortable and cozy.
Disadvantages of electronic tinting
Electronic window tinting has many advantages and disadvantages. However, there are two downsides:
- a complex and painstaking process of doing work that requires patience, skill and great knowledge;
- high cost of material (coating + tool kit.
The unique possibilities of electronic glass tinting
Despite the fact that the price for such a pleasure is quite high, the popularity of electronic tinting is gaining more and more momentum.
The possibilities of this coverage are simply unique. Thanks to him, driving in a car becomes comfortable, the driver and passengers will feel comfortable. Also, the car can be left in the sun, while turning off the power. The windows will be completely dark. The sun's rays will not be able to penetrate the interior and heat the car. Curious passers-by will not be able to look into the salon. Also, thanks to the coating, the driver will be protected from harmful ultraviolet radiation.
Glass maintenance
It is worth noting that the installation of such a film is expensive and therefore you need to know how to properly care for tinted glass.
- You need to wash the glass with a special sponge using ordinary detergents;
- wipe dry with a cotton cloth;
- make sure that the connected contacts do not fall out of the door firmware.
The cost of electronic tinting
The cost of such pleasure is different. If you use the services of elite car services, then for this service you will be asked about $ 1,000. If you do everything with your own hands, it will cost less, somewhere around 50 thousand rubles. In any case, keep in mind that this will be one of the cheapest options.
Step to perfection
Electronic tint on this moment not every motorist can afford, since its price is very high. It gives the car a beautiful appearance, chic and shine. But you must admit, beauty requires sacrifice!
However, despite the price, there are more and more lovers of comfort. It can be assumed that soon this service will become a little more accessible. Everyone can make a beautiful beauty out of their car.
Today, tinting is present on almost every car. This is a very popular procedure that you can do yourself, and especially for those who like to tune their car on their own. Tinting is a process that should be treated very carefully and carefully. Tinted windows have many strengths Let's list some of them:
- Protect the driver and passengers from the harmful effects of ultraviolet radiation;
- make your car look more presentable;
- film improves the strength of the glass, if possible emergency will not let it shatter into fragments;
- ensures maximum privacy and confidentiality;
- keep a great view of the interior of the car.
Before you start tinting a car with your own hands, you should carefully study the steps of this procedure and acquire all the necessary materials.
Purchase of materials
First of all, you need to purchase a film, which is the main element in tinting. It is from its quality and performance characteristics will depend on the outcome and durability of your work. American film is considered the highest quality, in this matter it is best to consult directly with film sellers. In addition, you should pay attention to the price, do not try to save money. You should also follow the law that regulates throughput tint film, depending on the type of glass in the car.
Before starting tinting, you should acquire not only a film, but also other necessary tools and materials:
- Napkins without lint;
- distillations of varying degrees of hardness;
- rubber scraper;
- hair dryer;
- ruler and stationery knife;
- sprayer;
- scraper for tinting;
- sponge;
- soapy substance, such as shampoo or liquid soap.
preliminary stage
At this stage, it is very important to prepare the windows for pasting the tint film. They should be thoroughly cleaned with a 10% soap solution, which is prepared from water and detergent. Using a sprayer, the solution is applied to the glass, which should be cleaned with a rubber scraper and wiped with napkins. Even if the slightest threads or villi remain, they must be removed. Next, lower the glass to clean its edge and seal. It is important to perform all stages of work with clean, soapy hands.
Film preparation
For tinting automotive glass it is necessary to make a pattern from the film right size. It is made 1-2 cm larger than the glass itself, which subsequently allows you to more accurately fit it. It is very important to determine on which side the adhesive layer is located, on which the transparent liner is pasted.
A soap solution is applied to the outside of the glass with a spray gun, and then a film is applied to it. Please note that the adhesive side should be wrapped towards you. Proceed to this stage very carefully so as not to damage the glass of the car with a cutting object.
It is very important that the bottom edge of the film is parallel to the outer horizontal seal and extends approximately 1 cm under it. Next, make side vertical cuts in the tint film so that you can apply the cut film under the vertical seal also by 1 centimeter. Then you should bend the lower part of the pattern and lower the glass, fixing it on the upper edge, then you need to make a horizontal cut.
To prepare a pattern for the rear window, you should take into account the fact that it has a rounded shape. On spherical surface With this glass, the film may form wrinkles and bubbles, which will prevent you from obtaining an even pattern. Creases are removed with a rubber spatula from the center to the edges, in horizontal and vertical directions. For the most accurate cutting of the film, you should highlight it with a flashlight from the passenger compartment and cut out the pattern so that it only protrudes 1-2 mm beyond opaque part glass.
Getting Started with Toning
First of all, as in the previous step, you should clean and wipe the glass from all sides. After that, a soap solution is applied to the inner surface of the glass. Further, starting from the upper edge, remove 2-3 centimeters of the liner and apply the film moistened with the solution to the glass. The unnecessary part of the liner should be cut off immediately. It is very important to apply the film evenly so that it does not touch the seals. The next step is to smooth out all the folds and squeeze out water bubbles with a rubber spatula or distillation. As mentioned above, this procedure should be performed from the center, gradually moving towards the edges. Hold the pattern with your hand, because in the early stages the film may slide on the glass. We fix the upper edge of the film with a hairdryer and distillation, and remove unnecessary parts of it with a knife. Next, lift the glass and peel off the remaining liner. The film must be moistened with soapy water. Next, we also smooth out all the bumps and fill the film under the seal. The remaining liquid should be driven out with a hair dryer and distillation.
As for toning rear window, then this operation is in many ways similar to that described above, but has its own characteristics. It is important to work with extreme caution so as not to accidentally damage the heating threads on the rear window.
Glass is also cleaned and wiped. Next, apply soapy water to it. And also, as described earlier, remove part of the liner, wet the film with soapy water. The coating is smoothed out along the heating threads from the middle to the periphery by hard forcing. After finishing work, dry the film with a hairdryer.
Windshield tinting
The dimensions and transmission capacity of the tint strip must comply with the prescribed rules and standards that the state has established. After wetting the surface of the glass, place the film on it with the protective liner towards you. Next, you need to make cuts along the seal and remove unnecessary parts of the film. Smooth out water bubbles and creases with a hair dryer or forcing.
In general, the procedure for sticking a film is practically no different from those described above. We remove the liner from the film, liberally applying soapy water to it, and stick it on the glass. Then, using a rubber spatula, level the film and remove water bubbles. In order to stick tint strips on Windshield, it also needs to be cleaned and wiped.
Performing tinting yourself, you should be very careful with the material, you can not bend, fold or wrinkle the film. Do not place anything on top of the tint film, and also make sure that it is not exposed to high temperatures.
It should be said that this procedure quite simple, but requiring a responsible attitude and compliance with all the rules. A person who does not have experience in this field is quite capable of doing tinting with his own hands. For more good example For this procedure, we advise you to watch the instructional video.


