If the coolant temperature sensor is faulty, then the engine is on. It is enough not to even get into traffic jams to.
On the video, replacing the coolant temperature sensor on the VAZ-2114
In most cases, a faulty sensor cannot be repaired, but before purchasing a new one, it is necessary to check the old one, there may be a problem in the wiring, and not in the sensor itself.
Control of the temperature gauge on the instrument panel
In order to prevent such a malfunction in advance, it is necessary to follow the pointer on the instrument panel, because it is he who will be the first to signal a problem, moving the arrow into the red zone. Below we will tell you how to check the coolant temperature sensor on the VAZ-2114 with your own hands.
Where can I find a temperature sensor?
The VAZ-2114 has a liquid-type engine cooling system, that is, the whole process occurs due to the circulation inside the antifreeze or antifreeze system.
Cooling system VAZ-2114
The whole system includes the following elements: and heating, a radiator fan, a pump (- approx.), all kinds of pipes, and finally, a coolant temperature sensor.

The sensor is easy to find under the hood.
The coolant temperature sensor is located in the area between the cylinder head and, that is, on the engine block itself.
Its body has edges (for a wrench - approx.), For the greatest convenience of dismantling, and the connection is made by connecting a block with two wires.
Design
The sensor in its design can be compared with a conventional resistor, which changes its resistance parameters depending on the degree of heating of the engine.
Major sensor failures
There are not so many reasons why the coolant temperature sensor can fail, because due to the simplicity of its design, there is nothing to break there. And if it still broke, you should pay attention to the following:
- No contact with the sensor - the cause of such a problem can be a banal breakage, or deformation of the wire due to the effects of corrosion on it.
- The device is out of order due to the expiration of its useful life.
Do-it-yourself sensor check
As you could already understand from the above, the temperature sensor transmits to the driver the level of heating of the coolant on the dashboard so that the driver can independently visually assess his condition.
And in order to diagnose it, you must do the following:
- We start the car in advance, let it idle until the arrow shows the maximum operating temperature, that is, 90-98 degrees.
- Next, you need to disconnect the contacts and look at what the arrow on the instrument panel will indicate.
In this case, there can be two types of further course of events.
- The arrow remained without movement, and does not react in any way to what is happening - the reason lies in the wiring, or in the sensor itself. It is necessary to check the wires themselves for integrity, and only then go directly to the sensor.
- The arrow went to zero - In this case, you need to check the fuse. If the fuse in the block is intact, and when the contact is closed to ground, the arrow starts to jump, the temperature sensor does not work.
Checking with a multimeter

Checking the operation of the coolant temperature sensor with a multimeter
Before proceeding with the test in multimeter mode, it is necessary to prepare a container that will be able to withstand a temperature of 100 degrees, a water thermometer and a boiler, with which we will heat the prepared antifreeze to test the sensor.
- On the multimeter, we set the values \u200b\u200bin the ohmmeter test mode.
- Next, we fix the probes on the body and on the sensor contacts.
- We put the sensor in a container with antifreeze and slowly begin to heat it up.
We compare the data you received with the results of a fully functional device. And if they are lower or higher than these readings, then the sensor can be considered faulty.
Thermometer and multimeter readings with resistance test mode.
In this way, it is very easy to check both new and used sensors.
conclusions
If necessary, because the performance of such work in the service, much more than the spare part itself will come out.
The average price in most stores is about 200 rubles, and despite the fact that it is small, they fail with enviable frequency, so the issue of choosing a device should be approached with all seriousness and responsibility.
The most important thing to know about the VAZ 2110 temperature sensor is that it is not alone. VAZ 2110 has two temperature sensors:
- Coolant gauge temperature sensor. This is a sensor designed to display information about the temperature of the engine on the instrument panel. It does not affect anything else, it is not wound up anywhere - it only affects the temperature gauge on the panel.
- Coolant temperature sensor connected to the ECU. This sensor dramatically affects the operation of the car engine.
It is from it that the control program knows the temperature of the engine and sets the injection duration to the injectors. It is for this sensor that, again, the ECU turns on the fan of the VAZ 2110 engine cooling system. Therefore, with high fuel consumption, a boiling engine, and an idle fan, it is this sensor that needs to be checked.
The temperature sensor is a thermal resistance, that is, a resistance that changes depending on the temperature of the engine. The sensor is installed in the outlet pipe of the cylinder head near the thermostat. It twists inside the pipe and its sensitive part interacts directly with the coolant. The sensor wound up on the injector has two contacts, on the temperature gauge - only one contact.

Usually check temperature sensor VAZ 2110 comes down to measuring its resistance at different temperatures. The sensor has two contacts - the resistance between them and must be measured with a multimeter.
Checking the temperature sensor VAZ 2110:
1) On a cold engine, remove the connector from the sensor, check if it is oxidized. Then use a multimeter to measure the resistance. We dress the connector in place.
2) Start the engine and warm it up. If the temperature gauge works correctly from its temperature sensor, then it will show us the correct temperature.
3) We turn off the engine, again remove the connector and measure the resistance of the temperature sensor. It should be less than it was on a cold engine.
On a cold engine at a temperature of about 0 degrees, the sensor resistance should be about 10 kOhm. At a temperature of 90 degrees, the resistance of the sensor will be 240 ohms.
4) When the temperature sensor resistance is less than 240 ohms, the ECU should start the cooling fan. To check this, you need to take a 100 Ohm resistor and connect it to the contacts of the temperature sensor connector. At the moment of closing the resistance of the contacts of the connector, the fan will start to rotate, and when it is opened, it will turn off.
5) If the resistance of the sensor does not change depending on the temperature of the engine, then the sensor is faulty, it must be replaced.
6) If the cooling system fan does not turn on even on a hot car and closing the contacts of the sensor connector with a resistance of 100 ohms, the fan also does not start, then you need to check the fuse, the fan relay on the block to the left of the passenger seat under the glove compartment. where the computer is installed.
7) Those who are interested can drain the antifreeze, unscrew the sensor and bring it home. There, lower it into boiling water and measure the resistance - it should be 100-200 ohms. Although the same can be done by car.
Temperature gauge sensor coolant does not spoil life much, but it should still be in good condition. Checking it is similar to the method described above - measuring resistance at different temperatures of the VAZ 2110 coolant.

Replacing the temperature sensor VAZ 2110:
1) We replace the temperature sensor on a cold engine. We unscrew the cap of the expansion tank and drain the antifreeze to the level of the temperature sensor.
2) We unscrew the sensor with a key of 19. In its place we screw in a working sensor.
3) Top up the antifreeze to the previous level, put the connector on the sensor, close the expansion tank with a lid.
4) We start the engine and see if antifreeze is leaking through the temperature sensor.
What to look for:
Do not confuse the VAZ 2110 temperature sensors with each other. The sensor that is connected to the computer is installed higher on the exhaust pipe. The temperature gauge sensor is lower, screwed into the engine housing in the area of \u200b\u200bthe cylinder head.
For you can use resistors of various ratings. By closing it to the sensor contacts, the arrow on the panel should show a different temperature. 10 kOhm - 0 degrees, 240 Ohm - 90 degrees, 100 Ohm - 130 degrees.
As you know, on the VAZ 2110, the coolant sensor is a kind of thermistor, the resistance of which changes depending on temperature. On the VAZ 2110, the coolant temperature sensor is wrapped in a special coolant pipe and placed on the cylinder head.
Overheating warning device

In cities, there are a huge number of cars. The main problem is the large availability of cars, at a time when there is no increase in space for their placement.
Sometimes, a situation arises that the car has to be left in the open air. On sunny hot days, this problem can be very dangerous.
Under prolonged exposure to solar radiation, the car heats up to such an extent that it cannot withstand the engine. In some cases, additional cooling systems simply cannot cope with the increased temperature.
It is necessary to inform the driver about this situation. Only he can fix this problem.
These indicators alert vehicle drivers to an increased risk of engine overheating through a device and sensor.
Note. The VAZ 2110 car is no exception. It uses a coolant sensor that shows the degree of overheating on the dashboard.
Sensor replacement

It is worth noting that during the production of this car, its manufacture was not reliable, and this structural element could break at any time. Many problems arise with the replacement of this equipment.
You should clearly follow the steps so that the car continues to delight for several more years.
Dismantling the old appliance

First of all, for a VAZ 2110 in a car, it is necessary to complete the procedure for removing the old, damaged device.
For this purpose you will need:
- Before dismantling the sensor, you should take care of its emptiness. To do this, drain the rest of the coolant into a special reservoir.
- To avoid unnecessary problems, you should dismantle.
- Access to the sensor is open. It is necessary to remove the protection in the most accurate way - a rubber cover.
Note. In order to avoid problems with the installation of a new device, you should pay attention to the location of the markings on the product body. They will be needed to install a new device.
- The last step is to simply remove the sensor. It is best to use a wrench with the number "21".
Coolant drain - a special process
The problem may arise with the drain of the coolant.
In VAZ 2110 cars, this process is very specific and requires some skills:
- First of all, the liquid is drained from.
- The second stage involves draining the fluid from the engine.
To drain the fluid from the radiator, you must:
- The engine has its own protection. It is secured with four fasteners. They must be removed using a wrench.
- Before draining the liquid, it is necessary to melt it. There is a stove inside the car. The heat supply regulator is set to the hottest position (to the right of the driver). The faucet on the device opens.
Note. The next step remains controversial. Some argue that it is necessary to remove the expansion tank cap, as in the open position there is a possibility of excessive splashing when draining antifreeze. Others believe that the lid can be left in the closed position.
- A reservoir is installed under the radiator to collect the liquid.
- On the radiator itself there is a special cover that plays the role of a cork. It is used to keep the liquid inside.
It should be unscrewed gradually and slowly. Otherwise, you can fill the generator with liquid. - After the procedure, you must wait 10 minutes.

After successfully draining the coolant from the radiator, drain the coolant from the engine.
Here's an even more specific approach:
- We take an empty container of large volumes, and install it under the engine.
- The fluid drain plug is located under the ignition module. It can be dismantled. We unscrew the plug.

- After waiting 10 minutes, the cork is installed in its original place. This step can be skipped, as it is intended to save details from being lost.
- Be sure, after draining the liquid, it is necessary to clean the surfaces of the drain holes with a clean cloth.
Dismantling the module

To dismantle the ignition module, for greater convenience of draining the coolant from the engine, you should perform a few simple movements:
- The battery has a negative terminal. It needs to be extracted. A wrench with the number "10" is ideal.
- The VAZ 2110 engine has a special decorative trim. It should be taken out.
The oil fill cap is unscrewed, and the plastic lining is removed. This process is relevant for 1.6 engines.
In engines 1.5 - it is absent. - Next, the system is removed by wire.
- High voltage wires are removed from the ignition module.
- The engine crankcase fasteners are unscrewed with a wrench with the number "13".
- The wrench with the number "17" loosens the fastenings of the module.
- The module is carefully removed from the vehicle.
- It remains to unscrew the module from the mount with a screwdriver.
To install the ignition module in its original place, after draining the coolant, you must:
- Connect the high voltage wires to the module according to the diagram. It is listed on the module itself.
- Wires and terminals are cleaned for the best charge transfer.
- Installation is carried out in the same order as dismantling, only you should start from the very end. The module is mounted, fastenings are clamped with the key "17", then with the key "13", etc.
- The battery terminal is connected. The engine is being tested.
Installing the sensor in place
After the coolant sensor is removed, it is necessary to repair, clean or replace the device. Upon completion of the replacement of the sensor, it should be installed in its original place.
This process is no different from the dismantling method, only the steps should be performed in the opposite order.
Note. Be sure to remember the marking of the sensor.
If there is a desire to improve the performance of a new sensor, a special sealant should be applied to the mounting location. It will help reduce the effect of heat on the engine.
After applying the sealant and installing the sensor in its proper place, the process of pouring coolant into its reservoir should be done. After closing the cover on the liquid-filled sensor, a test run of the car engine is made.
Note. You should carefully examine the sensor, its connections, fasteners and other parts. A leak may occur, and the liquid will disappear without a trace, causing a lot of worries to the driver.
Examination

An integral part of the process of installing / dismantling the coolant temperature sensor is to check its performance.
To accomplish this goal, it is necessary to use some additional devices and tools:
- Ohmmeter device. Some drivers call it a multimeter.
- Temperature sensor with readings over 100 degrees Celsius (thermometer, thermometer, etc.).
- A container or container that is not subject to thermal activity with a volume of 0.6 liters.
Some drivers often confuse the coolant temperature sensor with the coolant temperature gauge sensor. Here you should be extremely careful.
The ohmmeter has two output wires with terminals. They should be installed on the sensor body and to the sensor output connector.
The main indicators of device health are the following parameters:
- Temperature (measured in degrees Celsius).
- Sensor resistance (measured in ohms).
The temperature readings must match those of the ohmmeter.
First you need to clarify the temperature indicators:
- 30 degrees Celsius.
- 50 degrees Celsius.
- 70 degrees Celsius.
- 90 degrees Celsius.
- 110 degrees Celsius.
This data must correspond to the following indicators of the multimeter instrument:
- 1350 - 1880 ohm.
- 585 - 820 Ohm.
- 280 - 390 Ohm.
- 155 - 196 Ohm.
- 87 - 109 Ohm.
Where can I buy a new sensor
The acquisition of the sensor is carried out by contacting stores that provide them for domestic cars. Their prices may vary.
It depends on the place of purchase / sale and a number of other indicators.
Particular attention should be paid to fluid leaks. If at the time of starting the engine, coolant continues to ooze from the connecting holes, a heat-resistant sealant should be used.
Note. An alternative to sealant can be a copper washer, which will help hold the parts of the mechanism together and save the driver from leakage.
Also, you should pay attention to the voltage measurement. After completing this procedure, the car ignition should be turned off.
Some secrets to know
After doing these procedures, it is necessary to increase the coolant level to the maximum. This figure should not be reduced or exceeded.
The full and high-quality operation of the sensors and the entire car depends on the exact level of the liquid.
Knowing the main malfunctions of the sensor can be very useful for its repair or replacement. If this device malfunctions, the car may get a so-called cold control problem.
Note. If a malfunction occurs in this part of the car, fuel consumption may increase, which is highly undesirable in the normal operation of the vehicle.
Often, malfunction problems happen due to a breakdown of the sensor itself. The cause of its malfunctions may be the electrical wiring of the car.
One of the successful conditions for using the sensor is the constant monitoring of the condition of the vehicle's wiring.
Sensors indicate the operation of the engine, the emission of fuel, its economy. In case of problems with fixing the sensor (breakdown of the thermostat), the sensor may produce too low a temperature.
In case of removal or malfunctions in the thermostat, the sensor and the motor will give the minimum temperature. A low temperature level will lead to deviations from the normal operation of the engine.
This video tutorial will help you do everything correctly.
In the process of work, it is also recommended to use photographic materials and other visual aids: maps, diagrams, etc. It is easy and simple to replace the sensor with your own hands, and the instructions presented above will help you not to make mistakes.
The price for replacing the sensor in car services from specialists is high, and why, if you can do everything yourself?
The cooling system is designed to maintain the optimal temperature regime of the car engine. Its main elements are channels for antifreeze in the cylinder block, pipes, a thermostat, a radiator, and the electrical part includes a VAZ 2110 fan switch-on sensor, a temperature sensor and an electric motor with an impeller for. Late detection of defects in the cooling system can lead to engine overheating and costly repairs.
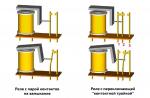
Fan activation sensor LS 0108 (ТМ-108)
Switching schemes
In injection and carburetor engines VAZ 2110, the temperature bimetallic sensor TM-108 is used in different ways to control the on and off of the fan motor.
For carburetor engines, it is located on the radiator on the left in the direction of travel. When heated, the threaded part located directly in the coolant, the bimetallic plate bends and closes the contacts. The voltage from the battery through the fuse is supplied to one contact of the electric motor, the second, when the sensor is triggered, is connected to the housing, setting the impeller in motion.
Fan switch on sensor (carburetor VAZ 2110)
For injectors VAZ 2110, TM-108 it is located near the thermostat, the signal is sent to the electronic control unit (ECU). The control signal from the ECU goes to the cooling fan relay, which, similar to the carburetor motor sensor, controls the electric motor.
Injection sensor for turning on the fan
In all engines, there is another device in the cylinder block, the signal of which is used to indicate the temperature of the coolant on the panel in the cabin.
Before engaging in self-repair of the fan on sensor, it is recommended to understand in detail the design of the cooling system:
The fan does not turn on
There may be several reasons for this:
- Fuse. In the mounting block, the F7 fuse, rated 20 amperes, may be faulty - it is responsible for powering the electric fan and horn circuits;
- Thermostat. The liquid circulates only in a small circle, the radiator and the sensor do not heat up, respectively, the fan does not turn on. You can check by simply probing the pipes, suitable for the radiator should start to warm up after opening the thermostat;
- Sensor. For a VAZ 2110 with a carburetor, contacts are closed for verification, if the device malfunctions, the electric fan will turn on. At the injection motor, it is necessary to disconnect the connector, with the rest of the elements working, the ECU will detect an open in the circuit, give an alarm constant signal to the relay, which will forcibly turn on the electric motor for cooling;
- Cooling fan relay for injection engines VAZ 2110. The sensor is turned off, the power contacts are closed on the relay located in the additional fuse box. If everything worked, then we check the control winding: on one contact there is always a plus from the main relay, connecting the second to the case, we try to hear a click of operation. But it’s better to just replace the relay to check, temporarily, with a known good one;
- Electric motor. When checking, the connector is disconnected; to force the impeller to turn on, voltage is supplied directly from the battery.
If all the elements are in good order, then the breakage must be sought in the wires, alternately “ringing” them. Poor contact with the car body of the terminals of the wires for connecting the relay and sensor is also possible. The worst case would be for the ECU to fail, while the signal from “leg” 46 usually “floats” and does not reach +12 volts (off) and 0 (on).
Fan runs continuously
This is a rarer defect, it occurs in the following cases:
- The sensor contacts do not open, the “Check engine” lamp is on, for carburetor VAZ 2110, when the connector is disconnected, the fan turns off;
- The wires to the device were cut off (only at the injector);
- "Stuck" relay in the closed state.
To eliminate the malfunction, it is necessary to replace the failed element.
Check at home
Sometimes the motor starts too late when the antifreeze temperature is already high. This may be caused by a malfunction of the valve in the radiator cap or abnormal parameters of the switch-on sensor. You can check the response temperature of the device at home, using a multimeter and a thermometer.
After disconnecting the electrical connector, the sensor is unscrewed with a key. To avoid burns, remove the device only from a cold engine, after draining the antifreeze. When reinstalling, it is advisable to use a new sealing copper washer and not apply too much torque when tightening.
The subtleties of replacing antifreeze are studied in detail in this article:
The switch-on temperature is engraved on the end, it can be from 92 to 95 degrees. To check, you need to connect a multimeter in resistance measurement mode and immerse the threaded part in a container of water.
By heating the water and following the readings of the multimeter, we register the moment of switching on by the thermometer, and when it cools down, the switch-off temperature. Standardly it is 92 and 87 degrees, with significant deviations, late operation is especially critical, the device needs to be replaced.
To improve cooling, it is possible to install a double fan from Niva. There are two modifications for placement: after the radiator or in front of it.
Nivovsky injection radiator 21214-1300024-43 (placed in front of the radiator)
On the VAZ 2110, you can install any of the options with minimal modifications to the fasteners in place. When the electric motors are connected in parallel, the current consumption increases to 40 amperes, which requires replacement of the wiring.
Nivovsky suction radiator (placed after the radiator)
Monitor engine temperature. If it is too late to notice overheating, then in addition to boiling antifreeze and a forced stop, more serious consequences are possible: deformation of the cylinder head, jamming of the camshaft. In case of defects in the operation of the fan of the VAZ 2110 cooling system, malfunctions can be diagnosed independently by checking the thermostat, electric motor, relay, switch-on sensor.
Allowing you to ensure the correct operation of the motor, based on the readings of various controllers. One of these is considered to be a temperature sensor in the VAZ 2110. You can learn more about this device, its principle of operation, as well as diagnostics and replacement from this article.
[ Hide ]
Characteristic DTOZH
In order for the injectors, as well as other elements of the 16 or 8 valve injector, to work in normal mode, the ECM reads readings from many devices. At first glance, it may seem that this is not a device that is particularly important for the “tens” engine, but it is not. How devices are turned on, where the pointers are located and what functions they perform - for starters, we suggest that you familiarize yourself with the answers to these questions.
Location, functions and principle of operation
The coolant temperature sensor is an electronic device, in fact, it is a semiconductor resistor with a negative coefficient. The resistance of the controller changes according to the environment. The device is designed to control the temperature during the circulation of consumables in the VAZ 2110 cooling system with further transmission of the received data to the dashboard. In addition, this device is also responsible for the emergency start of the fan. In the VAZ 2110, DTOZH is located in the head of the BC motor. Many motorists confuse DTOZH, calling it the VAZ 2110 fan switch-on sensor, but this is not true.
The design of the coolant controller on the VAZ 2110 is quite simple. The greater the temperature effect exerted on the device, the lower its resistance will be. The principle of operation is to transmit a signal from the device to the ECM, which, based on these data, regulates the supply of a combustible mixture to the cylinders of the power unit. Until the engine warms up normally, a more enriched combustible mixture will enter the cylinders.
Ways to test for performance
There are several ways to diagnose the antifreeze temperature controller - visually and using a tester. Before arming yourself with a multimeter, you should carefully examine the case of the device. If it shows signs of corrosion, deposits or damage, this indicates that the regulator needs to be replaced.
As for checking with a multimeter, this procedure is as follows:
- First, the device should be removed, for this you just need to find the place of its installation, turn off the power and unscrew the device. Next, you will need a container that should be filled with refrigerant.
- The next step is to heat the container after you put DTOZH in it. But before that, it should be connected to the tester probes. Please note that during diagnostics, you must definitely know the temperature level of the liquid heating, this is what will determine the performance of the controller. The container heats up, and you will need to compare the obtained indicators with those indicated in the table. The table itself is shown below.
- In the event that the temperature level does not correspond to the nominal resistance indicator, or vice versa, this indicates a malfunction of the device. Too high signal level of the coolant temperature sensor also indicates its breakdown. There are times when the problem, when the values are higher than optimal, can be solved by cleaning the surface of the device, but such measures, as a rule, help if the deviation of the indicators is insignificant (the author of the video on self-diagnosis of DTOZH is the Device and car repair channel).
Possible malfunctions and ways to eliminate them
The following symptoms may be reported to the car owner about the failure of the DTOZH:
- Too low quality of exhaust gases, which is associated with a violation of the combustible mixture in the cylinders.
- Increased fuel consumption, and significantly.
- There were problems in the operation of the power unit. The dynamics of the vehicle may decrease, and the power of the engine as a whole will also deteriorate.
- Combinations of errors may appear on the tidy, and the ECU can also send a signal to the panel about the need to check the engine's performance.
- The power unit became more difficult to start.
When the first signs of problems are found, many motorists immediately drive their car into a garage or service station to change the controller. In practice, the symptoms of DTOZH malfunctions are often associated with damage to the electrical circuit and poor contact between the device and the vehicle's on-board network. Therefore, if you encounter a similar problem, first of all we recommend checking the status of the wiring.
Photo gallery "DTOZH diagnostics"
Removal of DTVS in VAZ 2110
The VAZ 2110 interior temperature sensor is used to control temperature parameters in a car. This controller is also a transmitter associated with the ECM. In cold weather, the VAZ air controller transmits information to the computer, which contributes to the optimal circulation of air flow through the passenger compartment of the car. As in the previous case, a malfunction of the device may be due to problems in the operation of the electrical circuit, so it will not be superfluous to check the wiring if the controller does not turn on.
To replace the interior, you need to perform the following steps:
- The car must be put on the parking brake. Disconnect battery.
- Using a screwdriver with a flat tip, you need to move the device case away from the installation site.
- First, the upper part of the DFA is removed, this will provide a more convenient dismantling of the controller. When the device is dismantled from the latches, proceed carefully, because you will still need to disconnect it from the wiring (two connectors). First, the wiring is turned off, then the DTVS itself is removed.
- As for installation, this procedure looks the same, only carried out in reverse order. After installation, it is necessary to diagnose the performance of the device.