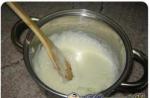
Beginner archers are often faced with the question of choosing fletches for their arrows. What plumage is better, how to choose and install it on arrows? To answer these and other similar questions, it is necessary to highlight the topic of existing types of plumage, their advantages and disadvantages.
Let's start with the most important thing: why do you need plumage for arrows? After all, according to the laws of physics and the displacement of the center of gravity forward relative to the center of pressure, when the arrow is equipped with a heavy tip, the flight of the arrow will be stable anyway. But theory and practice are somewhat different in this case. Firstly, the presence of plumage further stabilizes the arrow. And secondly, not every arrow has a heavy tip. For example, sports arrows are equipped with a light cap, which only prevents the arrow from breaking when it hits a target. In this case, the forward shift of the center of gravity is insignificant and additional stabilization of the boom in flight is required, which is performed by the feathers.
Of course, hunting tips have more weight than sports ones. The boom is stabilized both by the forward shift of the center of gravity and by the feathers. Therefore, in some cases, when shooting at short distances, plumage is abandoned. For example, in bowfishing and bird hunting at a distance of up to 15 meters. For firing at considerable distances, plumage is installed. But on the condition that the plumage will contribute to the stabilization of the arrows, and not interfere with it.
Plumage from natural feathers is considered a good choice ... in dry weather. In rain and in conditions of high humidity, the plumage gets wet, and excess weight spoils the balance of the arrows. In addition, wet plumage negatively affects the aerodynamics of the boom as a whole. In addition, if the plumage (or even one of the fans) is attached to the arrow incorrectly or begins to break away from the shaft after hitting the shelf, the stability of the arrow in flight and, as a result, the accuracy and accuracy of shots drops sharply. When using plumage made of hard plastic, vibration is transmitted to the arrow when it hits the shelf, and the flight path of the arrow can go astray. Natural plumage, on contact with the shelf, gently folds and returns to its original shape in flight, so feather fans for arrows still successfully compete with plumage made of artificial materials. But natural fletching wears out faster than its artificial counterparts, and feathered arrow flags are more expensive and more difficult to obtain. In contrast to this, it is worth pointing out that the use of arrows with natural plumage allows you to install on bows the simplest shelves in their design.
Hard plastic flags are much cheaper than feather flags, they are stronger and more durable. But ... provided that after the shot their condition remains perfect. And this is difficult to observe when using simple shelves. In order to avoid the “mandatory” hitting the shelf with a hard flag when fired, complex and expensive shelves are used, for example, falling models. Such shelves sometimes cost no less than simple bows, and installing and adjusting them is not an easy task.
There is another way out of the situation: artificial folding flags were developed. One of the types is plumage twisting around the shaft of an arrow. Flags of this type, when passing through a conventional stationary shelf, fold up, twist around the pole, and in flight again acquire their original shape.
Also, soft rubber flags are made to reduce shock and vibration. This is a kind of economical option, since the efficiency of such fans is somewhat lower than that of curled ones and much lower than that of natural, feather ones.
Another way to facilitate the passage of the shelf of plumage from artificial materials is to make an arrow with a spindle-shaped shaft. For such arrows, the greatest thickness is at a distance of 2/3 from the tip. In the presence of such a pole, folding flags operate in a softer mode, without hard blows to the base of their attachment. The greatest development of this method of bypassing blows when fired and damage to the plumage was obtained from crossbow bolts. But in the design of crossbows, getting around damage to the plumage is much easier than in the design of bows. A special cut is made in the stock of the crossbow, and the hard flags of plumage pass through it unhindered. In addition, the spindle-shaped shaft of the bolt reduces the area of contact between the bolt and guides, which increases the launch velocity of the ammunition.
Today, many novice archery fans, in an effort to reduce ammunition costs, are engaged in making their own arrows. Some people approach the manufacture of ammunition seriously, thoroughly: they purchase bird feathers, devices for gluing plumage (gluing), good shafts, etc. And some make arrows on the basis of "to make it look like." And various improvised means are used: a window glazing bead for a pole, tape for plumage, cheap glue. Alas, the result of such creativity: bows do not shoot, arrows do not fly. External resemblance has nothing to do with real shooting. And the use of plastic or rubber flags on bows with simple shelves leads to a significant spread when shooting. Therefore, if you want to shoot accurately, forget about such pseudo-economy. Learn how to correctly feather arrows or purchase expensive ready-made ammunition.
If you decide to make high-quality arrows with natural plumage, then be patient. Do not sew plumage flags to the shaft. In an effort to speed up the process of making arrows, some "hurry-ups" pierce feather fans with a needle (and all three at once) and wrap them in a spiral to the shaft. The arrow with the same plumage looks good. But its aerodynamics and functioning of the plumage leaves much to be desired. Even the thinnest threads do not allow the flags to naturally fold when in contact with the shelf. The fibers of the flags due to punctures quickly delaminate. All this does not add accuracy and accuracy to shooting.
You need to fasten the fan to the shaft of the arrow with high-quality waterproof glue. In this case, the bases of the flags must be glued into special grooves. In ancient times, they also made a special winding at the ends of the flags, but again, not on an even shaft, but in the provided recess, a groove for winding. Such winding can be done now, although this is not necessary.
To make grooves on the shaft, a special jig is made, along which grooves are cut, scratched. With the help of the conductor, the grooves are strictly the same. They can be either straight (parallel to the arrow axis) or spiral. Glue the flags in the grooves with strong waterproof adhesives.
The flags themselves made of natural feathers can either be made independently or purchased in a form already prepared for installation. For the correct installation of the plumage on the arrow, all flags must be made from the feathers of one bird wing (right or left). Most often, goose fly feathers are used. Depending on which wing the feathers are taken from, the arrow will turn to the right or left in flight. Which pen is better to take? By and large, there is not much difference. But especially advanced archers believe that the right or left swivel can help to shoot more accurately in crosswinds and you need to choose an arrow that, when fired, turns in the direction from which the wind blows. There is also a theory that feathers from the right wing should be installed on arrows for right-handers, and from the left - for left-handers, but it does not have a large number of adherents, that is, in the absence of arrows with a "right" plumage, right-handers shoot arrows with "left" flags and vice versa.
Making your own feather flags will require stencils and a processing clip. Such a clamp is purchased or made from two pieces of wood and a pair of bolts with nuts. The flag is clamped between the boards and the base is carefully processed with fine sandpaper. From a fresh feather, you can easily tear off a strip of the base with a fan, and if the feather is dry, then it is better to separate the base with a fan with a blade or a sharp knife.
 It is best to glue the flags with the help of a special device - perglue, so the plumage is glued very accurately and accurately.
If you put enough time and patience into making arrows, you'll have a supply of quality bow loads to be proud of. When you have a supply of quality arrows, remember to store them properly. Long-term storage of arrows in an overfilled quiver may warp the shaft. A shot with a crooked arrow a priori cannot be accurate.
Remember: a good arrow is harder to make than a good bow. This Native American proverb accurately reflects reality.
For the process of making arrows, you will need a knife, scissors, a set of small needle files, a special home-made device or a regular door hinge, an electric drill and a set of drills. From consumables - linen thread, glue, coarse and fine-grained skin.
arrow shaft
First, make an arrow shaft. The choice of material is important in determining the qualities of the finished arrow and depends on the type of wood suitable for making arrows. Spruce, ash, oak, hazel and even reeds can be used as the main material. The standard arrow has a length of 75-80 cm with a diameter of 8-10 mm. The rods must be cleaned of bark, dried in the sun. Pine poles can be made from dry pine planks split into fibers and from logs split into dies. Examine them carefully.
The lines of the tree itself should run along the shaft. If the workpiece is bent, it can be gently straightened over the steam. After straightening, it is necessary to allow the arrow to dry for several days. It makes sense to blot out an even finished shaft with an ordinary wood stain. This will allow the arrow to last longer. Having selected even and straight shafts, you can leave them with the same section along the entire length or give them a spindle shape, copying medieval arrow patterns. If you chose the second option, then your arrow should gradually thin out towards the tip and towards the heel. If in the center its diameter is 10 mm, then at both ends of the arrow the diameter will need to be reduced to 6-8 mm. If you make a cutout for the bowstring directly in the heel of the arrow, then the narrowing should not affect it, but break off, not reaching 1 cm to the end of the arrow.
A smooth descent can be made with a knife, cutting the workpiece along the fibers from the middle to the ends, with further processing with a fine sandpaper, or only with a sandpaper, first coarse, then fine-grained. After that, the entire body of the arrow, with the exception of the place where the plumage will stand, must be smeared with linseed oil - to preserve the shaft from moisture and reduce friction during flight. If you decide that some arrows are not straight enough, you can straighten them. To do this, you need to hang a load from the boom and leave it for several days.
Crossbow.
Heel in the arrow
The heel can be sawn through in an arrow, or it can be a separate piece of bronze, bone, horn, or solid wood. In the first variant, the cut is made before the installation of the plumage and the tip, in the second variant - after. The width of the cut should match or be less than the thickness of your bowstring. Make a rough cut with a sharp needle file to a depth of 5-8 mm, then give it the correct shape with a fine file.
Compliance with the angles is necessary for the tightest fit of the bowstring during maximum tension and even distribution of the load during the descent of the bowstring. If you will mount the heel separately, then, having machined or cast it according to the drawing, you must first drill a hole for the spike and achieve a snug fit of the heel to the arrow. After mounting and winding the feathers, it is necessary to glue the shank according to the location of the feathers and wrap it with thread, which should remain after winding the feathers. The cut in the heel should be perpendicular to any of the three feathers, or parallel, on the same axis, if there are only two feathers (Fig. 1).

Rice. 1. Arrows.
Arrowhead
A standard petiolate arrowhead is mounted immediately after the heel has been cut. The kerf and the blade of the tip (if it is flat) should lie on the same axis. This is necessary so that both the beginning and the end of the arrow simultaneously begin rotational movements around their axis. On the heel of the arrow, this movement begins the plumage, on the tip - the tip. The nozzle of the tip begins with drilling the end with a drill that matches the diameter of the petiole. For a more precise fit, it is necessary to heat the petiole in the fire and insert it into the hole in the end - hot steel will burn the necessary hole for the tightest fit.
After that, it is necessary to center the position of the tip relative to the shaft of the arrow. No matter how accurately you drill the hole, the tip will always be crooked and will need to be adjusted. To do this, it is necessary to bend the tip shank a couple of degrees in any direction until the desired angle coincides with the deflection angle and thus they mutually exclude each other. After adjusting the tip, you need to adjust the diameter of the arrow tip to the diameter of the shoulder-stops of the tip. This can be done with a knife or sandpaper.
Pasting the arrowhead
To glue the arrowhead, you need to remember its position relative to the shaft, remove it, fill the channel halfway with glue and insert the tip in the position in which it was fitted along the axis of the shaft. After gluing, it is necessary to secure the end of the boom against longitudinal and transverse loads for scrapping. To do this, wrap the arrow with a linen thread over the petiole, cutting off a straight thread, without knots and thickenings, no more than a meter long.
So that it does not get under your feet, hang it around your neck, take the arrow in your left hand, and the thread in your right. Put the tail of the thread on the shaft 8-10 cm from the tip and, pressing the thread near the tip with the thumb of your left hand, start very carefully, coil to coil, winding the handle. The coils will lie on top of the tail of the thread lying on the arrow, firmly fixing one end of the thread. The total length of the turns must be equal to or greater than the length of the tip shank. After wrapping 2/3 of the tip, bend the tail lying on the arrow of the thread in half so that you get a loop, and continue winding the thread on the shank. After you finish winding, insert the tail of the wound thread into the loop formed and, holding it with the finger of your left hand, with your right hand, begin to pull out the first tail of the thread that remains in the middle of the winding.
In this case, the loop will pull the second, last tail under the winding. Thus, both ends of the thread will be under the dense winding, tied at the same time into a knot. Additionally, you can glue the winding with glue. This method of winding and tying a knot is used when wrapping the plumage and heel. The tip can also be machined from a large diameter nail. Then the bottom of the Kalashnikov case is cut off, the tip nail is inserted into one end of the case, which is soldered for reliability, and the other end is put on the shaft (Fig. 2).
The tip can be a singed end of an arrow and a stone
But you can make it out of metal. First, we make a mold out of wood. We melt the tin in a coffee maker or saucepan, pour it into a mold and harden it - pour cold water onto the metal itself. Then this piece of metal must be sharpened with a needle file or bar to sharpen it. We measure 5 cm from the end, where there will be a split, we tie the shaft with a thread or rope so that it does not prick further. We split the shaft in the middle along. We insert the tip into the shaft, tightly tie it with threads.

Rice. 2. Arrowheads.
arrow fletching
The fletching of an arrow may consist of two, three, four or even six feathers, but the standard and most common number is three. This number is optimal for quickly stabilizing the boom in flight. For an arrow, only the main flight feathers can be used, on one wing their number does not exceed 10 pcs.
For one arrow, only feathers from one wing, left or right, are used, because all feathers must be bent in one direction. It is better to use simple white goose feathers as plumage, and it is better only from the inside of the feather - the wen, which is always overlapped with another feather. The width of the wen does not exceed 1.5-2 cm, the length depends on the size of the feather itself.
Cutting a feather for an arrow
Divide all the feathers for the arrow into two parts - from the right and left wings. First, cut off the base of the barrel, then apply the template to the feather, cut off the end of the feather and the feather itself. At both ends, leave mortgages for winding, no more than 5-6 mm long. The pen barrel always has a groove on the inside, along which you divide the pen into two parts. To do this, you need to put it with the front (convex) part on a flat, hard surface and carefully cut it in two steps: from the center to the base, then from the center to the tail.
With scissors or a knife, cut the resulting shelf along the rod, from the inside of the feather, from the base to the end. After this operation, the rod should resemble a small bar. Divide the entire batch into three feathers for gluing the three-feather plumage. Insert one pen into the mandrel and pinch it with the fingers of your left hand so that only the bar of the rod remains visible. Treat it with fine sandpaper until smooth along the entire length. Glue the feathers in three sectors so that there are exactly 120 degrees between them (Fig. 3).

Rice. 3. Bend arrow feathers.
Gluing must be carried out, stepping back from the heel 3-4 cm, one feather at a time. If you are making an arrow with a bowstring cut directly in the heel, then it is better to glue the first feather perpendicular to the cut axis. If you are making an arrow with a false heel, then there is no difference in what order the feathers are glued, as long as a 120-degree angle between them is maintained. Spread glue on the rod right in the mandrel and press it to the place where the pen is glued. After 5-6 seconds, when the glue has set, carefully remove the mandrel. Apply glue to the arrow itself and press the shank of the rod by hand.
If it was not possible to glue all three feathers at the same distance from the heel, you can cut them evenly with scissors. Next, you need to cut the front mortgages at an angle. After the feathers are glued, proceed to winding. Stepping back from the front edge of the pen 5-10 mm and placing the tail of the thread under the future winding, begin to impose one turn after another, additionally crushing the mortgages with your finger so that the transition from the shaft to the pen is the smoothest. After all three mortgages are wound, cut off the tail of the thread sticking out from under the winding.
Winding feathers to the shaft of an arrow
Winding feathers to the shaft of an arrow can be done in two ways. The first is to pierce the wen of the feather at the base of the rod with a needle, and the second is to wind the thread over the feathers, pushing the fibers apart. The thread is wound from the bottom up counterclockwise. The distance between the turns should vary from 5 to 10 mm. The end of the thread winds up the rear embedded feathers and is fixed with the same exhaust knot as when winding the tip.
Take the arrow in your left hand, and the tip of the thread in your right, then, rotating the shaft clockwise, pull the thread and cut through the feather with it, then turn the shaft and cut the feather again with an offset of 5-10 mm upwards. After you wrap the back mortgages tightly, you need to tie a knot. To tighten the knot for winding, you can put a piece of thread, bent in half, and start winding it.
Then - everything is the same as with a regular knot: after winding up to the slot in the heel of the arrow, insert the tip of the thread from the winding into the loop and pull it out. After that, cut off all the tips and coat with glue. The plumage is ready. The last thing to do with the arrow is to see it through. Rub the wax on the arrow and, melting it over the fire, let the wax soak into the wood.
![]()
Sports bow.
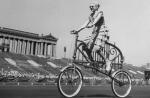
The bow is an ancient weapon
The bow is an ancient weapon that has survived to this day, but already as a subject of competition at the Olympic Games. Archery became an Olympic sport in 1900, and this sport was included in the program of the Games in 1904. Competitions were also held in 1908 and 1920 (women also took part in the competitions in 1904 and 1908). In 1924 this sport was excluded from the program of the Olympic Games.
The International Archery Federation (FITA) arose in 1931, since that time the undeservedly forgotten sport began to revive. In the same year, the first World Championship was held in Lviv (then the territory of Poland). The USSR joined FITA in 1967. In 1963, the first USSR championship was held in Tallinn, and two years later, by decision of the International Olympic Committee, archery was declared an Olympic sport.
Again, the Olympic championship was played in 1972. On August 13, the Games of the XXVIII Summer Olympiad started in Athens, and archers again competed at the foot of the ancient Olympus.
Hardened arrows
He wants to shoot him
Shoot, kill.
He pulled silk strings,
I applied maple arrows ...
("Suroven Suzdalets")
And Vasilyushko takes a tight bow,
And Vasily puts a red-hot arrow,
He lets into the tents in Batygins,
And he killed exactly three heads under the tents ...
... Then Batu saw that trouble had come,
That a red-hot arrow was fired from Kyiv.
("Vasily Ignatievich")
Unlike the evolution of compound bows, the principles of arrow construction were known as early as the Stone Age. At the same time, the main forms of tips known to the whole world, from North American Indians to the Japanese, were determined.
But we will not begin the story of the arrow with him. Let's start with the shaft of the arrow, that is, its wooden base, which carries the plumage and tip. Slavic craftsmen preferred birch, spruce, pine, maple, apple, hazel, cedar, cypress wood for these purposes. Also, in some places, poles made of reeds (do not confuse reeds and cattails: cattails) or reeds were used, the relatively strong hollow stems of which were very light. They tried to harvest the wood in the fall, when it is believed to have less moisture.
The ancient master approached the manufacture of the shaft with great care - after all, any oversight could cause severe injury to the shooter. After being debarked, or if the shafts were made from a large log, were split or sawn, perfectly straight and perfectly round blanks with a diameter of 7-10 mm. were ready, they were carefully polished, once again checking the perfectly round surface. First, the workpiece was scraped with a knife, then with a special device, a plow (see the figure), then with a special rough stone (see the figure). Particular attention was also paid to the absence of burrs, because due to one such small oversight, an arrow, when fired, could scratch the hand to blood (the author was convinced of this in the literal sense “on his own skin”), and if you take into account the monstrous power of the ancient bow, even more so .
The length of the arrows is set experimentally. For this, the bow is taken in the left hand, while the right one, without a bowstring, is brought to the chin, cheekbones or earlobes. The length from the outside of your left hand to your right hand is the length of your arrow. Moreover, it must be taken into account that the longer the arrow, the more accurate, but slower and shorter its flight, and the shorter, the farther and faster, but less accurate.
Then the master made a cut (eye) at the end of the shaft, which was turned upwards near the living tree (because the tip was attached to the butt, which was harder), where the bowstring was inserted. If the arrow was made "for glory", instead of a wooden cut, a bone, later a metal eye with a slot for a bowstring, was put on the end of the shaft. The ear also had its own parameters. The cutout for the bowstring, if it was too deep, slowed down the flight of the arrow, but it is more convenient to keep an arrow with such an eye at the ready, putting it on the bowstring, and therefore easier to aim. If the cutout was made the other way around, the arrow sat badly, but the flight was faster than that of a similar one, only with a deep cutout. In general, the dimensions of the “ears” in the 10th century and after five hundred years were as follows: the depth of the cutout on them was 5–8 mm, rarely 12, and the width was 4–6 mm. If the arrow was hollow (reed, reed), the bone ear was inserted into this cavity with the help of a special pin (in the figure - eye No. 5), if the arrow was wooden, an eye with a sleeve was preferred. In both cases, they were planted on fish glue.
Slavic arrows had a length of 75-90 cm. They weighed within 20-60 g. Moreover, the heavier the arrow, the farther and more powerful its flight, since it has a large inertia, while light arrows have a huge advantage in speed. Therefore, in a battle with heavily armed warriors, they took heavy armor-piercing arrows, if they went to hunt a bird or a fur-bearing animal, they took light arrows (on a fur-bearing animal, moreover, with a blunt pear-shaped tip - in order to stun and not spoil the fur).
After the master dealt with the ears, he had to think about the plumage of the arrow. It will ensure the accuracy and straightness of the arrow flight. Slavic arrows had from 2 to 6 feathers in plumage. The most common option is two feathers, the rarest is six. Although arrows without plumage at all are also known, this is a rarity, since it is very difficult to hit anything with such an arrow. Feathers were located in a strictly defined order. The main rule for the arrangement of feathers on the shaft is symmetry. If you have two feathers on your arrow, they should lie to each other at an angle of 180 degrees, if three - 120, if four - 90. The symmetry of the plumage ensures a straight flight of the arrow. The ancient master also carefully approached the choice of the pen - they should be even, elastic, straight, not very hard.

Various types of arrow feathers. XVII century.

1, 2 - shafts of arrows of the end X - start 11th century
3 - 6 - ears of Russian arrows XVI- 17th century
Usually feathers were taken from falcons, eagles, cuckoos, crows, gooses, sea birds. Each region, of course, preferred its own birds, whose feathers were easy to get, but they all met the above requirements. Some birds took a feather from the wing, some - from the tail. The feather was processed as follows: on the one hand, it was trimmed along with a piece of the rod. It turned out half a pen. She was given an approximate shape of the future plumage, which was very diverse, but most importantly - streamlined (see the main shapes in the figure), leaving small pieces of the rod 0.5-2 cm in front and behind for winding them with thread. Then the second part of the plumage was prepared in the same way, in general, as much as the master wanted to install on the arrow. Be sure to follow the direction of the twist of the pen. When installed on an arrow, it should be directed in one direction for all feathers (like the rays of a swastika). This twist of the feathers provides the twist of the arrow. In this case, the same effect is achieved as when fired from a rifled firearm: a projectile twisted helically in flight, whether it be a bullet or an arrow, flies much more accurately than without such a twist. Sometimes even feathers were superimposed on the shaft itself in a helical manner, and sometimes even threads were cut on the shaft of a crossbow bolt like on a screw. From this follows the following rule. A rotating arrow in flight deviates somewhat in flight from the target in the direction of rotation. Therefore, experienced shooters were advised to aim with an arrow feathered from the right wing of a bird to the right side and vice versa.
The heavier the arrow, the longer and wider it needs plumage. Samples with a pen width of 2 and a length of 28 cm are known. But this is already plumage for a real log. Usually the ancient Slavs preferred plumage 12-15 cm long, 1-1.5 cm wide. This plumage was quite suitable for an ordinary military man, experienced shooters preferred shorter plumage - 8-10 cm, and arrows were used for shooting at ultra-long distances with plumage 6-7 cm long.
Now that the master has all the feathers for the arrow ready, you can begin to fix them. You just need to decide on the place where to put this plumage. They are fixed a few centimeters from the ear. But by no means close to him! Otherwise, you simply will not put an arrow on the bowstring without wrinkling the plumage, and having wrinkled the plumage, you will certainly not hit the target (unless by chance). The following rule applies here - the closer the plumage to the bowstring, the more accurate the shooting will be, the farther - the faster the flight.

Leaf-shaped tips VI- 11th century
The ancient Slavs gave priority to the accuracy of the battle. The distance from ear to feather fluctuated on average, from 2 to 5 cm.
Now the master put feathers on the glue in the chosen place of the shaft and took out a needle with a thin thread or horsehair. Those tips of the pen that were left without a fan were tightly wrapped around the glue to the shaft with a continuous winding. In the place where there is a fan on the feather, with the help of a needle, which was used to pierce the core of the feather and passing a thread through it, it was wound to the shaft. The step of such a winding was 0.5-1.5 cm.
After that, if desired, the master could wrap a shaft with birch bark over the winding with a thread, so that the rough surface of the thread would not slow down the flight of the arrow and not scratch the arrow's hand. Now it's time to talk about tips. For some reason, artists often attach tips to the arrows of their characters, either gigantic in size, or vice versa, the size of a needle. But most often they like to depict tips with two spikes pulled back, believing that they see it very intimidatingly. However, the Slavs rarely used such tips - they did not differ in sadistic inclinations, especially for an emergency, they were truly terrible weapons.
In fact, in the scientific literature one can find descriptions of about 110 types of metal and 8 types of bone tips. Despite such an abundance of forms, each tip was used for specific purposes. Conventionally, all tips can be divided into several huge groups - according to their purpose. The first is standard leaf-shaped tips. They were used by both warriors and hunters. These tips can be called universal: they will break through the light armor of the steppe and catch up with the hare. Such tips did not cause much suffering to the victim - they easily entered the body and were easy to remove, such arrows did not have any spikes.


Such tips can be called the most massive tips of Ancient Rus'. In the 12th-16th centuries, the classic tips slightly crowded out the armor-piercing ones, designed to pierce the super-heavy armor of Western European crusader knights. Few people know that under the "tin can" they often also wore chain mail. Armor-piercing arrows were made as thin as a needle, sometimes quite long, and did not have any spikes. Their main task is to break through the armor and injure (kill) the warrior. Also, these tips were made of good grades of iron and steel, so that when they hit the armor, their sharp stings did not break, blunt or bend. In epics, even damask arrows are mentioned everywhere, but in most cases, this is still hyperbolization, since the lion's share of arrows was still lost in the heat of battle, and damask tips are not a cheap thing. And the third class - if, for example, someone needs to cut off a hand with a sword raised above a comrade with an arrow, the so-called cut was pulled out of the body - and with a successful shot, the enemy looked in horror at his hand lying at his feet. Such arrows were used in the fight against lightly armed warriors, such as nomads. They were used to "cut off" limbs, slit necks, inflict horrific wounds on the unprotected chest from a distance. Srezen is an arrow with a spade-shaped tip or a dovetail tip (see the figure). These tips, having a wide cutting surface, did not pierce the victim, but cut them. The width of the cutting surface of the cut is 6-10 cm. Often they tried to lighten such a massive tip - they cut a hole in the middle, made it in the middle 4. Tips with spikes. X-XIII centuries 4. Tips with spikes. X-XIII centuries tips with spikes bent back, as well as many other, sometimes seemingly fantastic designs. But all of them were used in combat or hunting.

2. Armor-piercing tips. IX-XII centuries

Shear tips of the IX-XIII centuries.
Generally speaking, the spike on the tip is intended primarily for well-founded purposes, for example, for incendiary arrows, which, having stuck, for example, in a board or thatched roof, should not have fallen from there - such tips clung to their spikes.

Main parts of iron tips:
a - feather, b - sleeve, c - side, d - shoulder, d - petiole, e - neck, w - warhead (for armor-piercing), h - faces, and - emphasis for the pole, k-point, l - thorn
Or, to limit the maneuverability of a particularly difficult enemy: seeing that a comrade with a sword could not cope with the enemy, the archer, fearing to hurt his friend, hit the enemy in the shield with an arrow with a spike - in this way he significantly limited the enemy’s maneuverability, but if it’s useful to chop off a shaft, turning a shield towards him - for sure a warrior with a sword will hit an unprotected place of the enemy. And only then such tips were used to inflict a huge wound, complicate its pulling out, causing unnecessary torment. Oddly enough, such tips became widespread precisely after the baptism of Rus', the peak of their popularity falls on the XIII-XV centuries. There are very few ways to painlessly pull out a spiked tip, but the ancient Slavs knew them and put them into practice. For example, if an arrow has two symmetrical spikes bent back, it was necessary to carefully break off or cut off the shaft as close as possible to the tip, then take a thin wire hook, pry the tip with it so that it turns over in the wound in the opposite direction - now with the help of the same hook, you can easily pull it out. Otherwise, the wound would have to be severely cut open.
The situation is more complicated with tips in which one spike is bent forward and the other back - such tips are almost impossible to pull out painlessly, and therefore, they are much more dangerous than symmetrical tips. Also in Rus' there were exclusively hunting tips. Since when hunting for a fur-bearing animal, nevertheless, not every shooter could "hit a squirrel in the eye so as not to spoil the skin." Therefore, the beast was silenced with blunt pear-shaped tips. They were made of iron, bone or even wood; for such tips, the material is not a matter of principle. Such tips were called "tomars".
In Rus', along with metal, there were also bone tips. Despite their seeming primitiveness, they are very, very dangerous and are practically not inferior to their iron counterparts, but in some ways they are superior to them. For example, bone tips are lighter than iron ones, which made it possible to put them on "high-speed" types of arrows. Bone tips were made from hard non-tubular bone (horns, some other bones) of large animals by sawing (cutting out) a blank and then turning it to the desired shape. The only limitation of the bone tip is the impossibility of penetrating armor, whether it be chain mail or shell, so by the 13th-14th centuries such tips become only the property of hunters.
Having decided on the type and shape of the tip, our master - archer, that is what people who make arrows were called in Ancient Rus', had to decide on the method of attaching it to the shaft. All tips are divided into two types according to the method of attachment - socketed and petiolate. We can observe this separation in all the illustrations showing the tips.
The petiolate tips were inserted inside the shaft with the help of a special pin, the socketed ones were planted on glue over the shaft and riveted with a small rivet or nailed with the same small carnation. Much more, 99% of the tips have petioles rather than sleeves for attachment. The sleeve mount was preferred to be used only for armor-piercing arrows, and even then not always. Socketed arrowheads are typical primarily for the western and Far Eastern (Kama region) regions of Ancient Rus'.
After the final fastening, for strength, the master wrapped them with thread or horsehair over glue, and if desired, birch bark was superimposed on top. Now, after the glue has dried, the arrow is ready.
What a variety of tips! Meanwhile, each warrior had with him a "gentleman's set" of arrows with different tips - armor-piercing, classic, studded, cut. To distinguish them when shooting, in order to quickly and accurately snatch the desired arrow from the body (quiver), their ears were painted in different colors. That is why, in order to distinguish between arrows, the ancient Slavs preferred to wear a tool at the waist, and not behind the back, as artists usually draw ...
Another description of the manufacture of arrows for archery.
An equally important detail of the shooting complex, so we do it carefully, although they are lost, broken, etc. on the shooters. We go to the hardware store and buy a bead 10 * 10 mm. We buy a lot of it, because. consumable material. We select carefully, straight, without knots. I took 4 rubles per meter.
It's time to decide on the length of the future arrow. To do this, we get up, pull the left hand with the index finger extended to the left parallel to the ground, look at this finger. The length of the arrow is the distance from the tip of the finger to the chin!
The blank for the arrow should be 5 cm longer than the future product.
We remove the edges of the glazing bead with a planer, bring it to a round state using the following device.
At the base are two suitable boards / pieces of plywood, pieces of a glazing bead with knots are nailed along the edge of one. A hefty evil skin on a rag basis is glued to both parts of the device. The length of the fixture is comparable to the length of the arrow, the width is about 10 cm. If desired, both parts can be sewn with a piece of leather along one side.


The principle of rounding is very simple, we clamp the workpiece into a screwdriver and at high speeds a couple of minutes of reciprocating movements. After that, in the hands, using sanding paper 100, 200, 600, only it is better to hold the paper through a rag so as not to get burned. As a result, we get an amazing quality arrow shaft with a diameter of about 9 mm. I tried a 500 watt drill, not that it twists the workpiece into a spiral.
We cut off the “technological tail”, make a cut perpendicular to the annual rings to a depth of 8-10 mm, expand the cut with a flat file, round off the edges of the cut, cut off 1-1.5 mm from above and below at a length of about 2 cm
plumage manufacturing
The goal is a simple weather-resistant bright plumage with good flight characteristics. For manufacturing, we need colored tape, aluminum tape, A4 paper. We cut the paper along the short edge to a width of 4 cm (4 * 21). We cut the aluminum tape 1 * 21 cm and fold it along the aluminum outward.


We unwind the colored tape with a sticky layer up on a flat surface, lay the paper so that 5 mm is left on both sides, glue strips of aluminum tape on these places and again a layer of colored tape on top. With one such blank, 4 feathers are obtained. So there are a lot of them to do.
We circle the pattern with a ballpoint pen, cut out the feather, not forgetting 1 cm of aluminum tape on both sides for further winding. Feathers are even more consumable than arrows, after successful shooting, the disheveled feathers on the arrows found can be cut off, the arrow cleaned with sandpaper and new feathers glued on!
Influence of the shape and material of the plumage on the characteristics of the arrow
One of the most important factors influencing the behavior of an arrow during flight is the plumage. A properly stabilized arrow will have the correct flight path, which will greatly increase the chance of hitting the target. In order to create the highest quality arrow, you need to pay close attention to the choice of material and shape of the pen. It is the correct plumage that guarantees the stability of the arrow during the flight and the accuracy of the hit, on which the result of the shooting directly depends. When choosing the material from which the plumage will subsequently be made, great care is required, since the quality and durability of the manufactured arrow will depend on this factor. The shape of the completed plumage affects the accuracy and speed of the arrow, and also plays an important role in balancing. A well-chosen feather shape contributes to increased stability and accuracy of the fired arrow.
arrow fletching materials
The fletching material has a direct impact on the quality of the boom balance. A well-chosen type of pen will increase the aerodynamic characteristics of the arrow. The most popular materials used in the creation of plumage include bird and synthetic feathers, as well as rubber or hard plastic. Each material is characterized by certain properties that affect a number of aspects during the flight of an arrow.
- Natural feather. Such material is able to qualitatively balance the arrow, increasing its aerodynamic capabilities. Plumage made of natural feathers when hitting a shelf, unlike artificial material, elastically folds and unfolds during the flight, without affecting the further flight of the arrow. But, the use of plumage of this type is desirable only in dry weather, because when wet, a natural feather absorbs moisture, as a result of which the feathers gain weight, which introduces an imbalance in the arrow flight path, which affects the accuracy and accuracy of the shot. Also, the disadvantages of this type of plumage include a rather low wear resistance, compared with the same plastic. Most often natural feather is used in the manufacture of arrows intended for traditional bows.
- Hard plastic. This type of artificial material is famous for its reliability and reasonable price. The plumage, made of hard plastic, has a high degree of strength and is much more durable than natural materials, but still inferior in terms of durability to rubber. When using arrows, the plumage of which is made of artificial materials, it is necessary to install more complex and expensive shelves on the bow. Thanks to special designs, the arrow avoids hitting the shelf with a flag, which allows you to maintain the perfect condition of the plumage.
- Synthetics and rubber. The plumage, made of synthetic material, is not afraid of moisture, does not deform, does not wear out and has the highest degree of strength. The only negative is that when fired, the plumage is able to touch the bow shelf, thereby, although slightly, but still changing the trajectory of the arrow.
Influence of the shape of the plumage on the dynamics of the flight of an arrow
The shape of the plumage plays an important role, since the effect of the air flow on the flying arrow depends on this factor. The shape of the plumage gives the arrow its own peculiarity, which is reflected in the range, speed and accuracy of flight. Each shooter chooses for himself his own type of plumage, which directly depends on the set distance and the goal of the archer. In the manufacture of plumage, 3 or 4 feathers can be used. There are three most common types of feather stickers:
- 1.Direct plumage. Arrows with this type of plumage have a high speed. The released arrow flies straight and fast, but is inferior in accuracy to the helical type. High speed is guaranteed by the fact that during the flight of the arrow there is an unhindered passage of air flow through the feathers. In this case, the plumage serves only as a balancer, but does not affect the straightness of flight.
- 2.Angle plumage. The arrow twists during flight, has good accuracy, but less speed, in contrast to the direct type of plumage. The lower speed is due to the fact that the intensive rotation of the boom takes energy, contributing to a rapid decrease in speed.
Spiral plumage. The arrow has maximum stability, air passing through the swirling feathers contributes to the rotation of the projectile. During the flight, the arrow rotates around its axis, which allows it not to deviate from a given direction. An arrow with a spiral tail has high accuracy, but at the same time its speed is less than that of arrows with a direct type of tail.
For uniform ballistics and, accordingly, high accuracy, all your arrows should be the same. Uniformity will also help to avoid additional sighting. With an average weight of an arrow with a tip of about 25 grams (390 grain), we are talking about tenths of a gram. Almost any household electronic scale can easily cope with such measurement accuracy.
Much more difficult with rigidity. An arrow is not a bullet, in flight it coils like a snake. This phenomenon is called the "beam paradox" and it is often played up in Korean and Chinese historical action films, when on the screen in slow motion arrows manage to cleverly go around "their own" and hit the enemy. We will dwell on it in detail in an article about archery arrows, since it is difficult to do without adjusting the stiffness (“spine”) for a specific bow. "Spine" - the amount of deflection of the boom in fractions of an inch. For example, with a spine of 400, the value is 0.400 inches (2.54 cm).
In short, the method of measuring the "spine" looks like this:
The load must be a certain weight (880 g), an arrow 29 inches long, etc. The smaller the "spine" - the amount of deflection of the arrow - the harder it is. The length of the arrow, the weight of the tip and shank, the strength of the bow, and much more are also taken into account.
For a crossbow, this factor is not so significant. The fact is that a crossbow arrow is much shorter than a bow arrow and in any case, even with relatively thin walls of the “tube”, it will be stiffer (archers cut the tubes to increase rigidity). In addition, unlike any bow, it moves along the groove of the guide. And yet, it is impossible to completely discount the "spine". Simply put, the more powerful the crossbow, the harder the arrows should be. And the bigger the beast you are going to hunt, too. As, by the way, the total mass of an arrow with a combat tip, even if the speed decreases slightly.
We are only interested in uniformity in rigidity. The easiest and only way is to buy arrows from well-known manufacturers and not bother with anything else. Moreover, for them, “firmachi” always indicate both the mass and the “spine”. Correctly measuring the spine of a short crossbow arrow at home is very difficult, you can bend it or break it.
As for the material. These are fiberglass, aluminum and carbon. We will not consider the first one at all - well, to hell with it. In the case of choosing expensive branded arrows, there is not much difference - they are aluminum or carbon fiber. Among cheap products from Southeast Asia, it is better to choose carbon. Not an expert in Structural Materials Technology, but I think that carbon is more technologically advanced in production and allows you to achieve better performance at a lower cost.
In general, it would not hurt to have a special one. It costs about as much as one good hunting arrow in the collection.
Finally, we move on to the actual arrows. Let's start with the entertainment and recreation segment.
Budget crossbow arrows
As a rule, they come with crossbows. With very cheap models - a couple of aluminum 14-16-inch, like "AL 2219".

For crossbows of a higher class or in the PKG configuration, the set will be a little richer: there are already four “lumines”, and even 20-inch carbon projectiles. The latter, indeed, are much better in ballistics.
It takes them a while. Crossbow shooting is very specific, and misses are guaranteed at first. As a result, the arrows lose their plumage, the tips bend, and they themselves fight like pretty ones. The same thing happens when shooting not at, but at trees, barn walls, etc. It should be remembered that an arrow fired even from budget “blockers”, like the MK-250, or the recursive Mongoose, is able to pierce through a steel sheet with all the consequences.
Therefore, the best option would be to purchase at least a dozen more shells in reserve. "AL 2219" can sometimes be bought quite freely, even in the specialized sections of "Sporting Goods". More serious aluminum and especially carbon arrows will have to be looked for, for example, in hunting stores. With us, they most often go either under the Interloper brand, or in general, something like Arrow Carbon 20 inches. It is best to take over the Internet with delivery. Here you can choose them even by brands, given the fullness of the wallet.

Fortunately, unlike crossbows that require Russian certification, it is not provided for accessories. Moreover, arrows and creepy-looking broadhead hunting tips, until you combine them into a single whole, are not individually weapons and there are no restrictions on the implementation and forwarding(see fragment).

To be honest, I took budget arrows and other similar accessories for near-sport shooting and recreation on such a popular resource as Aliexpress (pictured below). For me, especially in the season, their consumption becomes simply unbearable - there are too many who want to join ... There they were much cheaper than their counterparts sold in domestic stores. Well, you can easily check this yourself by running through the hunting shops in your city and walking around the Web.
Alas, that opportunity is now gone...

ATTENTION! In 2016, the Russian Customs banned the shipment of bows, crossbows and ALL components to them for individuals. Therefore, all information related to their purchase on global resources is for informational purposes only! In general, I recommend to get acquainted with the article " «.
So, willy-nilly, I had to bow to domestic sellers :)). Prices, of course, are not Chinese, but generally acceptable. Especially on the arrows of the budget segment.
If you are going to use them for more or less targeted shooting, do the following manipulations:
- Roll all the arrows (leaving the feathers hanging in the air) on a tabletop or piece of glass to select the straightest ones. Carbon fiber, unlike cheap aluminum ones, let me remind you, they have better geometry initially.
- Weigh the arrows and arrowheads separately and select the ones that match as much as possible in weight.
- Check the alignment of the tip and arrow - very rarely, but the thread may be crooked. As is plumage.
- Rejected specimens, if any, leave for friends and acquaintances who, on cheerful friendly shootings, all these “sniper” STP displacements of yours will somehow be up to the lantern.
However, the best option would be to purchase. It costs about as much as one good hunting arrow in the collection.
I do not advise you to buy cheap hunting tips, and even more so to go with them to the beast. Unless it is absolutely in extreme cases, as read in the next chapter. But I recommend that you familiarize yourself with some of the materials in the "" section. There, indeed, not everything is so simple.
Arrows for hunting
Again, I suggest that you first view the article "". And estimate the size of the financial costs, based on the fact that only one hunting arrow complete with a tip will cost five to six thousand.
If we are talking about animal hunting, then the novice crossbowman has two options.
First: without further ado, purchase any arrows from overseas companies.CarbonExpress" or "Easton 20" or 22" with no higher than 400 spine, weighing about 350 grains / 22-25 grams without a tip.

Please note that in some cases the arrow will have to be assembled by hand. That is, to purchase separately the tube itself, the shank, the insert sleeve and pick up a tube of glue. Then pick up tips for them from one of the leading companies 100-150 grains (7-10 grams). To avoid illusions, I report that one of these costs 4-5 thousand rubles.

But their choice is already a completely separate conversation (see ""), everything will depend on the type, age and size of the intended prey, distances and shooting conditions, as well as the characteristics of the crossbow.
The second option, cloth-clothed, is extremely undesirable, but much cheaper. We buy budget carbon arrows 20-22 ”and do all the manipulations outlined in the previous chapter, selecting the heels of the most worthy specimens. But the main savings will be on the other. According to the method of searching for arrows from the same chapter, we look for and find tips-broadheads or mechanical "openers" of not so famous manufacturers (pictured). Here they will be many times cheaper than elite overseas ones.

Carefully - in a special target shield! – . We select those that show the best accuracy, and calm down, because we still can’t change anything else. The blades of very cheap tips, frankly, are disposable, but often replaceable. That is, your stock should be enough for several exits. Especially if there are no hits on the bone, for example, in the shoulder blade of an animal or on a feather hunting ("").
In principle, nothing prevents, "crushing the toad" and raising the bar a little, to buy "broadheads" in reserve or take more serious samples. Fortunately, the choice of hunting tips, in particular mechanical "openers", in online stores is very solid. There are quite interesting models, albeit more expensive than the bulk. But sometimes you come across simply amazing prices, especially after they are converted into foreign currency - something not even in dollars, but in cents.
Before buying, I advise you to get acquainted with some of the nuances associated with the use of this kind of components in the article "".
Necessary explanation. In articles, and in practice, I always try to find the most budget option for entertainment use, which is optimal according to the “price / quality” criterion. For serious goals and objectives, on the contrary, I recommend using only high-quality accessories and ammunition, for example, pneumatic bullets of German and Czech production. But in the case of cheap arrows and tips, an exception had to be made. The article "" presents several ways to make arrows and arrowheads from improvised materials in the "field" conditions. So, no matter how sophisticated we are, self-made ammunition will be head and shoulders below the most unassuming factory analogues from Southeast Asia in terms of characteristics.
This is where we end the story. If you have questions or new information, I will update it.
The article "" was devoted to the choice of weapons on large animals, now it's up to its use. I emphasize that this description is nothing more than a diagram of some ideal hunt for a beginner. Reality can radically differ from it, both in plus and in minus. Literally in passing, we will consider purely biological issues - you can read them in detail in any article about wild boars - we will focus on the wild pig exclusively as an object of hunting.
Who can't shoot
First, about those whom we will not shoot arrows under any circumstances.
First of all, this is a female with piglets.

Comments, it seems, are not needed. However, the widespread belief that females and piglets are not shot at all is also erroneous. And pigs in the land there is an overabundance, and piglets are defective. As a rule, hybrids with domestic pigs are culled, which happens not so rarely (pictured).

Modern domestic sow is essentially a miserable creature, something like a bodybuilder abusing steroids - an artificially created biomass on legs, due to the lack of immunity, living on injections of antibiotics. So that such a monstrously mutated genotype does not spread throughout the livestock of wild boars, selective shooting is carried out - when the piglets grow up to gastronomic conditions, but before the onset of maturity.
In any case, the huntsman will clearly prioritize before the hunt: when, whom and how much.
The second taboo option is an adult wild boar, he is also a billhook, he is also a wild boar, that is, a seasoned male with well-formed fangs - "dividers".

Weighing at times a quarter of a ton, a living tank is the northern analogue of the rhinoceros, whose poor eyesight, as you know, is absolutely not his problem. Moreover, just in time for the hunting season, the billhook begins to acquire the so-called "Kalkan" - completely impenetrable armor made of overgrown connective tissue in the neck and chest, supplemented by a solid frozen woolen tangle for winter. Kalkan, as if on purpose, covers the kill zone of the boar, and not even every bullet can take it.
Add to this the natural power of the beast: a high pain threshold, an exorbitant level of endurance and, in general, “life force”. A huge elk lies down from a wound that only enrages a boar. In ancient times, for any warrior, it was a manifestation of valor to defeat such, naturally, from a horse and a heavy spear. And at the same time stay alive.
Even now, with the exception of trophy hunting, the billhook is caught relatively rarely, and not at all because of fear of him, but because it is he who is the main producer of offspring. Mostly shaggy monsters that have already lost their minds are shot back, who are interested not so much in females as in the opportunity to once again rip open the side of a relatively young opponent. Like all higher mammals, including primates, in the boar world everything is run exclusively by powerful male warriors.
Fortunately, seasoned billhooks are extremely unsociable and visit their brethren, clustered in herds, only during the rutting season. In open spaces, they also do not like to glow, except at night. It is at this time of day that the most experienced hunters (with powerful firearms and insurer comrades, of course) take from the approach a boar fattening in the fields. An arrow with almost no stopping power would only be an additional irritant for him.
Also we will not shoot at any moving boar. But more on this below, when we begin to consider the methods of hunting.
Who will we hunt?
So, relatively young individuals, as a rule, males, remained as the main objects of crossbow hunting.
This prey is all the more attractive because the nutritional value of meat deteriorates with age, and the taste changes great. Moreover, the risk of trichinosis sharply increases - that is still disgusting, very painful and difficult to treat. Moreover, the larvae calmly withstand any heat treatment.
From a gastronomic point of view, the best option is a yearling, that is, a pig of the current year of birth and a little older.

You can see him right away - all so neat, well-groomed, still without a hump, but far from being a milk minke. With hardly distinguishable gender. They are slightly lighter in color than adults and more ankle-length. They weigh from 25 to about 40 kilograms.
The so-called gilts - wild boars aged one and a half to two years - the guys are much more solid, weigh 60-70 kilograms and look accordingly. Withers have already been outlined, real stubble appears.

At this age, it is still very easy to confuse a boar with a pig.
Over time, sexual dimorphism develops, and an adult boar is quite easy to distinguish from a female in silhouette. In a billhook, so to speak, the shoulder girdle is much more developed, and the head is much more massive.
Now attention: you just passed a kind of test. If you were touched by the above photos and warped by the text commenting on them, do not read further. And put aside the thought of hunting. There is a sea of its own specifics, far from always understandable and pleasant for outsiders. You only torture yourself and your first prey, which, most likely, will be the last.
This completes the short course of "boar science", we move on to the actual hunt. The first in our crossbow career. Most likely, it will take place either in an aviary or in the hunting grounds of the country where it is allowed. By the way, the so-called. “enclosure” is by no means a pen for deer and wild boars, but full-fledged lands, sometimes of a huge area, only with a different legal status. In them, animals are not the object of hunting, and therefore, the methods of their killing are not regulated by hunting legislation.
Current insert.
This article did not have time to come out, when the first comment appeared, in the following vein:
“The article is stupid - some additional sightings, communication with some rangers, the hunter's ethic-shmetics and other crap. We need clear and precise instructions on how a tenth grader who bought a crossbow should go into the forest and kill a wild boar.”
Especially for my critic and his fellow spirits: if it comes to that, a successful poacher is the most experienced hunter. Or a fisherman. Or both at the same time. You cannot become one by reading articles or posts on thematic forums, without starting with the basics of practice, preferably by learning from someone more knowledgeable. It's like building your life according to the precepts of the wonderful book "How to become a criminal "authority" in 10 lessons." Help for suckers."
Methods of hunting with a crossbow for a wild boar
Its main types are not available to us due to the low speed of the arrow. It is impossible to calculate the lead when shooting at the animals rushing past the shooter "on the number" when driving. Hunting with dogs is not safe, first of all, for themselves, who are able to instantly run under a leisurely projectile that seems to have been fired at a wild boar.
What remains is static ambush hunting. Mainly from a tower, a seat, a storehouse, including a mobile one - the so-called tristand.

And not only for the safety of the shooter. Over millions of years, wild boars, as well as bears, have developed an extremely useful property for hunters not to pay attention to what is happening above their heads. And really, who dares to jump from a branch on their scruff? Is that Rambo from the "first blood".
Hence the first rule of preparation for crossbow hunting: do not get carried away with shooting at classic paper archery targets, devote more time to voluminous ones. And get acquainted with the information presented in the article "".
3D targets allow you to fully simulate shooting at real animals at different angles, both horizontally and vertically. And it is quite different from a shot “on paper”.
Ideally, preparation for the hunt should look like this.
It looks something like this:

You will notice how the aiming corrections will change compared to the horizontal shooting you are used to. Therefore, it is highly desirable to arrange training and entertainment shootings not only on the lawn, but also, say, from the balcony of the country attic (which is unsafe) or in an abandoned quarry.
Consider yourself ready to hunt only when 90 percent of the arrows fired from the tower at different distances will fall into the kill zone of the target. The huntsman or the worker of the open-air cage hunting ground will also carefully observe your actions and will definitely draw conclusions for himself. For example, about how likely it will be for you to get a wounded animal - of course, not free. And even about whether it is worth allowing you to hunt at all, even though you paid for it.
You have to spend a lot of money one way or another. The cost of aviary hunting or a commercial permit (which is basically the same thing) for a wild boar amounts to tens of thousands of rubles. So don't skimp on accessories.
Selection of arrows, arrowheads and hunting accessories
Tips. Don't be fooled by cheap 'tin broadheads' like the OZ, go for well-known manufacturers. For example, "New Archery" or "G5 Outdoor" (pictured "G5 Striker Magnum").

But here, too, be careful. In the lower picture on the left is the original "G5 Montec CS", on the right is a one-time Asian "copy" under the same name

This is by no means a neglect of oriental goods, it's just that miracles do not happen, and the difference in price by an order of magnitude did not arise by chance. For that matter, you know perfectly well WHERE most of the complex technical products are now produced, regardless of the brand name, and China has now become a leading steelmaking power. We are talking about "nameless" products of equally faceless enterprises or, even worse, about undisguised counterfeit. The best cure for following the principle of "cheap and cheerful" will be the purchase of a normal tip and a consumer product, followed by an objective comparison in practice. After all, we are not used to learning from the mistakes of others.
Extremely undesirable, but having the right to exist, the budget option is also possible. Below in the text is a link to an article on the choice of arrows. In it, it is considered in sufficient detail.
For hunting large boars, you can use 2-blade tips, with which the guarantee of breaking through will be somewhat higher, although blood loss from a non-penetrating wound, on the contrary, is lower due to the reduced area of tissue damage.

Tips with blades that open upon contact with the body are preferable to use on other, not so “thick-skinned”, ungulates, such as roe deer or other deer (see ““). Maybe a piglet of the year.

The approach to choosing arrows is similar: only time-tested well-known models from leading manufacturers. As a rule, these are Easton and Carbon Express products. For example, "EASTON BloodLine carbon" is 20″ or 22″, with a mass of 10.5 grains per inch. Complete with a 100 or 125 grain high quality tip, this will be a very fast and accurate projectile.


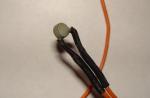
Some craftsmen make them themselves, using chemiluminescent components or LEDs.
More about their application - below, when we go directly to the hunt.
Remember that zeroing should be carried out with the same arrows and tips with which you will hunt.
Rangefinder. Either a professional military man or a surveyor can do without it. For a slow crossbow arrow, not even every ten, but every five meters of distance matters. But this property also gives us an unexpected plus: since we are talking about short distances and far from extreme hunting conditions, relatively cheap models are quite enough - there are such even in the region of 10 thousand rubles (pictured below).

For reference: a professional (and there are no others) 50-meter measuring tape will also cost a pretty penny.
Fortunately, most full-size hunting crossbows are already factory equipped with optical sights with original reticle. According to their characteristics, they are quite suitable for our purposes. In a different situation, be guided by the tips for choosing a sight from the article "".
But you may need not just optics, but night sight. As a rule, wild boars come out for feeding already at dusk, and even at night. With the exception of farms where hunting is relatively rare and the animals are not frightened. And here the crossbow is a significant gain, not only in comparison with the bow, where you can’t stick the “night light”, but also with the firearm.
The fact is that due to the practically absent recoil on a crossbow, you can use 1st generation night vision devices that do not hold a shot from a carbine, and even more so from a gun. Such devices cost several times less than devices of generation 2 and 2+, and they differ from the 3rd in general by an order of magnitude. These are, in particular, the sights of the Vologda Optical and Mechanical Association (VOMZ), produced under the PNS brand (PNS 2.5x50 in the photo). Brackets to them can be selected for any type of fastening.

The Vologda residents also have night vision devices of the conditional generation “1+” with a ceramic bulb (“PNS 3 × 50”). They are literally several thousand more expensive, but they are already resistant to serious recoil and work confidently at distances of 100 meters or more.
There is one nuance in the use of "nightlights". They are intended mainly for direct shot distances from firearms (for rifles up to 150-200 meters) - the night is still in the yard. That is, there is no time and no reason to work especially with the introduction of amendments. Therefore, the reticle is simplified - “cross” or “peak”. Crossbows do not have a "direct shot" as such. This means that you will either have to choose a sight with a cross-shaped “mildot” reticle (VOMZ also has such), or shoot from a tower during the day, say, at 40 meters, and then wait until the boar approaches any landmark located at this distance at night.
Although it is quite possible to shoot at least a couple of distances using a simple “duplex” cross:

Concerning hunting with underbarrel lantern, then it differs little from the rifle. Is it even more difficult, again due to the peculiarities of the flight path of slow crossbow arrows. Too little time to aim from the flash to the scattering of "targets" in different directions. Therefore, it is not entirely correct to recommend it to a beginner. This is where regular exercise can help.
So, we have almost completed all the preparatory activities. It's time to finally move on to the hunt itself.
Aim and Shoot: Boar Hunting Secrets
In the evening, the huntsman takes you to the tower / storehouse, where you will immediately agree on a connection. Now all that remains is, having laid out everything you need at hand and loading the crossbow, sit and wait. At the same time, do not make noise, do not drink, do not smoke, do not peel the seeds. And so many hours - the herd may well show up in the morning.

Finally, piglets will begin to appear on the feeding ground first (they still don’t really know how to be afraid), then their older relatives. After some time, a relatively young billhook may also come up, who will almost certainly disperse all the small things in order to dine alone. It all depends on the settings given to you by the huntsman - who to shoot. Depending on this, you will select a target and track - already through the sight - all its movements. When the boar is in the most favorable position for shooting (preferably in profile), at a well-defined distance, carefully aim and pull the trigger.
How and where to aim.
The targeting itself goes something like this:
in the photo - a distance of 20 meters ...

... and now - 30 meters.

The extraction of the beast occurs due to the cutting of the vessels with the blades of the tip, which causes rapid blood loss.
With blood comes life. I have a suspicion that the animal often does not even understand what is happening to him, but simply runs off to the side and, feeling suddenly surging drowsiness, lies down to rest.
This is if you do not frighten him, jumping out of hiding with a triumphant cry. Then the beast "on adrenaline" is able to get away from the hunter for hundreds of meters, often with ends.
We are not talking about a sniper shot in the artery. In addition to the heart and liver, which are very difficult to hit with an arrow launcher, the main target is the lungs (in the figure - in blue). The organ is quite solid, paired, that is, located on both sides of the body, moreover, it is densely permeated with a network of blood vessels.

Do not rely on pictures with kill zones for firearms. In most cases, even a successful shot from a crossbow "in place" - in the head, neck or spine - will not do much except for the torment of the animal. Yes, an arrow is able to crush even large bones, but it still does not cause such destruction as a bullet, and a wild boar, as already mentioned, is a specific animal.
After the shot
Now about what will happen at the time of the shot and after it.
During daylight hours, everything is much simpler, so let's consider a more complex nighttime option.
Great if you followed the advice and purchased tracer shanks. Even during the day, they will help to better track the trajectory of the flight of an arrow, even more so at night.

This will instantly determine the quality of shooting. Here the flying light entered the side of the animal, approximately where you were aiming, then disappeared for a moment and lit up again, frozen in immobility. This means that the arrow pierced the beast right through and stuck into the ground. When hit “in place”, this guarantees an excellent result, with such a wound the beast will not go far. Yes, and finding an arrow will be much easier.
Now is the time to contact the huntsman - until he approaches you will remain on the tower. Then briefly tell him what you saw, especially if the animal did not lie down on the spot or within the site, but went into the thickets. The behavior of the prey will testify to a successful hit: a wild boar spinning in place, falling to its side or falling to its knees, if it leaves later, it is clearly not far away.
Now you should examine the "accident scene" with a powerful flashlight. First of all, you are interested in blood and traces.
The abundance of spots and color, torn pieces of the heart or liver, the presence of air bubbles in the blood remaining on the arrow indicate an accurate shot. In principle, the beast has already “reached” somewhere nearby, and it is easy to find it even at night.

The complete absence of spots and the straight run of the animal is most likely a miss. He is annoying, but not terrible, it happens to everyone.
The worst option is a wounded animal: there is blood, but not enough, a broken arrow is lying nearby, obviously not gone right through, clear traces lead in a straight line into the forest. This means that the mandatory search and selection of a wounded animal will follow. But already in the morning and, as a rule, with dogs. It is not always possible to find it, and this is almost the main "jamb" for any hunter, which you will remember all your life.
Of course, there are still a lot of nuances of crossbow hunting for a wild boar, which there is simply no way to talk about in one article. And it’s not in vain that they say that it’s better to see once than hear a hundred times ... or read. Here is a fairly recent video of such a hunt (season 2015-2016) from.