User guide
Standard alarm functions
- Two three-button programmable radio transmitters (4 transmitters can be programmed)
- 6 channel receiver
- New dynamic code with Super Keeloq anti-intercept and new anti-scan technology X 2 -CODE
- Advanced Anti-HiJack mode with active engine shutdown
- 2-zone shock sensor with warning mode
- Connector for connecting an additional 2-zone sensor
- Multi tone siren
- LED indicator with 12 modes
- Starter lock by normally open relay
- Possibility to connect two additional engine interlock circuits
- Built-in electric relay systems for remote control of door locks
- Built-in electric relay for control of right/left direction indicators
- Programmable 1- or 2-digit personal system shutdown code
- Service mode "Valet" / Remote mode Valet / Warning about the enabled mode "Valet"
- Remote Panic Mode
- Dynamic Disable Alarm
- Auxiliary channel 2 output (for controlling the trunk lock or additional devices)
- Auxiliary channel 3 output (for controlling additional devices)
- Output for turning on the "polite illumination" of the passenger compartment (an additional electric relay is required)
- Ability to control the closing of car windows
- Possibility to connect an additional pager
- Possibility to initially unlock only the driver's door (2-stage unlocking function)
- Ability to implement the function of "central locking"
- Silent arming and disarming of the system
- Arming with separate deactivation of sensor zones
- Possibility of arming without the help of a transmitter
- Possibility to disarm the system in 2 stages
- Possibility of arming with "silent" operation mode
- Possibility of manual or automatic inclusion of the "Turbo" mode
- Transmitter Low Battery Warning
- Intrusion warning / Memory for last 2 alarms
- Bypassing and indicating a faulty trigger when arming
- Protection of doors, hood and trunk and car ignition circuit
- Vehicle search function
Programmable System Functions
- Programmable automatic arming with or without door locking
- Programmable automatic door locking when the ignition is switched on
- Programmable automatic door unlocking when the ignition is turned off
- Programmable automatic re-arming with or without door locking
- Programmable long-term shutdown of siren signals
- Programmable immobilizer mode
- Programmable anti-false alarm function
- Programming the emergency shutdown of the system using the Valet button or by entering a personal code
- Programmable system disarming in 2 steps
- Programmable automatic disarming of the system with remote unlocking of the trunk lock
- Programmable activation of the Anti-HiJack mode using the transmitter, when the ignition is turned on and when the car door is opened
- Active and safe engine shutdown in Anti-HiJack mode
- Programmable ability to arm the system with the engine running
- Siren warning signals when the door is open
- Selectable pulse duration for door locking and Comfort mode control
- Programmable additional channel output type 2 systems: trunk release, impulse, constant, timer: 30 seconds, 1 minute, 3 minutes
- Programmable additional channel output type 3 systems: pulse, constant, timer: 30 seconds, 1 minute, 3 minutes
- Possibility of reprogramming the functions of individual outputs and inputs of the system
ARMING WITH A RADIO KEY FOB
SILENT ARMING
SILENT ARMING
ARMING WITH SEPARATE DISABLED SENSOR ZONES
Disabling the main sensor zone will be automatically canceled when the system is triggered by opening the door, hood or trunk. Disabling the warning zone will also be canceled when the main zone of one of the sensors is triggered.
AUTOMATIC (PASSIVE) ARMING
Attention! This function is programmable (function number 1) and can be disabled at the request of the owner. You can also program the system so that when it is automatically armed, the system will also lock the vehicle doors.
- Switch off the ignition, exit the vehicle and close all doors, hood and trunk.
- Opening any door, hood or trunk during the 30 second pre-arming countdown will immediately stop the countdown and the LED will turn off. As soon as all doors, hood and trunk are closed again, the 30 second countdown will start again and the LED will flash rapidly again. At the end of the 30 second countdown, the following will happen.
- The engine will be blocked.
Note:
- If function No. 1 is programmed as necessary, the car doors will be locked (if electric locks are installed).
- If this function is enabled, the system will also automatically close the car windows.
IMMOBILIZER MODE
If you do not want to use the automatic arming function after turning off the ignition and closing all doors, you can use the immobilizer programmable mode (function no. 7). In this case, 60 seconds after the ignition is turned off, the system will only automatically turn on the engine block, and will not be further triggered by opening doors, hood or trunk, from a shock sensor or an additional sensor.
You can also use this programmable function in addition to the automatic arming function, but in this case, the immobilizer mode will be activated only when the automatic arming function cannot be started for one reason or another (for example, if one of the doors is left open).
ARMING WITHOUT THE HELP OF A TRANSMITTER.
If the passive arming function (function #1) is disabled, you can arm the system without using the transmitter. This may be necessary if, for example, the transmitter is lost, defective, or if the transmitter batteries are dead and you are not using the system's passive arming function.
Attention! This function is not automatic, so after disarming the system, you will need to use this function again to arm the system without the help of a transmitter.
To arm the system without the aid of a transmitter:
- Open the door, then turn the ignition on and off.
- Within 10 seconds, press and hold the Valet pushbutton for 3 seconds.
- The system siren will give 1 short beep to confirm that this feature is enabled.
- Remove the key from the ignition, exit the vehicle and close the hood, trunk and all doors of the vehicle.
- As soon as the last door is closed, the LED will blink rapidly to indicate that the 30 second countdown has begun before auto-arming.
Note: If during the 30-second countdown before arming any of the doors, hood or trunk are opened, or if the ignition is turned on, this automatic function will immediately stop and the system LED will turn off. As soon as the ignition is turned off again and all doors, hood and trunk are closed again, the LED will flash rapidly again, indicating that the 30-second countdown before arming the system has restarted. You can also temporarily stop the pre-arming countdown by quickly turning the ignition on and off twice (the siren will sound a confirmation signal). However, after turning off the ignition again and closing the hood, trunk and all doors of the car, the countdown before arming will start again.
This function is canceled only when the system is armed.
- 30 seconds after the last door was closed, the following will happen:
- The system LED will flash slowly.
- The engine will be blocked.
- The direction indicators will flash 1 time.
- The siren will sound 1 beep (if function #5 is enabled).
- The doors will lock (if electric locks are installed).
SECURITY OF A CAR WITH A WORKING ENGINE
If programmable function No. 15 is enabled, this system will allow the car to be armed even when the ignition is on and the engine is running. For this:
To disable the armed mode with the engine running, press and release the transmitter button. The siren will sound 2 times, the direction indicators will flash 2 times and the system LED will turn off.
TURBO MODE
After active driving of a vehicle with a turbocharged engine, before shutting down the engine and arming the system, it is usually recommended to cool the turbine by letting the engine idle for a few minutes. The "Turbo" mode allows you to arm the system without waiting for the turbine to cool down.
1. Manual inclusion of the "Turbo" mode
Attention! To implement this function, the function of arming the system with the engine running (function No. 15) must be enabled, the necessary connections must be made and the output of the additional channel 3 of the system must be programmed accordingly (function No. 22).
2. Automatic inclusion of the "Turbo" mode
Attention! To implement this function, the function of arming the system with the engine running (function No. 15) must be enabled, the necessary connections have been made and function No. 18 has been programmed accordingly. In this case, the output of additional channel 3 of the system will no longer be controlled by a transmitter, and will be automatically programmed as a timer for 3 minutes.
CAR PROTECTION WHEN ARMED
- When the outer zone of the shock sensor is triggered (caused by a slight push or hit on the glass or car body), the warning mode will turn on and the siren will give 5 short beeps.
- Any strong impact or impact on the glass or body of the vehicle will immediately trigger a full 30 second alarm cycle.
- Opening any door, hood or trunk, or turning on the ignition, will cause the siren to sound immediately. The siren will sound for 30 seconds, then turn off and the system will re-arm. If the hijacker left the door, hood or trunk open, or left the ignition on, the siren will sound for 6 cycles of 30 seconds (unless you disable the alarm mode using the transmitter earlier) and then arm, bypassing only the circuit that caused actuation.
- When the system is activated, the direction indicators will flash for 30 seconds to draw visual attention to the vehicle.
- If this function is enabled, when the alarm is triggered, the interior lighting will flash during the entire 30-second alarm mode cycle.
Note: If you have armed the system with the "silent" system activation mode, then when the system is triggered, only the direction indicators (and interior lighting, if this function is enabled) will flash and a signal will immediately be transmitted to an additional pager (if this function is enabled) . The system siren will not work in alarm mode.
- When armed, the starter interlock and an additional engine blocking circuit (if an additional electric relay is installed and this function is programmed) are enabled, preventing unauthorized starting of the engine.
- The bright LED flashes slowly when armed. This is a visual warning to a potential hijacker. The current consumed by the LED indicator is very small and practically does not drain the battery even over a long period of time. After the system has been triggered, the LED will flash with a series of flashes after a pause, indicating in turn the last two zones that triggered the system (or one zone if the system was triggered by only one zone).
DYNAMIC ALARM OFF
DISARMING THE SYSTEM
SILENT DISARMING
DISARMING THE SYSTEM IN 2 STAGES
For more security, you can use the 2-Step Disarm function (Programmable Function No. 10).
If function no. 10 is enabled, when disarming the system using the transmitter, the car engine will remain blocked, although all other security functions of the system will be disabled. To disable the interlocks and start the engine, it will be necessary, after disarming the system, to additionally enter a personal code for disabling the system. This feature can be very useful if the thieves stole the key fob transmitter and car keys.
AUTO REARMING
- If the automatic re-arming function (function no. 4) is enabled, after disarming the system using the transmitter:
- The system LED will flash rapidly to indicate the start of the 30 second countdown before auto-rearming.
- Opening any of the car's doors will cancel the countdown. However, if the programmable passive arming feature is enabled, after all doors, hood and trunk are closed again, a 30-second countdown will begin before passive arming.
- If the door, hood or trunk of the car was not opened, then 30 seconds after disarming the system, the system will re-arm and:
- The system LED will flash slowly.
- The engine will be blocked.
- The siren will sound 1 beep (if function #5 is enabled).
- The direction indicators will flash once.
Note: If, after the confirmation signals of arming, the siren gives 3 more signals and the direction indicators flash 3 times, this means that the input of the main zone of the shock sensor or the additional sensor is active or faulty.
- If function No. 4 is programmed in the necessary way and electric drives of locks are installed, the car doors will be locked.
QUICK DISABLE PASSIVE ARMING / PASSIVE ENGINE LOCK
If the passive arming function (function No. 1) and/or the passive engine blocking function (function No. 7) is enabled, but you want to temporarily disable it (when refueling the car, etc.), use the following simple and convenient function:
- Turn off the ignition, but do not open the car door.
- Within 5 seconds, quickly turn the ignition on and off 2 times.
- You will hear 1 long chirp to confirm that the passive arming/passive engine immobilization feature has been disabled until the next ignition is turned off or the system is armed with the transmitter again.
INTRUSION WARNING SIGNALS
The system will inform you if there were attempts to break into the car during your absence. If the system worked, then when disarming, the siren will give 4 beeps and the direction indicators will flash 4 times. In this case, the LED will flash a certain number of times after a pause until the ignition is turned on, alternately showing the zones or triggers that caused the last 2 system trips. Sit in the vehicle and count the number of LED flashes.
Note: If the main zone of one of the system's sensors or the hood/trunk trigger caused 3 activations of the system and this zone was disabled by the system's protection against false alarms, then when the system is disarmed, the siren will sound 5 signals and the direction indicators will flash 4 times.
- If the LED flashes 1 time after a pause, etc., then the trip was caused by the shock sensor (ZONE 1).
- If the LED flashes 2 times after a pause, etc., then the operation was caused by an attempt to open the hood or trunk (ZONE 2).
- If the LED flashes 3 times with a pause, then the trip was caused by an attempt to open the car door (ZONE 3) or by turning off and on the power of the system.
- If the LED flashes 4 times with a pause, then the trip was caused by an attempt to turn on the ignition (ZONE 4).
- If the LED flashes 5 times with a pause, the trip has been caused by an additional sensor connected to the system (ZONE 5).
- If the LED blinks 15 times with a pause, then the trip was caused by a power cycle of the system.
Note: The activation of the warning zone of the shock sensor is not indicated by the LED.
Information about the zones that caused the last 2 trips is stored in the system memory and is erased at the moment the ignition is turned on or when the system is armed using a transmitter.
VALET MODE
The Valet pushbutton switch will allow you to turn on the "Valet" service mode (i.e. temporarily disable all security functions of the system), if, for example, you need to leave the car at a service station. At the same time, the possibility of remote control of the "Panic" mode and door locks remains.
- Get into the car and turn on the ignition (the system must be disarmed).
- Within 10 seconds, press and hold the Valet push button switch for 3 seconds.
- The siren will give 1 short signal.
- The system LED will turn solid, indicating that the system is in Valet mode.
Note:
- Turn on the ignition.
- Press and release the Valet push button switch once.
- The siren will give 2 short beeps.
- The system LED will turn off, indicating that Valet mode is disabled.
Note: Don't forget to turn off Valet mode when you no longer need it. This guarantees the constant protection of the car.
REMOTE VALET MODE
This system allows you to turn on the Valet service mode (temporary disabling of the security functions of the system) remotely using a transmitter. However, enabling the Valet mode remotely is possible only when the security mode is off and the Anti-HiJack mode is disabled.
To enable Valet service mode:
Note: When the system is in Valet mode, each time the ignition is turned off, the siren will give 2 short warning beeps.
To turn off Valet service mode:
You can also disable Remote Valet Mode using the Valet Button Switch (see Valet Mode section above).
DISCONNECTING THE SYSTEM USING THE VALET SWITCH
This system can be disarmed without using a transmitter (emergency shutdown procedure). This is necessary if, for example, the transmitter is lost, defective, or if the transmitter batteries are exhausted. In addition, the system emergency shutdown procedure is used to disable the Anti-HiJack mode.
To disable the system using the Valet switch:
- Turn on the ignition.
- Within 15 seconds, press and release the Valet push button switch.
- The alarm mode will turn off.
- The system LED will turn off.
Note: You can use the above procedure only if programmable function No. 9 is enabled. If function no. 9 is disabled, then the system shutdown must be done by entering a personal code (see the "Personal system shutdown code" section below.)
Attention! Note that this will not put the system in Valet mode. This means that if the passive arming feature is enabled, the next time the ignition is turned off and all doors, hood and trunk of the vehicle are closed, a 30 second countdown will begin before passive arming.
DISCONNECTING THE SYSTEM USING YOUR PERSONAL CODE
If programmable function No. 9 is programmed accordingly, disarming without the help of a transmitter, as well as disabling the Anti-HiJack mode, will only be possible using your programmed personal code. To program your personal system shutdown code, see the "Programming your personal system shutdown code" section of this manual.
To disable the system using a personal code:
- Open the car door with the key.
- The system will immediately work, the siren will turn on, the parking lights and interior lighting will start flashing (if this function is enabled).
- Switch the ignition on, off and on again.
- Within 15 seconds, press and release the Valet button switch a number of times equal to the first digit of your personal code (from 1 to 9), then turn the ignition off and on again.
Note: If your personal code consists of only one digit, skip step 4.
- Within 15 seconds, press and release the Valet button switch a number of times equal to the second digit of your personal code (from 1 to 9), then turn the ignition off and on again.
- If the correct code has been entered, then the alarm mode (siren, side lights and interior lighting) will turn off.
- The system LED will turn off.
- The system will disarm and the engine will be unlocked.
Note: If the armed mode does not disarm after entering your personal code, the 15-second time interval may have been exceeded or an incorrect code has been entered. In this case, switch off the ignition and enter your personal system deactivation code again.
Attention! If the wrong code was entered 3 times in a row, the system will stop responding to further attempts to enter the code for a while to exclude the possibility of selecting the system shutdown code.
PROGRAMMING A PERSONAL SYSTEM SHUT OFF CODE
Programming your personal system shutdown code is done as follows:
WARNING: MANDATORY write down or memorize well your new personal code!!!
Please also note that if feature #9 is programmed as "Code", your personal code will also be required to disable the Anti-HiJack mode (see below) and to enter the system's feature and transmitter programming mode.
AUTOMATIC DOOR LOCKING WHEN IGNITION ON / AUTOMATIC DOOR UNLOCKING WHEN IGNITION OFF
If programmable functions #2 and #3 are enabled:
- The system will automatically lock the car doors 3 seconds after the ignition is turned on, if at that moment all the car doors are closed;
- The system will automatically unlock the car doors immediately after the ignition is turned off, if all the car doors are closed at that moment.
"CENTRAL LOCK" FUNCTION
If the necessary connections have been made and the appropriate functions have been programmed, the system will also be able to perform the functions of a central lock when the system is disarmed.
- When manually locking the driver's door, all other doors will also automatically lock;
- If the driver's door is manually unlocked, all other doors will also automatically unlock.
FALSE ALARM PROTECTION FUNCTION
In order to avoid, as far as possible, possible frequent false alarms of the system caused by a faulty limit switch, thunder, etc. This system uses an advanced anti-false alarm function (Function No. 8), which works as follows.
- If the system is triggered 3 times within 60 minutes from the main zone of one of the system's sensors or from the hood/trunk trigger (which are the most common cause of false alarms), that sensor or trigger will be disabled for 60 minutes. This will prevent possible subsequent false positives of the system.
- A system-disabled sensor or trigger will recover before 60 minutes has elapsed:
- when the system is triggered by any other trigger or sensor;
- when the system is disarmed and the ignition is turned on.
- when disarming the system and then arming it using the transmitter.
Attention! The operation of this function does not apply to door limit switch triggers and, therefore, the number of activations of this protection zone cannot be limited. This function also does not apply to the warning zone.
- If one of the system sensors or the hood/trunk trigger caused 3 or more activations of the system and was temporarily disabled by the anti-false alarm function, when the system is disarmed, the siren will sound 5 warning signals and the direction indicators will turn on 4 times.
Note: This function is programmable (function No. 8) and can be disabled at the request of the system owner. In this case, the number of possible system activations from any security zone will not be limited.
REMOTE PANIC MODE
Remote mode "Panic" is activated by pressing the button and the button of the key fob-transmitter with the ignition off, when the system is armed or disarmed:
Remote Panic can also be enabled while the system is in Valet mode. In this case, after the end of the "Panic" mode, the system will again switch to the "Valet" mode.
REMOTE ANTI-HI JACK
This system allows you to activate the Anti-HiJack (anti-robbery function) using the transmitter if the corresponding programmable function (function No. 12) is enabled.
Remote activation of the Anti-HiJack mode using the transmitter is carried out by simultaneously pressing and holding the transmitter button for 3 seconds with the ignition on. The activation of the Anti-HiJack mode will be confirmed by a short signal of the siren and the inclusion of the LED Yes of the system for 5 seconds. After that, the Anti-HiJack mode will work as follows:
Stage 1: 50 seconds*** after turning on the Anti-HiJack function, the siren will sound for 10 seconds.
Note: Note that the Anti-HiJack timer counts down to stage 2 only when the ignition is on. If at any time before the start of stage 2 the ignition was turned off, the timing of the corresponding stage will pause (the system can even be armed), but will immediately resume as soon as the ignition is turned back on.
Stage 2: 60 seconds after turning on the Anti-HiJack function, the siren will sound and the vehicle's direction indicators will flash. If the vehicle's ignition is switched off during this time, the system will immediately engage the starter interlock and additional engine interlock circuits (if additional electrical relays are installed).
Stage 3: 30 seconds after the siren is turned on (i.e. 90 seconds after the activation of the Anti-HiJack function), the starter and additional engine blocking circuits will be disabled. Siren and direction indicators will continue to work regardless of the position of the ignition key, and the engine will remain blocked until the vehicle battery is completely discharged
Thus, this algorithm allows you to enable the Anti-HiJack mode in advance, for example, immediately before parking the car. After that, you can turn off the ignition and arm the system. In this case, if you are attacked and your car keys and key fob transmitter of the system are taken away from you, the Anti-HiJack mode timer will begin immediately after the system is disarmed and the ignition is turned on. It will no longer be possible to disable this mode using the remote transmitter of the system.
Note: If the function of active and safe engine shutdown in Anti-HiJack mode (function No. 14) is enabled and if an additional electric ignition circuit blocking relay is installed, then at the 2nd stage of the Anti-HiJack mode operation (from the moment the siren and direction indicators turn on), the engine will gradually forced shutdown: for 30 seconds, the vehicle's ignition circuit will be intermittently interrupted by short progressive pauses, thereby causing the vehicle to slow down to a safe level, after which the ignition circuit and the vehicle's starter circuit will be blocked.
Disabling Anti-HiJack Mode:
Once the Anti-HiJack mode has been enabled, it can no longer be disabled with the transmitter, although you can still arm the system with the transmitter when the ignition is off. The way to disable the Anti-HiJack mode enabled by the transmitter depends on the status of programmable function No. 9.
Among the variety of different burglar alarms that exist today, the Panther system is especially popular. This is largely due not only to the high reliability of this system, but also, to a large extent, the ease of installation on various car models, as well as the availability of detailed recommendations explaining how to connect the panther alarm.
But for the siren, the best place is precisely in the engine compartment - in a place well protected from third-party access. The main thing is that it should not be close to moving and very hot engine elements. To prevent the accumulation of moisture in this unit, its socket should be directed downwards. Mount the siren with a bracket and a few screws. 
The set of the Panther system necessarily includes a limit switch, with the help of which the protection of the car hood is ensured. This switch should be installed on a metal surface connected to the common "mass" where moisture does not accumulate, for example, on the side surface of the wings in the area of the hood (trunk). When properly installed, the limit switch should have at least 6 mm of travel when closing the hood (and also the trunk, if a second, similar switch is installed).
A red LED signaling the state of the security system is placed on the dashboard in a place that is clearly visible from the outside of the car and, at the same time, the indicator should not distract the driver. Before you start drilling a hole for it, you must first make sure that there are no wires and other elements on the reverse side.
Determination of a place for the Valet switch requires special imagination, since, on the one hand, it should be easily accessible, and on the other hand, an attacker should not quickly find it and turn off the alarm.
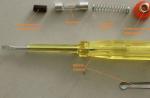
For the shock sensor, the most convenient place is a hard surface between the engine compartment and the passenger compartment (from the passenger compartment). Sometimes it is attached with constrictions under the dashboard or on the steering column. In any case, the sensor must have good access to make adjustments.
The standard panther car alarm connection scheme provides for the following distribution (in accordance with color marking) and connection of the main wires:
- The white wire, which ensures the side lights flash when the system is triggered, as well as at the time of arming and disarming, is connected to the side lights circuit (if the circuit is of negative polarity, then through an additional relay);
- The red wire, designed to power the system through a + 12V fuse, is connected to the positive terminal of the battery ";
- White / red wire + 12V power supply of the central unit - through a fuse it is connected to the red wire;
- White / black siren output wire - through a rubber bushing, it is laid to the siren installation site;
- The dark blue wire used to remotely open the trunk is connected to terminal 85 of the additional relay. Please note that connecting this wire directly to the lock circuits is strictly prohibited;
- Green / white wire that controls the interior lighting when the "Panic" mode is triggered, as well as at the time of disarming - the wire is connected to terminal 86 of the additional relay ";
- Black wire "weight" - connects to the negative terminal of the battery;
- The dark / green wire (-) of the hood (trunk) trigger, when shorted to ground, the system is instantly triggered, is extended to the hood (trunk) limit switches;
- Purple wire (+) of the door trigger - regardless of the number of doors, it is connected to only one limit switch;
- Purple wire (-) of the door trigger - as in the previous case, goes to the door switch;
- The yellow wire for monitoring the presence of power at the ignition switch is connected to the wire of the ignition switch, on which, when the key is turned, + 12V appears;
- Orange Starter Interlock Wire - Connects to terminal #86 of the auxiliary relay. At the same time, terminal # 85 is connected to the wire of the ignition switch, on which, at the time of starting the engine, a constant voltage of + 12V is created.

When installing the antenna wire, it is pulled out to its full length and installed in a place where it is difficult to damage it during the operation of the car.
Our instruction turned out to be quite universal, so it fits almost all modifications of pantera signaling devices. Below is a list of models that our guide will fit.
- Pantera SLK-250SC
- Pantera SLK-450SC
- Pantera SLK-400SC
- Pantera SLK-300SC
- Pantera SLK-675RS
- Pantera SLK-650RS
- Pantera CLK-350
- Pantera SLK-35 SC ver. 3
- Pantera XS-330
- Pantera SLR-5750
- Pantera SLR-5755
- Pantera QX-240
- Pantera QX-250
- Pantera QX-270
- Pantera QX-290
- Pantera XS-2000
- Pantera XS-2500
- Pantera XS-2600
- Pantera XS-3100
- Pantera SLK-868RS
- Pantera LX-320
- Pantera SLR-5625 BG
- Pantera SLR-5625RC
- Pantera CLK-650
- Pantera SLK-600RS
- Pantera CLC-200
- Pantera QX-250
- Pantera SLK-400SC
- Pantera SLK-350SC
- Pantera SLK-600 RS
- Pantera SLK-300SC
- Pantera CLC-180
- Pantera SLK-625RS
- Pantera SLR-5650
- Pantera CLK-375>
- Pantera CLK-455
- Pantera CLK-355
- Pantera CLK-500
- Pantera CLK-600
- Pantera XS-200
- Pantera XS-110
- Pantera XS-1500
- Pantera XS-1000
- Pantera SLK-7i
- Pantera SLK-5i
- Pantera SLK-3i
- Pantera SLK-2i
- Pantera SLK-85
- Pantera SLK-755 RS
- Pantera SLK-75
- Pantera SLK-25 SC ver. 3
- Pantera SLK-200SC
- Pantera SLK-20SC ver. 3
- Pantera SLK-500RS
- Pantera SLK-100SC
Security alarms manufactured under the Panther brand are well known to many motorists for their reliability, ease of operation and installation, as well as affordable prices.
One of the most interesting options in the line of security systems are the Pantera CL 500, CL 600, CL 700 models. With similar functionality and approximately the same price, these alarms provide effective protection for the car from hacking, unauthorized start-up and vandal actions.
Features Pantera CL 500
ATTENTION! Found a completely simple way to reduce fuel consumption! Don't believe? An auto mechanic with 15 years of experience also did not believe until he tried it. And now he saves 35,000 rubles a year on gasoline!
Pantera CL 500 is a budgetary one-way alarm equipped with sensors for opening doors, hood and trunk. It also has protection against starting the engine and is equipped with a sound warning system - a siren for concealed installation. The kit includes 2 key fobs equipped with 3 buttons and an LED indicator. The advantages of the system include:
- Dynamic protection of the code from interception, system - Super Keeloq, protection from scanning;
- Shock sensor - 2-zone;
- Arming with the engine on, off;
- The presence of the "Panic" mode;
- Switching on, off protection without noise;
- Possibility to connect an additional pager;
- The presence of the function of programming commands.
The functionality provides for the possibility of connecting additional engine blocking circuits, a central locking system and many other options. The key fob works effectively at distances up to 30 m.
Features Pantera CL 600
The Pantera CL 600 alarm system is a universal device that provides door and engine blocking. Ease of execution, guarantees trouble-free operation, the absence of additional functionality affects the affordable price. The system has the following features and benefits:

It is possible to connect a wide range of additional devices and operating modes if you want to optimize the system. A simple connection diagram makes it possible to quickly install an alarm on any car. All additional options are described in the instructions from the manufacturer attached to the alarm.
Features Pantera CL 700
Pantera CL 700 is one of the most advanced alarm models in this line. Initially, it comes in a fairly modest configuration, equipped with 2 control panels. It has a functionality that includes all the advantages and features of the models described above.
The key fob is equipped with 4 buttons, has an ergonomic shape, the ability to memorize commands and program modes.
An optional possibility of connecting an immobilizer, systems for determining coordinates using GSM channels and GPS navigation is provided. Reviews characterize this system as one of the most advanced and reliable in its price segment.