The ignition of the fuel mixture in the cylinders of an internal combustion engine must occur at a strictly defined moment. An incorrectly set ignition in a VAZ 2106 car is fraught with serious troubles. The car engine starts not working properly. It is quite possible to adjust the ignition on your own, without the help of qualified specialists. Below in the article we will analyze how to adjust the ignition on a VAZ 2106 car and what is needed for this.
Ignition 2106, how ignition affects engine performance and fuel consumption
As mentioned earlier, if the ignition is incorrectly adjusted, the engine of the VAZ 2106 car starts to work incorrectly. The thing is that if the ignition adjustment is violated, the ignition of the fuel mixture occurs either too early, or vice versa, too late.
These malfunctions in the ignition system are called:
- early ignition.
- Late ignition.
Problems that arise when the ignition is set incorrectly on a VAZ 2106 car:
- Decreased vehicle performance. It does not matter which ignition is earlier or later;
- There is increased wear of engine parts;
- The engine gets very hot;
- Fuel consumption increases. To develop the necessary speed, the engine consumes more fuel.
The ignition of the fuel mixture with normally adjusted ignition occurs at the moment when the piston is directly at top dead center (TDC). It is at this moment, when the mixture is ignited, that the engine provides the maximum coefficient of performance (COP).
Helper tools
To adjust the ignition system on a VAZ 2106 car, you will need the following tool:
- Multimeter (voltmeter);
- Candle key;
- Key on "13".

How to set the ignition on a VAZ, step by step instructions
Before proceeding with the direct adjustment of the ignition in a VAZ 2106 car.

You should know that the ignition moment on this vehicle is set according to the marks located on the cover of the gas distribution mechanism (timing).
On the timing cover, three marks are cast, of various lengths:
- Short mark - corresponds to an ignition timing angle of 10 degrees from top dead center, designed to drive on 76th gasoline;
- Middle mark - corresponds to an ignition timing angle of 5 degrees from top dead center, designed to drive on 80th gasoline;
- Long mark - ignition timing 0 degrees, ignition of the fuel mixture occurs exactly at the top dead center of 1 or 4 cylinders, designed to drive on 92nd and 95th gasoline.

Important! Ignition adjustment is carried out on a muffled car with the ignition off.
And so, we directly proceed to adjust the ignition on a VAZ 2106 car:
- Open the hood;
- We remove the high-voltage wire from the spark plug of the first cylinder;
- Using a candle wrench, unscrew this spark plug;
- We close the candle hole with a finger or a rubber plug;
- We turn the crankshaft to the compression stroke, that is, until the moment when the piston of the first cylinder starts moving up (this can be understood by how the rubber plug flies out or the air starts to push out the finger);
- Having determined the compression stroke of the first cylinder, we set the mark on the pulley according to the required ignition (the mark on the timing cover, in our time it is usually the longest mark intended for 92nd and 95th gasoline);
- We collect everything back.


Now we go directly to the ignition distributor:
- We unfasten the latches securing the cover to the ignition distributors;
- We remove the cover;
- We loosen the fixing nut with a key to "13";
- We expose parallel to the axis of the engine;
- Tighten the fixing nut (do not tighten!);
- Turn on the multimeter (voltmeter);
- We hook the positive probe of the multimeter to the output of the ignition coil, negative to the "mass";
- Turn on the ignition;
- We begin to turn the ignition distributor clockwise, it is necessary to turn until the voltage on the multimeter disappears;
- Now we smoothly turn the distributor counterclockwise, as soon as the voltage reappears, we stop. Ignition adjusted;
- Tighten the fixing nut;
- We assemble the ignition distributor.

How to check the ignition, the progress of work on checking the correct ignition adjustment
Now you need to check the ignition in practice. This requires a long, straight and level stretch of road. Checking the ignition on a VAZ 2106 car is carried out as follows:
- We start the car;
- Fully warm up the engine;
- We accelerate the car, gradually reach the 4th gear, the speed should be approximately 45-50 km / h;
- We press the gas pedal "to the floor";
- There is a knock of "fingers";
- When the speed increases by 5 km / h, the knocking of the fingers should stop;
- This means a correctly set ignition;
- If not, then the ignition is not adjusted correctly.

Early ignition, signs and how to fix
Early ignition will be indicated by increased and ongoing knocking of fingers, as well as detonation in the engine (pops heard).
To fix early ignition on a VAZ 2106 car, you need to disassemble the ignition distributor and turn it a few degrees counterclockwise. After that, it is necessary to collect everything in place and check the ignition again in the manner described above.

Late ignition, symptoms and how to fix it
Late ignition will be indicated by a slow set of engine speeds.
To fix this problem, you need to disassemble the distributor and turn it a couple of degrees clockwise, and check the car again.

- According to experts, the ignition on a VAZ 2106 car can be considered adjusted only if no more than 2 finger knocks are heard at a speed of 60 km / h;
- In the absence of a multimeter or voltmeter, the ignition can be adjusted using the usual 12 Volt control;
- This method of adjusting the ignition, in addition to the VAZ 2106, is suitable for all carburetor "classics".
As we can see, the ignition adjustment on a VAZ 2106 car can be done independently, without any help and calls to a car repair shop. This concludes our article.
As you know, properly adjusted ignition VAZ 2106- this is not only, but also serious fuel economy. Therefore, at the first symptoms, we first of all recommend diagnosing the entire system with subsequent adjustment. The signs will be described below, as well as how to configure it.
Signs of incorrect ignition timing VAZ 2106
- While driving, the car does not develop maximum speed
- elevated
- Interruptions at idle
- Engine overheating
- Engine knock after shutdown
- Knocking fingers when you sharply press the gas pedal while the car is moving.
How to adjust the ignition of the VAZ 2106
The whole process comes down to three steps:
- Changing the angle of the closed state of contacts (UZSK)
- Changing the ignition timing (UOZ)
- Checking ignition adjustment while driving
Adjustment of the angle of the closed state of contacts (UZSK)
We make this adjustment if you have classic or installed on your car.
- Remove the distributor cover. For classic ignition, before adjusting with a needle file, we clean the contacts in the distributor and check the tightness of their fit to each other. If necessary, gently press the fixed contact.
- Using a special key, turn the crankshaft until the distance between the contacts is maximum (if there is no such key, then turn on the fourth gear and slowly push the car)
- We turn off the screw that fixes the contact group on the bearing plate
- Using a 0.4 mm probe, we adjust the contact group so that the probe fits snugly with the contacts
- We tighten the screw and thereby fix the position of the contact group.
- We check the gap using probes 0.35 mm and 0.45 mm. In this case, a thinner probe should move freely between the contacts, and the one that is thicker should not pass between them at all.
In the process of this adjustment, we obtained the desired clearance of the contacts of the distributor. But in fact, it is precisely the angle of the closed state of contacts (UZSK) that is critical. As a rule, the exact angle is present only in new distributors, when there is no wear in the contacts. Therefore, after adjusting the gap, it is recommended to check the angle, it should be 55°±3°.
How to determine the angle of the closed state of contacts (UZSK)
To check, you will need an electronic tachometer that has the function of measuring UZSK or another similar device with the same function.
Adjusting the ignition timing with a light bulb
For execution ignition adjustment VAZ 2106 with this method, you will need a 12 volt light bulb and a key to rotate the crankshaft.
- Turn the crankshaft with the key until the marks match, as shown in the figure, and at the same time the distributor slider was on the high-voltage wire of the first cylinder.
- We connect one contact of the light bulb to the wire that goes to ignition coil vaz 2106, and the second to the mass.
- We take out the central wire from the distributor and lean it against the mass of the car
- We loosen the bolt fixing the distributor housing and.
- We turn the distributor clockwise until the light goes out, which indicates the opening of the contacts.
- Then slowly rotate in the opposite direction. The contacts should close and the light will turn off.
- Now slowly rotate the distributor housing clockwise until the light comes on again.
- We fix this position with a screw.
In cases where the car uses a transistor or thyristor ignition system, then with this adjustment you will need a voltmeter or diode probe, since the voltage may not be enough to light the bulb.
Checking the ignition settings of the VAZ 2106 while the car is moving
- Warm up the engine to the optimum temperature
- On a flat stretch of road, accelerate the car to a speed of 40-50 km / h. and, turning on the 4th gear, sharply press the gas pedal. At the same time, characteristic detonation knocks should be heard in the engine for 1-2 seconds, and the car should pick up speed. If this does not happen, then turn the distributor one division, located on the scale at its base, counterclockwise.
- If, on the contrary, knocking is present for a longer period of time, turn vaz 2106 one notch clockwise.
If during these adjustments the position of the distributor has changed significantly compared to the position found in the second stage, then this is a sign of a malfunction in the operation of the distributor, or significantly from the nominal one.
Despite the fact that the "classic" VAZ 2106 has long been discontinued, a considerable number of these machines are operated in the Russian open spaces. Since their design is outdated, the desire of the owners of the sixth Zhiguli model to improve it by any means is quite understandable. One of the effective options is to replace the standard ignition system with a non-contact one (abbreviated as BSZ), where electronics are in charge of sparking. The replacement procedure is quite simple and available to anyone who wishes to improve the performance of the engine of their "six".
What is BSZ and how does it work?
In order to successfully install and configure contactless ignition, it is desirable to understand the principle of operation of a system consisting of the following elements:
- The main ignition distributor (otherwise - distributor). Inside it is a photoelectric Hall sensor, a vacuum drive for adjusting the lead angle and a so-called slider with a moving contact.
- A coil that generates a high voltage pulse. It has 2 windings: primary, consisting of a small number of turns of thick wire, and secondary, wound with thin wire with a large number of turns.
- The electronic unit is a switch equipped with an aluminum cooling radiator. The latter plays the role of a fastener.
- Spark plugs connected by high-voltage wires to the distributor.
- Wires for connecting elements to each other.
For reference. In standard outdated VAZ 2106 systems, instead of the Hall sensor, there was a contact group inside the distributor, but there was no switch at all.
The first contact of the coil is connected through the ignition lock relay to the generator, and the second - to the control unit. Also from it to the distributor is a high-voltage wire of large cross section. There are 2 bundles of wires coming out of the distributor connecting it to the switch and spark plugs. The system operates according to the following algorithm:
- After turning on the ignition by turning the key in the lock, a voltage of 12 V is applied to the primary winding of the coil, which causes an electromagnetic field.
- When the crankshaft rotates and one of the pistons reaches top dead center (TDC), the photoelectric sensor sends a signal to the switch, which briefly breaks the connection of the coil with the voltage source - a generator or a battery.
- During a circuit break in the secondary winding of the coil, a voltage pulse of 20 to 24 kV is generated, which is transmitted through a large wire to the distributor slider.
- The moving contact of the slider sends an impulse to the spark plug where the piston went to TDC. A powerful spark jumps between its contacts, igniting the mixture of fuel and air in the combustion chamber.
- The distributor shaft is driven by a gear train connected to the crankshaft. When the next piston moves to TDC, the shaft turns and the moving contact connects to another candle, and the Hall sensor sends the next signal and the sparking cycle repeats.
Reference. In older systems, the chain was broken mechanically using a cam on the distributor shaft, pressing on the contact group.
Benefits of contactless systems
For an ignorant car enthusiast, the main argument in favor of BSZ is the fact that at the moment no manufacturer produces cars with a contact-cam sparking system. Foreign brands abandoned it in the distant 80s of the last century, and in the Russian Federation, mechanical ignition lasted until the 90s. The reasons for the refusal are quite clear:
- a spark constantly jumped on the contacts, which is why they burned out and required frequent cleaning;
- the contact group wore out quite quickly, on average it was enough for 15-20 thousand kilometers, after which the element had to be changed;
- the wear of the bearing on which the contacts were placed made itself felt, which caused unstable operation of the power unit;
- the springs of the weights - balancers were stretched.
All of the listed malfunctions appeared in turn, haunting the owner of the "classic" Zhiguli. Due to an imperfect design, the power of the spark on the candles constantly decreased, the engine performance deteriorated, and fuel consumption increased. New BSZ systems are devoid of such shortcomings, they are distinguished by durability and stable sparking. The power of the spark also increased, since the voltage of the output pulse increased from 16-18 kV to 24 kV, which contributes to better ignition of the fuel.
Note. At first, the weak point of domestic non-contact systems was considered to be the switch, which quickly fails and cannot be repaired. But later it was improved and the reliability of the BSZ increased.
Selecting an Electronic Ignition Kit
Since the “sixes” were equipped with three types of engines (1.3, 1.5 and 1.6 liters), the BSZ sets for them also differ in the design of the distributor. The engine is 1.3 liters. (model VAZ 21063) there is a distributor with a shortened shaft, and in engines of 1.5 and 1.6 liters. (VAZ 21061 and 2106 respectively) this shaft is equally long. The composition of the electronic ignition kit is as follows:
- distributor with catalog number 38.3706-01 for a power unit with a volume of 1.3 liters. or 38.37061 - for engines of 1.5 and 1.6 liters;
- high voltage coil marked 27.3705;
- electronic control unit, marking - 36.3734 or 3620.3734;
- connecting wires.
Attention! When buying a contactless kit for the "classic" Zhiguli, do not confuse it with products intended for the Niva VAZ 2121, the distributors look very similar in appearance. But the "Nivovskaya" part differs in technical characteristics and is marked as follows: 3810.3706, 38.3706-10 or 038.3706-10. Putting it on the "six" is categorically not recommended.
Of the manufacturers selling their ignition kits in the Russian Federation, the most popular among motorists are spare parts from the SOATE company from Stary Oskol. It should be noted that the new candles of the A-17DVR brand, which are installed on classic VAZs with electronics, are not included in the delivery package, they will have to be purchased separately. In order to fully experience the results of the replacement, it is also recommended to install new high-voltage wires if you have not changed them in the recent past.
Despite the fact that the oil pump is one of the most reliable components in VAZ 2106-2107 cars, sometimes it fails. In order to replace it, it is recommended to study this material:
Preparing to replace the BSZ
The work of removing the old ignition and installing a new one does not require any special tools, fixtures or devices. An inspection ditch is also not needed, and the entire operation can be carried out outdoors in good daylight. It is enough to have such tools:
- open-end wrench size 13 mm for unscrewing the distributor fastening nut;
- using keys for 10 and 8 mm, the coil is removed;
- screwdriver flat and Phillips;
- pliers;
- an electric or manual drill with a drill for the diameters of the self-tapping screws for mounting the switch.
Advice. For the convenience of performing work, rent or from friends a ring wrench with a long handle, which is put on the ratchet nut and is used to manually rotate the crankshaft.
To get started, follow a few steps of preliminary disassembly:
- Open the hood and disconnect the negative battery terminal.
- Remove high-voltage wires from spark plugs and distributor cap.
- Unscrew the candles.
- Lower the screwdriver into the spark plug hole of cylinder 1 and turn the crankshaft until the piston in it reaches TDC. In this case, the mark on the shaft pulley will stand opposite the longest risk marked on the cylinder block.
Advice. If you did not find a key for the ratchet nut, the crankshaft can be turned by rotating the posted rear wheel of the car. Do not forget to fix the machine with wheel chocks, remove the handbrake and engage 4th or 5th gear.
Having compared the marks and prepared new parts, you can proceed to the main stage of work.
Installation procedure for electronic ignition
The first step is to dismantle the old system by performing operations in the following sequence:
- Disconnect the high-voltage wire coming from the coil, remove the cover of the distributor and remember the position of the slider. For convenience, the direction can be marked with chalk on the valve cover of the engine.
- Disconnect the wires from the distributor and the vacuum tube coming from the carburetor. Unscrew the fastening nut with a 13 mm wrench and remove the element from the cylinder block.
- Unscrew the nuts of the contacts of the high-voltage coil and remove the wires, remembering where the wires from the ignition lock relay and tachometer were connected.
- Remove the coil and put it aside.
Advice. There is a gasket between the distributor and the seat of the cylinder block, do not lose it when removing the part from the car.
After disassembling, proceed with the installation of the BSZ, observing the following procedure:
- Move the gasket from the old distributor to the new one and remove the cover from it. Turning the slider in the desired direction, which you marked with chalk, insert the distributor shaft into the socket and fix its position with a nut. It is not worth tightening it strongly, because you still have to adjust the ignition and loosen the nut again.
- Screw in the spark plugs, having previously set the gap between the electrodes to 0.8-0.9 mm. Put the distributor cap in place and connect the high-voltage wires, observing the cylinder numbers (embossed on top of the cover).
- Replace the old coil with a new one. If the contacts on it are opposite, then first loosen the mounting clamp, turn the case 180 ° and install the part on the car.
- Attach a commutator close to the coil. Having removed the washer reservoir, pre-drill 2 holes in the side member of the body and fasten the block with self-tapping screws. Please note: the electronic element should not be lower than the tank, so that it is not flooded with water in case of a leak.
- Take the connecting wires and connect the electronic unit, distributor and coil according to (attached to the BSZ kit). It is not difficult to understand it: the connector from the switch is connected to the distributor block, and the wires are connected to the contacts "B" and "K" of the high-voltage coil. Do not forget about the wires previously connected to the old coil (including from the tachometer), they must be connected to the new element in the same way.
- Put a vacuum tube coming from the carburetor onto the fitting of the distributor membrane assembly. This completes the installation of the contactless system.
Reference. In the VAZ 2106 models of the latest releases, holes have already been made for mounting the switch. Look carefully at the side member on the left side (in the direction of the car).
Installation instructions in photos
The slider must be in this position before removing the distributor. The distributor cover is removed by releasing two latches. With a key of 8 and 10, you need to unscrew the wires from the distributor. The high-voltage wire is removed from the coil and the wires leading to the ignition switch and tachometer are unscrewed. Thus, the distributor is removed from the cylinder block. Wires to the new coil is connected in the same way as to the old one The switch is placed in a free place above the washer reservoir Do not mix up the wires when connecting a new distributor
Video about the installation of the electronic system on the "classic"
Starting the engine and setting the ignition
If during the process of replacing the elements you did not move the marks, but connected the wiring correctly, then the "six" will start immediately. Let it warm up for a minute or two by manipulating the accelerator pedal, and then proceed to setting the ignition. It is performed in two ways:
- the most common technique is “by ear”;
- using a special device - a stroboscope.
Advice. If the car engine does not start and does not show signs of life when the starter rotates, then you should check the correct connection of the high-voltage wires. The second reason: during installation, you turned the distributor cap 180 °, which is why the slider began to transmit impulse to the 4th cylinder instead of the first and vice versa.
Ignition adjustment "by ear" is performed as follows:
- With the engine running, loosen the distributor nut.
- Slowly turn it clockwise and counterclockwise, achieving the most stable operation of the power unit. The angle of rotation must not exceed 15°.
- Having caught the position of a clear operation of the engine, finally tighten the distributor nut.
With the help of a stroboscope, the ignition timing is set much more accurately. If you managed to get this device or take it somewhere for a while, then connect it to the battery terminals and the high-voltage wire of the first cylinder. Start the engine and carefully bring the flashing lamp to the marks on the block. A stroboscope will help you see the position of the risk embossed on the pulley when the engine is running. Now you can loosen the distributor nut and turn the body to align this mark with the last, shortest mark.
Repairing a carburetor is not difficult if you know all the details of the procedure:
After adjusting, warm up the car to operating temperature and try to drive it in different modes. If you hear the sound of piston fingers when you press the gas pedal sharply, then you are dealing with detonation caused by too early ignition. Loosen the fastening of the distributor and turn it clockwise by 1-2 °, no more. The knock should be gone.
Advice. After installing the BSZ, it often happens that the engine idling speed increases due to better sparking. The speed is reduced to a value of 850-900 rpm by the fuel quantity screw. In Ozone type carburetors, this is a large screw located on the right (in the direction of travel) at the bottom of the unit. In Solex carburetors, this is a plastic handle peeking out of the back and resting against the damper axis. The “quality” screw is not allowed to be touched without knowledge of the matter!
Video about setting up contactless ignition
If you removed the distributor and high-voltage wires with a cover without aligning the marks, then the following video will help you correctly set the ignition on the new one:
Operating a car with an electronic system is very different from driving an old ignition. The engine runs much smoother and more stable, and cleaning the contact group is a thing of the past. But the owner of the VAZ 2106 does not hurt to carry a Hall sensor in stock in case the standard one breaks down. This part cannot be repaired, although it breaks quite rarely.
On cars of the VAZ family that fall under the category of "classic", including the "six", an electric ignition system is installed. The exception is its modified versions, in which a contactless system was mounted. In the first case, a tool of the B117A brand was used as a coil, while the modified ones were equipped with coils of the 27 3705 series. The main distinguishing feature of both devices was the difference in some winding elements. The only thing that has remained the same is the “habit” of frequent failure (by the way, the ignition of the VAZ 2107, “seven”, is built on the same principle).
About the VAZ of the "classic" family
On the "classic" a standard engine start lock was installed, which did not fundamentally differ from the previous representatives of the VAZ family. There are three main parts in its design:
- contour part.
- Anti-theft device.
- Lock.
Moreover, if the anti-theft device failed, motorists had to change the entire system in its entirety. The contact part, which is located in the ignition housing, can be replaced in a separate order. The installation of a car start (ignition) device on VAZs is carried out under the front panel, namely under the instrument panel (to the left of the driver), on the mounting bolts of the steering shaft.
All these three components must ensure a smooth and trouble-free start of the engine, because the performance of the entire vehicle will depend on their condition. As a rule, the question “how to set the ignition on the VAZ” (including 21213) is asked by car owners no earlier than after 100 thousand kilometers, since the lock is set up by the manufacturer itself while still on the conveyor. But if this issue still arises, you need to take certain measures. If the ignition switch is not adjusted in time, your car will at least consume too much fuel, or even stop starting normally, even “hot”.
Signs that indicate a breakdown of the ignition lock system on VAZ cars
Before setting the ignition on the VAZ 2105 (however, as on any model), you need to make sure that the breakdown is really in the key. The most likely symptom of this in the event of a malfunction in the ignition switch is an overheated engine and poor acceleration dynamics. In addition, it happens that at low and medium speeds in the cabin a characteristic ringing is heard in the engine compartment. I would also like to say about the speed that such a machine can shake slightly if it is incorrectly set or the ignition switch is adjusted.
Is it really the ignition switch?
Every experienced car owner knows that signs such as overheating of the engine, loss of vehicle dynamics and increased fuel consumption may not arise at all due to the lock, but due to a number of other technical problems. This may be a malfunction in the fuel system, a poorly adjusted carburetor, or simply poor-quality gasoline. Therefore, in order to make sure that this is really a symptom of a malfunctioning ignition switch, you need to pay attention to the candles. It is by their condition that you can determine what kind of breakdown it is, and what caused it.
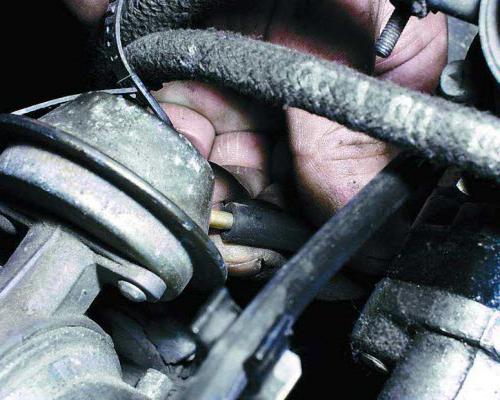
Before setting the ignition on the VAZ 2106, motorists pay attention to the amount of deposits in the working part of the candle. If so much dirt has accumulated on its surface, as in this photo ...

... then, of course, the reason lies in the ignition switch. There is so much plaque here that there is simply no point in restoring the working surface of this incendiary element. Otherwise, after several hours of long and painful work, you still won’t achieve anything, and the electrode will again not spark in a normal amount. As a rule, the working surface of a candle with a black oily residue can no longer be restored. The same applies to parts with a thick layer of plaque on the working surface. Such parts are subject to replacement only. But if you still want to try to restore the characteristics and clean the candle from contamination, you can perform the following manipulations:
- Put a candle in the 2nd or 3rd cylinder of a warm and serviceable internal combustion engine. Here, the heating temperature is slightly higher, since the combustible air-fuel mixture is leaner than in cylinders 1 and 4.
- Sandblast the working part.
It is simply impossible to set the ignition on in another way. Other methods, such as cleaning with a metal carriage or baking the surface, are just a waste of time, and by such methods you will definitely not achieve the desired result. Therefore, to save personal time, change the candle in the kit.
At the same time, it is necessary to pay attention to how many kilometers your candles have already “run off”. If they are operated for more than 30 thousand kilometers, then - subject to the accumulation of soot and pollution - such a part must be changed. Experts recommend replacing spark plugs at least once a year, even if the speedometer has not added 30 thousand over this period. But in any case, you should not wait for the moment until they completely fail. This can significantly affect the technical condition of the car, and not for the better.
The candle wears out in the process of reducing the height of the central electrode and the cross section of the outer one. During engine operation, the thin end of the outer electrode is heated to a temperature that is sufficient to ignite the working mixture in the combustion chamber. If the fluid ignites independently of the spark (known as erratic ignition), then the driver may experience a noticeable loss of engine power. Sometimes it happens that even when the ignition is off, the engine does not stop working. This indicates that the candles have failed, and with them - which is quite possible - the ignition switch.
But how to set the ignition on the VAZ 2106 in this case?
In this case, it is best to simply replace the candle with a new part. But if you decide to restore it, try sawing off the clogged part of the outer electrode with an appropriate tool. At the same time, do not neglect the size of the gap in the candles, which should be 0.55 mm. If your VAZ runs on 76th gasoline, this value can be increased to 0.6 millimeters. But if the gap is very large, it will significantly complicate the start of the engine in the cold season, and besides, it will lead to a significant waste of fuel. And this happens because the spark formed in the electrode can sometimes disappear before reaching its final destination. Useful advice for the future: in order to avoid such situations, it is better to always carry a new set of spark plugs with you (and preferably also a distributor cap and slider). Still, a VAZ is not a Mercedes, and it can break down at any moment. Well, with the "six" more or less sorted out. And you can find out how to set the ignition of the VAZ 2107-21099 a little lower.
Is it the distributor's fault?
As practice shows, it is this product that most often fails. It is also worth noting that it is not the distributor itself that can break, but some small element of its design. So, one of the smallest and most unreliable parts is the 900706U ball bearing, which is equipped with a vacuum corrector diaphragm. In addition, the distributor cap may break. Most often, this is either a deformation in the form of a crack resulting from mechanical damage, or a layer of deposits in the form of oil with graphite. The distributor cap also does not like water very much and in cases of getting wet it also fails.
If you have a broken ball bearing, you will notice that the motor has stopped "pulling", and you will feel how it does not work well at idle. Often, it is simply impossible to adjust something in this case. However, if you want to set the ignition (on the VAZ 2114, for example) with a broken distributor cap, you can try to fix the situation by doing the following series of work:

Thus, you can set the ignition on the VAZ 2105-2110 and return the lock to normal mode. However, often in such cases, fuel consumption increases (by 3-5 percent) and the level of CO 2 concentration in the exhaust gases of the car increases.
By the way, with such “symptoms” on the Niva, VAZ “penny” and “six” cars, the tachometer needle walks strongly along the entire scale, regardless of what the true engine speed is.
So, let's look at how to set the ignition on the VAZ 2106.

Since the design of the "classics" and VAZs of the "ninth" family is almost the same, the instructions we offer can be applied to almost all models of cars from the Volga manufacturing plant.
Before setting the ignition on the VAZ 2106-2110, we need to prepare several wrenches (13, 14 and 36 millimeters), as well as a minus screwdriver and a set of probes to measure the gaps. Using wrenches of 13 and 14 millimeters, we will unscrew the fasteners of the distributor. With the help of a 36 mm tool, we have to turn the crankshaft ratchet.
So, how to set the ignition on the VAZ 2110? To begin with, we pick up the key for 36 and unscrew the crankshaft clockwise. You need to turn on yourself. At this point, you need to carefully examine the contact in the distributor. We set the largest contact gap. To do this, take a 0.40 mm probe. If the value obtained does not correspond to the set value, then the gap must be adjusted. In this case, take a flat screwdriver and loosen the contact fastening screw. Now, with the help of an eccentric, you should set (increase or decrease) the gap. In this case, the probe itself must be located between the movable and fixed parts of the distributor contact.
How is the ignition adjusted?
VAZ 2106 and all its other "brothers" are repaired in the same way: after the contact gap has been set, we proceed to adjust the next important parameter. Now we need to adjust the ignition gap. How to set the ignition on the VAZ 2110? To do this, use a 36 key to turn the crankshaft pulley clockwise until the mark does not match the notch we need on the timing (gas distribution mechanism). There are only three of them. The first indicates an angle of 10 degrees, the second - 5 degrees of advance, and the third (it is the longest) we do not need, since this is the top dead center. We only need the second label.

After setting these values, check the piston of the first cylinder, which should be located at top dead center. This can be done as follows: unscrew the cylinder spark plug, which is located near the distributor, and insert a screwdriver into the spark plug hole. If the piston is located at the top, then the screwdriver will immediately rest against it. If not, then the crankshaft pulley should be rotated 360 0 and again set it to the marks.
Note! In order to set the ignition correctly, the VAZ 21213 (in principle, like any other car) must be cold, since the temperature contributes to the appearance of errors. Even when performing these works, it must be taken into account that the crankshaft can rotate 360 degrees, and the camshaft - only 180. It is thanks to this characteristic that the piston will be in the position of the top point.
In the next step, we will need a 12 volt light bulb with 2 wires soldered on. We connect one of them to the "mass" of the car (to the body or engine), and the second one is connected to the distributor contact.
Final steps
Further, you will not have problems with how to set the ignition (VAZ 21099, 2114, 2115 or 21213 - it doesn’t matter, the principle of operation is still the same). Using a 13 mm open-end wrench, unscrew the connecting elements of the last part mentioned above and rotate them until the lamp lights up. The latter should not glow completely, but only half-heartedly. If, when connected, it immediately caught fire, then the distributor should be turned clockwise until it goes out. As soon as this happened, you need to catch the moment when the light bulb will glow half-heartedly. Then the ignition will be advanced, and it remains for us to tighten the mount back, put the cover on and start the engine. Everything, the task "how to set the ignition of the VAZ 2103-2110" is solved.
We are repairing the VAZ 2106. How to set the ignition? Method number two: use a stroboscope
You can also go the other way. In this case, we need to establish a small gap between the contacts of the breaker. After the distributor cover has been removed, use the crankshaft to be set to a position in which the clearance would have a maximum value. Now we unscrew the fixing bolt on the bearing plate and use the feeler gauge to select the appropriate position, which is equal to its easy movement. Next, you need to tighten the screw back and find the marks on the engine. These are 0, 5 and 10 degrees. There is a similar marking on the rim of the crankshaft pulley. We now set the ignition.
After all these operations, we pick up a special device - a stroboscope. With his help, we make adjustments. But since this tool works from the mains, it must first be connected to the battery with power wires. The vacuum corrector hose in this case should be muffled. Now we start the engine and wait until the idle speed becomes stable. After that, slightly loosen the fastening of the distributor (in order to turn it further). Next, we direct the stroboscope to the markup, which is located on the engine and at a division of 5 degrees, set the ignition value for the 92nd gasoline. If you have a VAZ of the "tenth family", then set the gap to 0 degrees. It is designed to consume gasoline with an octane rating of 95 or more. After completing all these manipulations, do not forget to screw the latch back. Well, at this stage, the question "how to set the ignition (on the VAZ 2104 including) using a strobe" can be considered closed.

In the photo on the right you can see the strobe in action. Below we will consider how to set the ignition of the VAZ 2111-2106 without a strobe.
If you do not have the device mentioned at hand, you can replace it with a 12-volt lamp. You will also need a few wires. In the same way as described above, you will need to rotate the crankshaft to set the necessary marks. After that, one wire from the lamp must be connected to the distributor coil. The second wire will be our "mass".
We need to turn on the ignition. To do this, loosen the wire again. Next, you should find the position in which the voltmeter will show the average values. In this case, it is unacceptable that the lamp goes out or shines too brightly. Then fix the bolt back and put the distributor in place. Remember that you need to loosen the screw no more than 2 turns.
In principle, all of the above methods lead to the same result. And whichever one you use, the ignition will still be adjusted at the output. The differences between the procedures are not too significant, however, as is the design of the VAZs of the “tenth” family or the same “classics”. Therefore, you can use all methods of adjusting the ignition key for almost any model, starting with the legendary Kopeyka and ending with the Lada Priora.
Go ahead. How to set the ignition is no exception), we have already found out. But did it really affect the operation of the internal combustion engine? How correctly the gaps were set, we will find out on the move of the car. To do this, you need to warm up the VAZ engine to an operating temperature of 85 degrees Celsius (when the arrow is still in the green scale) and find a flat and straight section of the road.
A kind of test drive

After the internal combustion engine has warmed up to the required temperature, we leave for the track and accelerate to 50 kilometers per hour. In this case, it is necessary to switch to fourth gear and sharply press the gas pedal to the floor. If at this time you heard quiet and short knocks, you can rejoice: this indicates that you have set the ignition correctly. In this case, screw the cover of the distributor clockwise, and feel free to go wherever your heart desires, for any distance. By the way, for VAZs of the “classic” family, it is enough to accelerate to 40 kilometers per hour and switch to fourth gear.
In continuation of the knocks ... If during a sharp pressing of the gas to the floor you feel loud and characteristic sounds, be aware that this indicates that all adjustments have been made incorrectly. This is also evidenced by such signs as engine overheating, a drop in power or increased. Therefore, we again return to the question of how to set the ignition of the VAZ 2108-21099.

Unfortunately, we have already considered all possible solutions to the problem. But you should not be upset, because even from a hopeless situation you can always find a way out. So, what to do if the work was done incorrectly? In principle, the only right decision would be to contact a service station. Qualified and experienced craftsmen will quickly and efficiently be able to set the ignition (on the VAZ 2104 and on any other model). By the way, such a service will cost you quite inexpensively, about a few hundred rubles.
Conclusion
Now you know exactly how to set the ignition of the VAZ 2108-21099 (with your own hands, by the way). As for the methods and methods of the mentioned adjustment, we note one thing: the end result of all work performed will be the same. Therefore, there are simply no fundamental differences between which option will be chosen to adjust the ignition of a car. The only thing worth paying attention to is that with the use of a stroboscope it is much easier to set the required gap. Well, of course, without a probe here you can’t do anything.
Properly adjusted ignition timing is one of the determining factors for the correct operation of a gasoline internal combustion engine. Even minor violations of its adjustment lead to a loss of power of the power unit, an increase in fuel consumption, overheating, and the occurrence of detonation processes.
In this article we will talk about what ignition marks are, why they are needed, and how to set the correct moment of ignition of the combustible mixture using them using the eight- and sixteen-valve VAZ-2110 engines as an example. In addition, we will consider the concept of lead angle and figure out how to adjust it.
Why is the moment so important?
The ignition of the fuel-air mixture in the combustion chamber of the internal combustion engine must occur clearly at the end of the compression stroke before the piston reaches top dead center. If the ignition starts before this moment ( early ignition), the pressure of the gases will oppose the movement of the piston, causing detonation. When ignited at top dead center, the opposite occurs. Late ignition is characterized by the ignition of the mixture with an increasing volume of the combustion chamber, which leads to a decrease in the power of the power unit.
What is ignition timing
The optimum ignition timing is achieved by adjusting the ignition timing. This value is characterized by the angle of rotation of the crankshaft at which voltage is applied to the candle before the piston is at top dead center. Naturally, it cannot be permanent.
In order to determine the required value of the advance angle, it is necessary to take into account the quality of the fuel, since the combustion time of the mixture depends on it, as well as the number of engine revolutions.

How is the lead angle adjusted?
In injection cars VAZ-2110 ignition setting carried out by the electronic control unit. It receives the necessary information from the crankshaft position sensor and, based on it, determines the moment when a spark needs to be applied. But this only happens when the valve timing is set correctly. Otherwise, everything can happen exactly the opposite.
The advance angle in carburetor engines is also set in automatic mode. For this, a vacuum corrector is used. The principle of its operation is to change the lead angle depending on the number of engine revolutions. This happens due to the difference in pressure that occurs under the throttle valve of the carburetor, with which the corrector is connected by a tube.
In addition, the advance angle is also manually adjusted by rotating the ignition distributor cap in one direction or another. This is a kind of coarse tuning that allows you to adjust the engine to the quality of the fuel.
What are tags and why are they needed?
For the convenience of adjusting the gas distribution phases, each car engine has corresponding ignition marks. They are applied to the drive elements of the gas distribution mechanism.

There is also a risk on the flywheel crown. It can be seen if you pull out the rubber cap covering the viewing window on the gearbox housing. The mark on the crown with the ignition correctly set must match the same mark on the gearbox.
We check and adjust the marks on the injector eight-valve
To adjust the ignition, you will need the following tools:
- jack;
- balloon key;
- key (head) for 10;
- key for 13;
- key for 17;
- key for 19;
- large slotted screwdriver;
- flashlight.
It is also advisable to bring an assistant.

Work order:

How to set the ignition on the 16-valve VAZ-2110 engine according to the marks
To adjust the ignition on the "ten" injector sixteen-valve, the same tools will be required. The setup process is almost the same, however, it must be borne in mind that this power unit has not one, but two camshafts. The order of work is as follows:
- We put the car on a flat area, block the wheels. We jack it up from the side of the front right wheel. We remove the wheel.
- In the engine compartment, we dismantle the decorative trim on the engine.
- With a 10 key, unscrew the five bolts securing the front timing cover.
- Dismantle the crankshaft pulley in the manner described above.
- First, we spin the wheel and match the marks on the camshaft gears with the marks on the top of the back cover. When they match, check the position of the mark on the crankshaft pulley. If it corresponds to the position of the dot on the oil pump cover, everything is in order with the ignition.
- If they do not match, remove the timing belt and carry out the adjustment according to the above described algorithm for the eight-valve.
Features of ignition settings in a carburetor engine
Setting the ignition on the marks for a carburetor engine is carried out in exactly the same way as for an eight-valve injector. The only difference is the need to manually adjust the firing angle. In the conditions of a service station, it is performed using a stroboscope and a tachometer.

But you can make adjustments and "by eye". All that is required for such an adjustment is a 10 spanner. The algorithm is as follows:
- We raise the hood and release the three nuts holding the ignition distributor cover to the body with a wrench.
- We scroll the cover so that the mark on it coincides with the “zero” risk on the scale of the case.
- We start the engine, warm it up to operating temperature.
- We scroll the cover clockwise until the moment when the engine starts to give out the maximum number of revolutions. After that, turn it half a division to the left.
- We sit behind the wheel, accelerate the car to 60-70 km / h in 4th gear. We press the gas pedal sharply down, listen to the engine. If at the same time a stable detonation is observed (fingers knock) - we have too early ignition. We stop and turn the lid a little more counterclockwise. With a correctly set ignition angle, when we press on the gas, detonation should last no more than 2 seconds, after which the engine, having gained momentum, continues to operate normally.
- Having achieved the desired result, tighten the cover nuts.


