There are hardware and visual ways to check the machine's generator. However, the owner must know the device and purpose of this electrical appliance in order to diagnose correctly. This guide will help you avoid a trip to the service station and save your operating budget.
The design and purpose of the generator
Before you check the generator with a multimeter on your own, you need at least minimal knowledge about the design of the electrical appliance:
- the belt transmits rotation from the engine crankshaft to the alternator pulley
- mechanical energy is converted into electrical energy
- diode bridge changes alternating current to direct current
- the regulator relay is responsible for recharging the battery when it is discharged during the start of the internal combustion engine
- the rest of the voltage is spent on electrical appliances of the machine
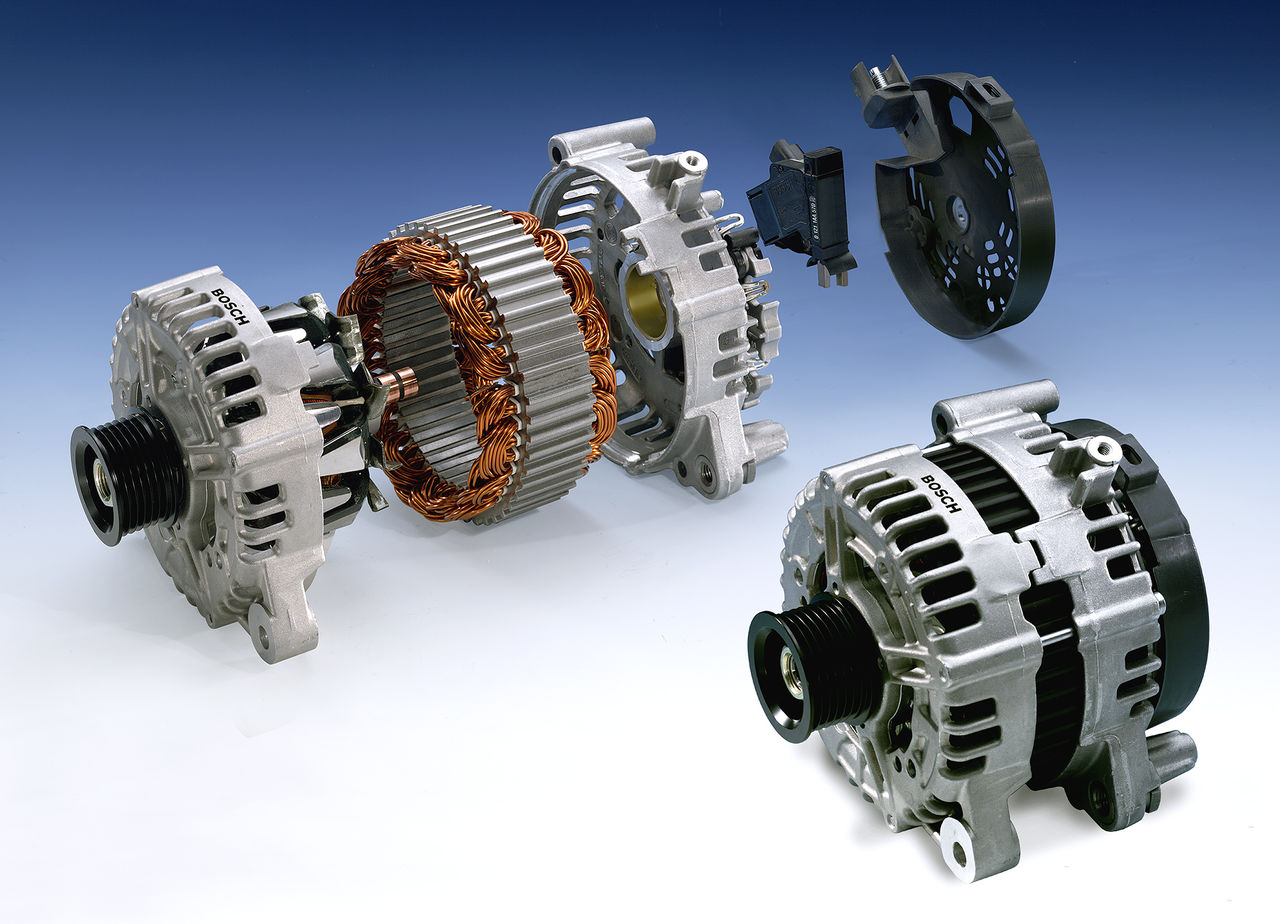
For the battery, both undercharging and overcharging are harmful, so the voltage at the terminals must have stable characteristics at any speed. At the same time, the connecting unit, dimensions, scheme and quality of manufacture of generators can differ significantly from different manufacturers and for specific modifications of the car.
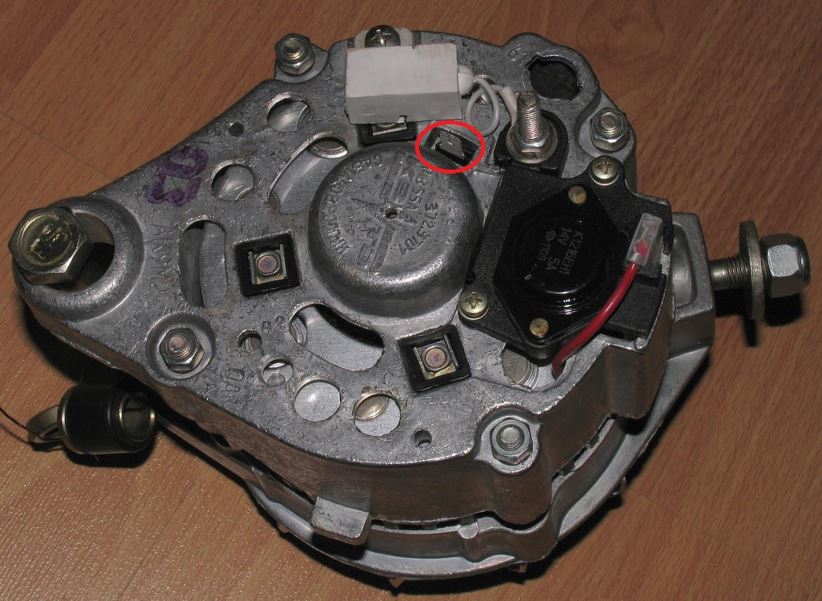
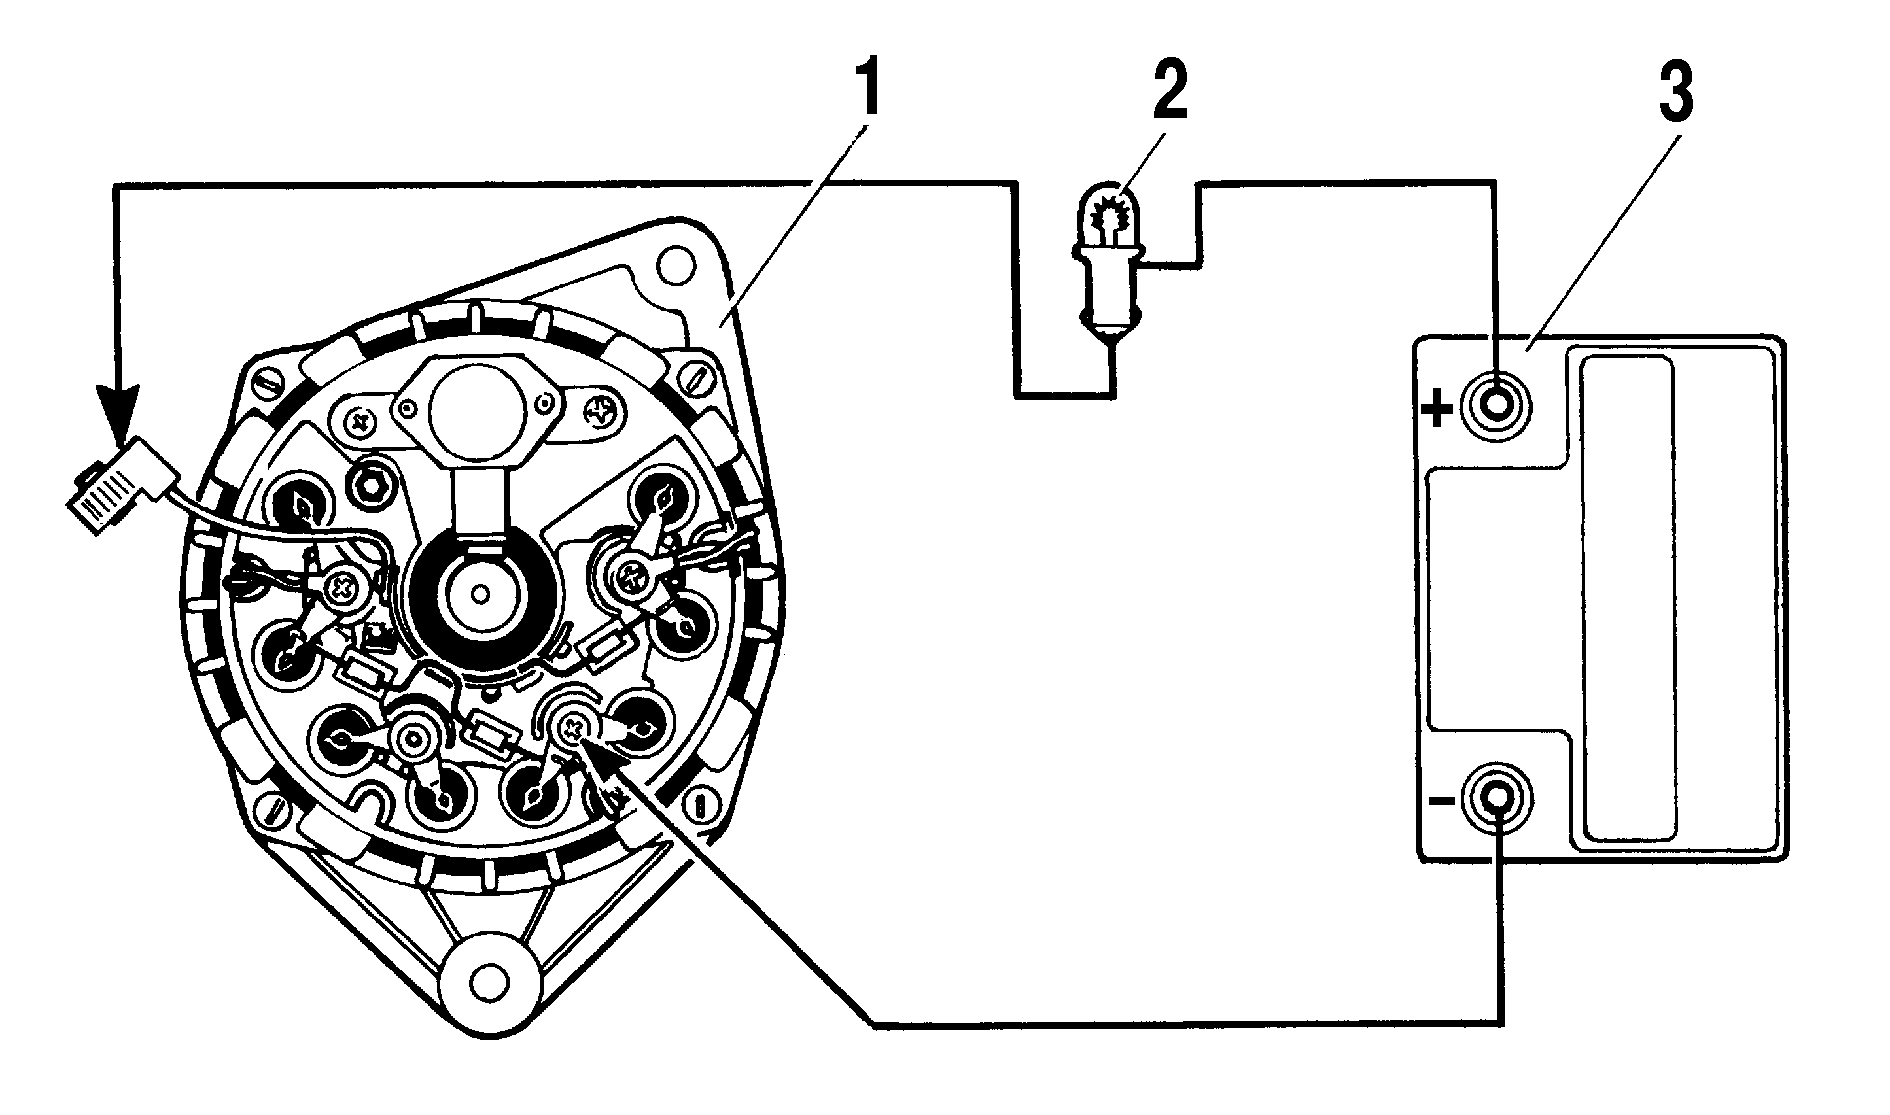
Diagrams and terminals
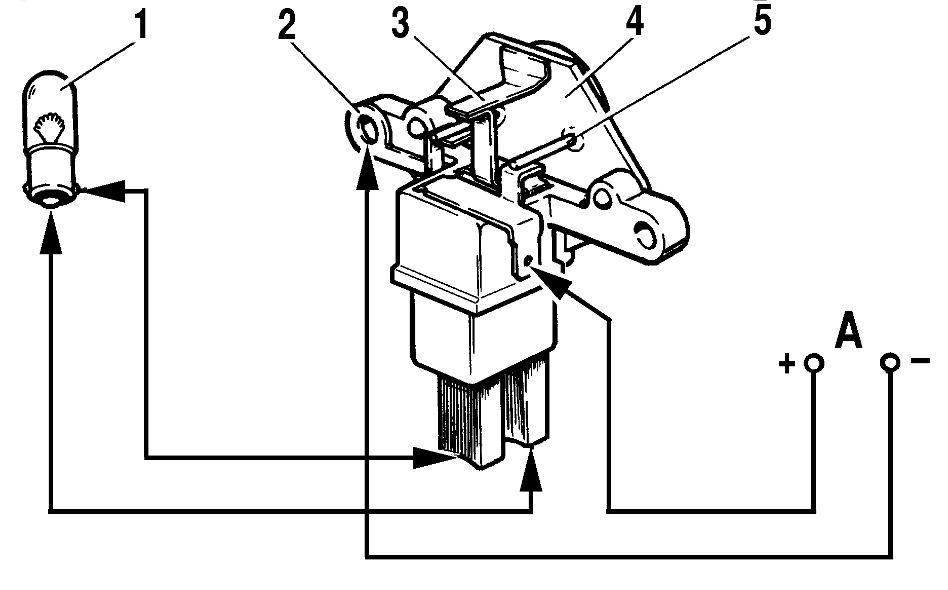
Before you check the generator on the machine on your own, you need to know the electrical circuit of this unit and the purpose of the terminals on its body. 6 schemes are most in demand, for example, one of them is shown in the lower photo.
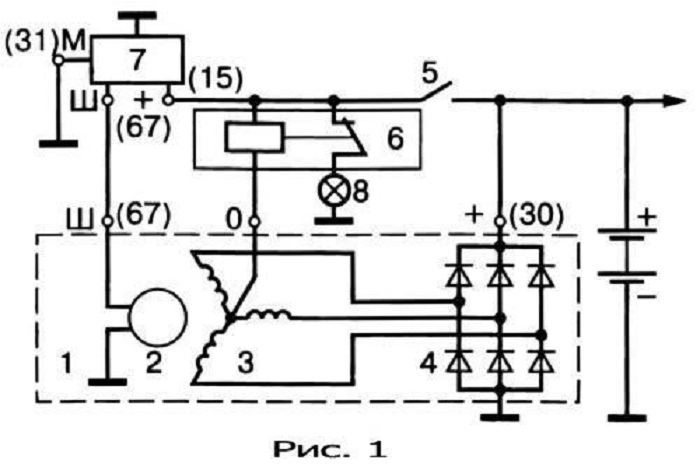
For ease of reference, the digital designations on all diagrams are the same:
- generator block
- exciting winding
- stator winding
- rectifier
- switch
- pilot lamp relay
- voltage regulator
- control lamp
- interference suppression capacitor
- block transformer/rectifier
- zener diode
- resistor
The conclusions on the case are not designated the same, which can interfere with the correct diagnosis with a multimeter (tester):
- positive terminal of the power rectifier - BAT; B+; thirty; B or "+"
- exciting winding - FLD; E; EXC; F; D.F.; 67 or W
- output for a control lamp from a backup rectifier - IND; WL; L; 61; D+ or D
- phase - STA; R; ͠ or W
- zero - MP or "0"
- output for "+" battery - B; 15 or S
- terminal for connection to the on-board computer - F or FR
- output to the ignition switch - IG
In the Russian Federation, generators are most often operated, the exciting winding of the voltage regulator of which is connected to the on-board network with a "minus". Although there are options attached to it "+".
In machines with diesel internal combustion engines, two-level power plants 14/28 V can be installed. Checking these generators is more difficult, it is better to carry it out in a service station.
Self test generator
The simplest option, how to check the generator at home without a trip to the service, is a visual inspection and search for extraneous sounds. However, not all existing defects can be detected by these methods. For example, a glowing lamp on the dashboard indicates that the battery is not being recharged. In this case, the battery itself may be faulty or the generator supplies insufficient voltage to its terminals.
Therefore, it is better to arm yourself with a tester or its more modern version of small dimensions - a multimeter for high-precision diagnostics. Most breakdowns can be identified locally, to search for and repair the rest, you need to check the removed generator by disassembling it partially.
Safety
In order for the diagnostics to be safe for the user and the electrical part of the car, the following conditions must be met:
- using a tester, multimeter or devices to measure current, voltage and resistance separately
- disconnecting the battery from the on-board network and from the generator additionally
- when replacing the wiring, maintain the length and cross section of the cable, as in the original parts
- make sure the belt is properly tensioned
It is forbidden to perform actions:
- use sources with a voltage greater than 12 V
- turn off consumers when the engine is running and the generator is connected by a belt drive
- close with "mass" or terminal D + (67) output B + (aka 30)
- check the spark on the case with a short circuit
visual inspection
First of all, the owner is interested in how to check the generator on the car without removing this electrical appliance. Therefore, faults can be diagnosed in the following ways:
- recharging light - if it lights up on the panel, either the recharging voltage is insufficient, or the battery has exhausted its resource
- third-party sounds - noise, whistling and rustling indicate a weak belt tension, a worn bushing or bearing
- the smell of burning - it can penetrate through the stove into the passenger compartment, the reason for the high-temperature heating of the windings is likely
- interruptions in the work of electricians - indicate insufficient current, which produces a running generator
The belt can be tensioned without removing the entire assembly, other faults are eliminated only after the generator is dismantled.
Bearings (bushings)
The generator shaft rotates in two rolling bearings. The first is fixed on the shaft itself, removed along with the anchor. The second one is pressed into the stator in its central part. In this case, the diagnosis is made by ear and visually:
- whistling and hum at normal belt tension are signs of a worn out bearing or its crumbling cage
- when turning the shaft by hand after removing the belt, it should turn freely, white transverse play
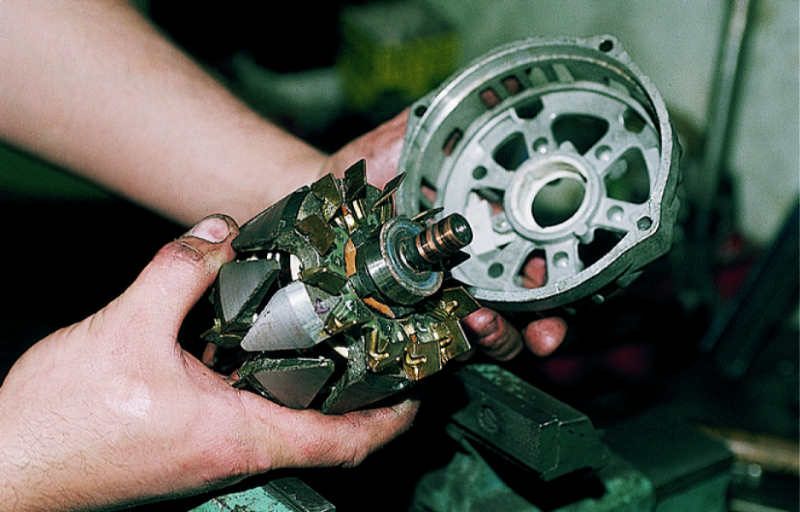
Otherwise, distortions, jamming, burnout of the windings, precipitation of the armature magnets are possible. In any case, a low voltage will reach the battery, insufficient for recharging.
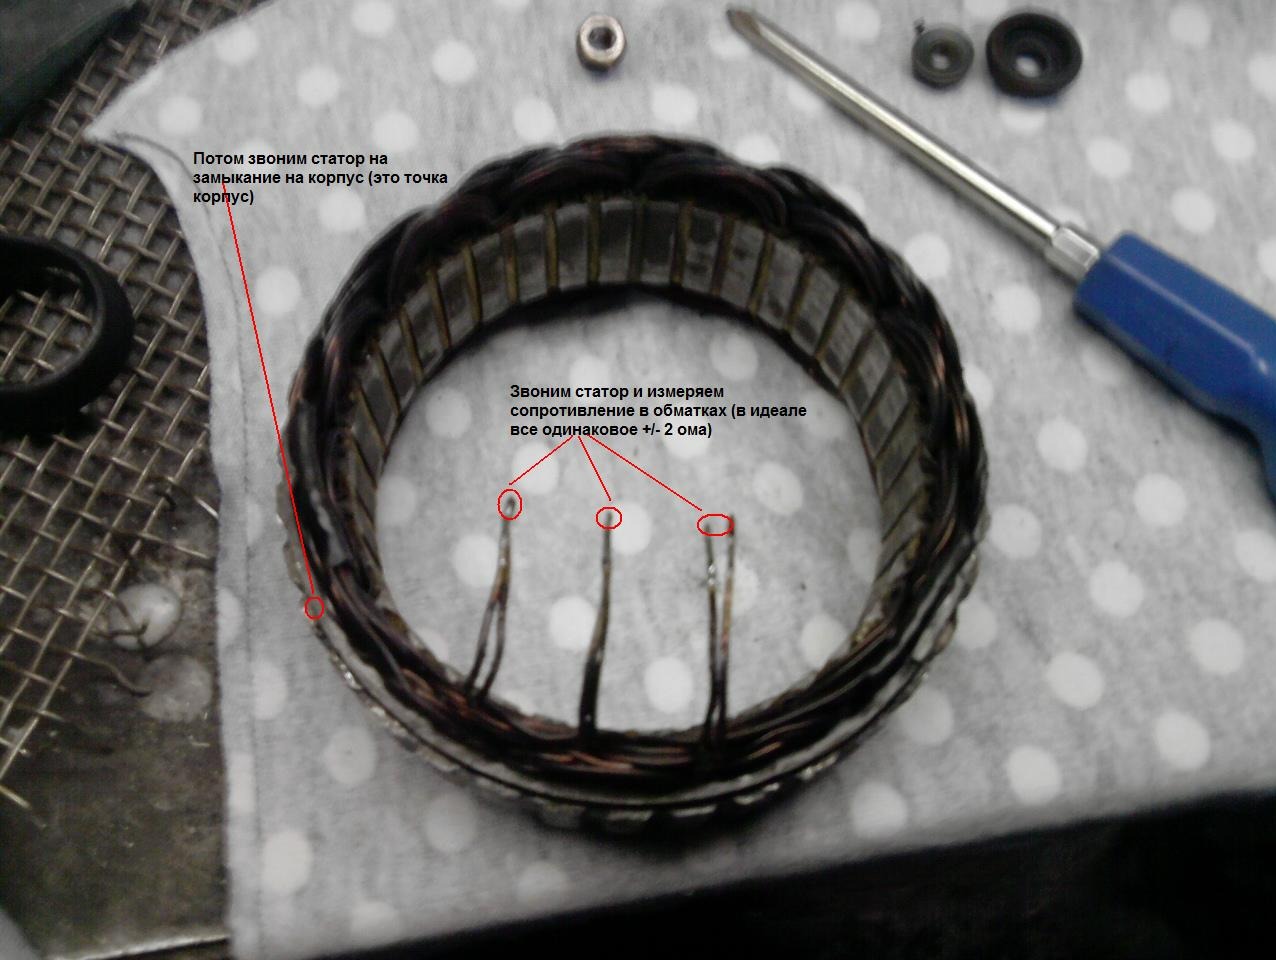
windings
This node is the only one in the generator, the diagnostics of which is visually more effective than using the tester for a number of reasons:
- with intense heating, the lacquer coating of the copper conductor darkens
- there is a burning smell
- the resistance of the windings is too small to accurately diagnose them for a short circuit
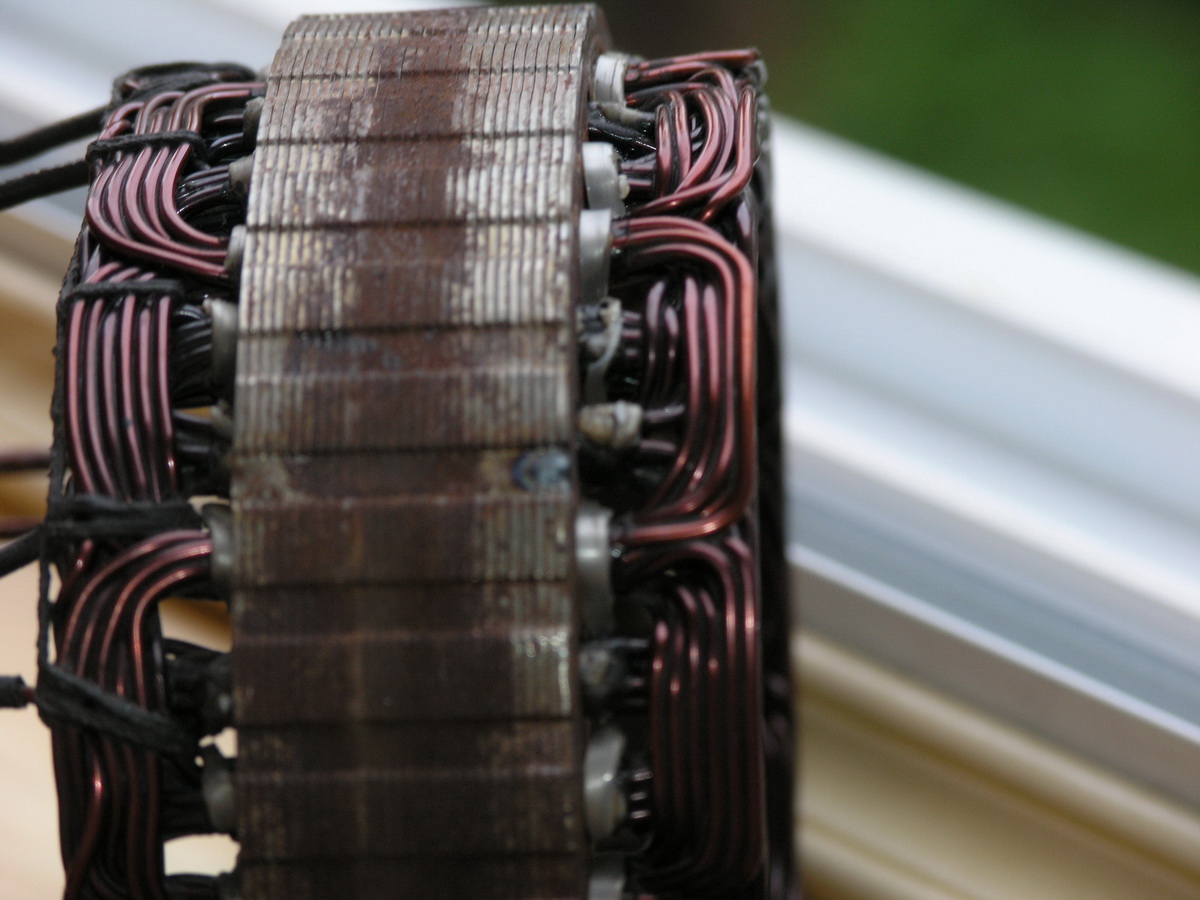
It should be noted that before checking the generator for operability, in this case it will be necessary to disassemble it by removing it from its seat. If the electrical appliance is in good condition, the lacquer coating will be light by default.
Collector group and brushes
Before checking the generator for wear of these friction parts, you need to disassemble it:
- brushes are adjacent to cylindrical brass contacts - collectors
- brushes wear out most often, it is better to change them as a set
- the wear of the collector group is determined visually by the grooves that have appeared
- collectors can be ground 3 - 4 times, then they will have to be replaced entirely
At this stage, the car owner does not have problems.
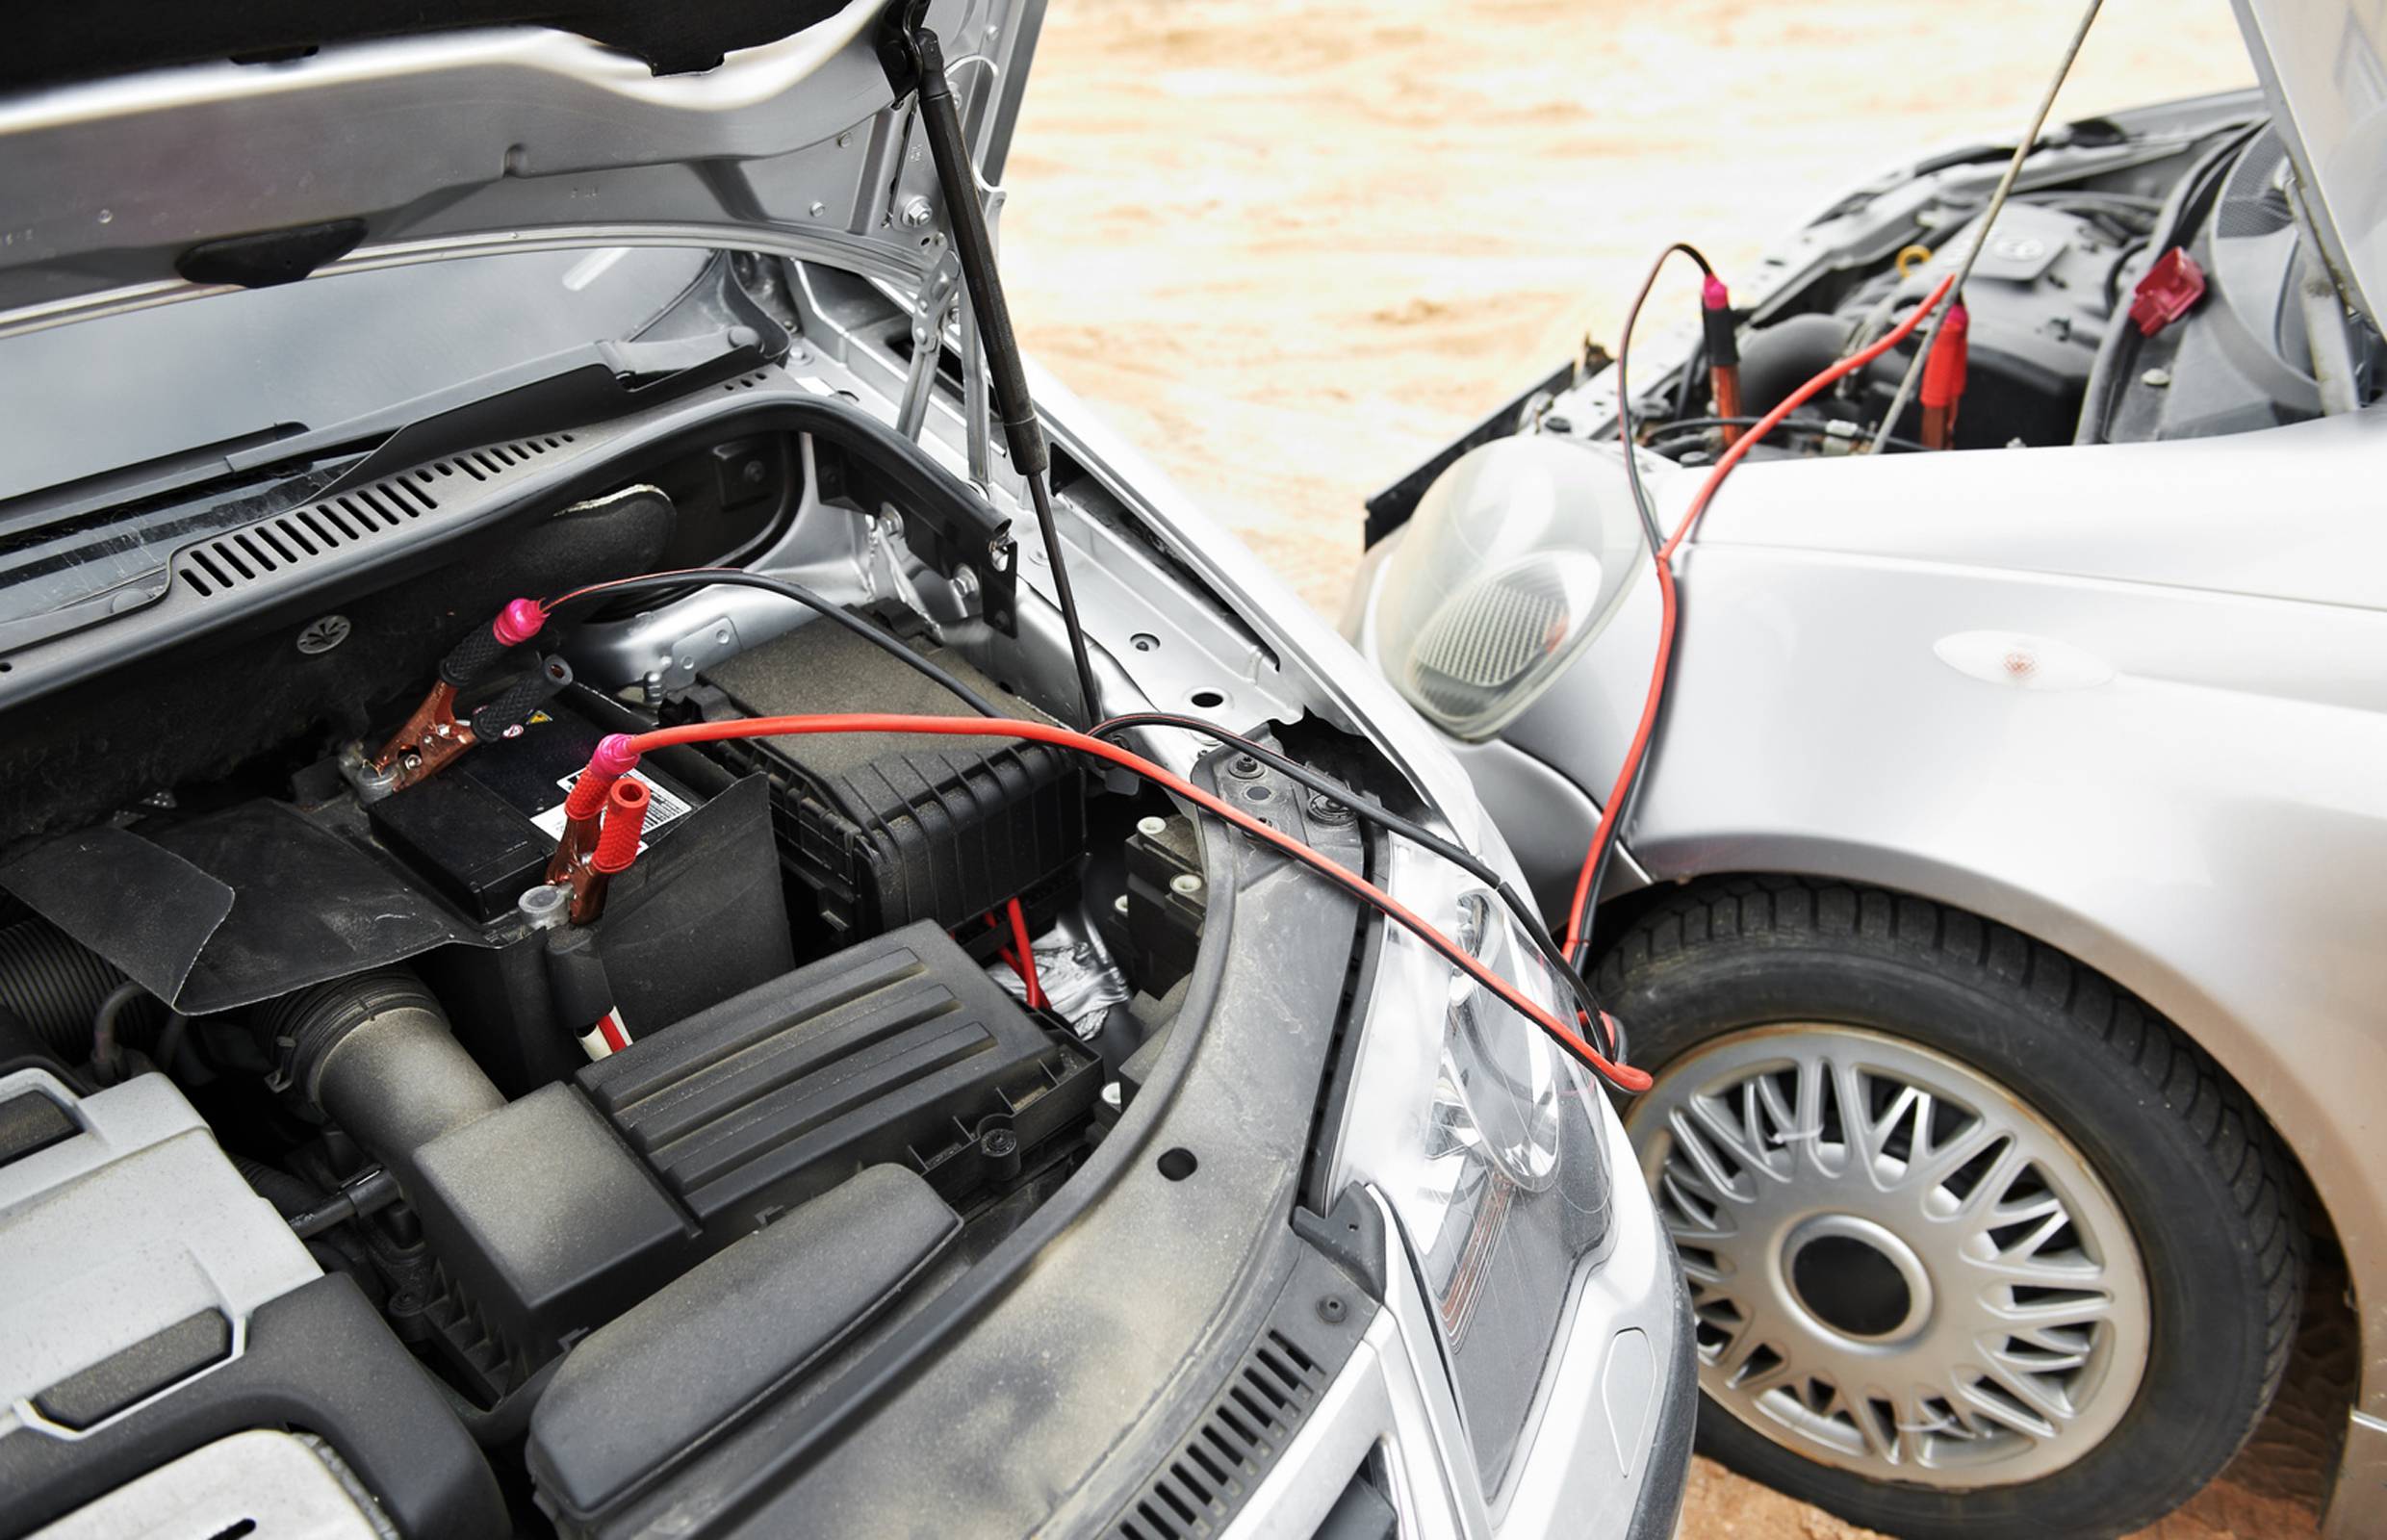
Attention: The "grandfather" method of checking the generator's performance - removing the "minus" terminal after starting the internal combustion engine and not stalling the engine, is unacceptable for modern cars. Moreover, on injector cars it is better not to let them “light up” with wires from a battery connected to the on-board system. It is possible that the "check" error will light up.
Hardware diagnostics with a multimeter
The best option, how to check the car's generator with your own hands, is to use the instruments: ohmmeter + voltmeter + ammeter or tester (multimeter). The last option, how to check the health of the generator, is preferable, since you can also ring the diode bridge with a universal device.
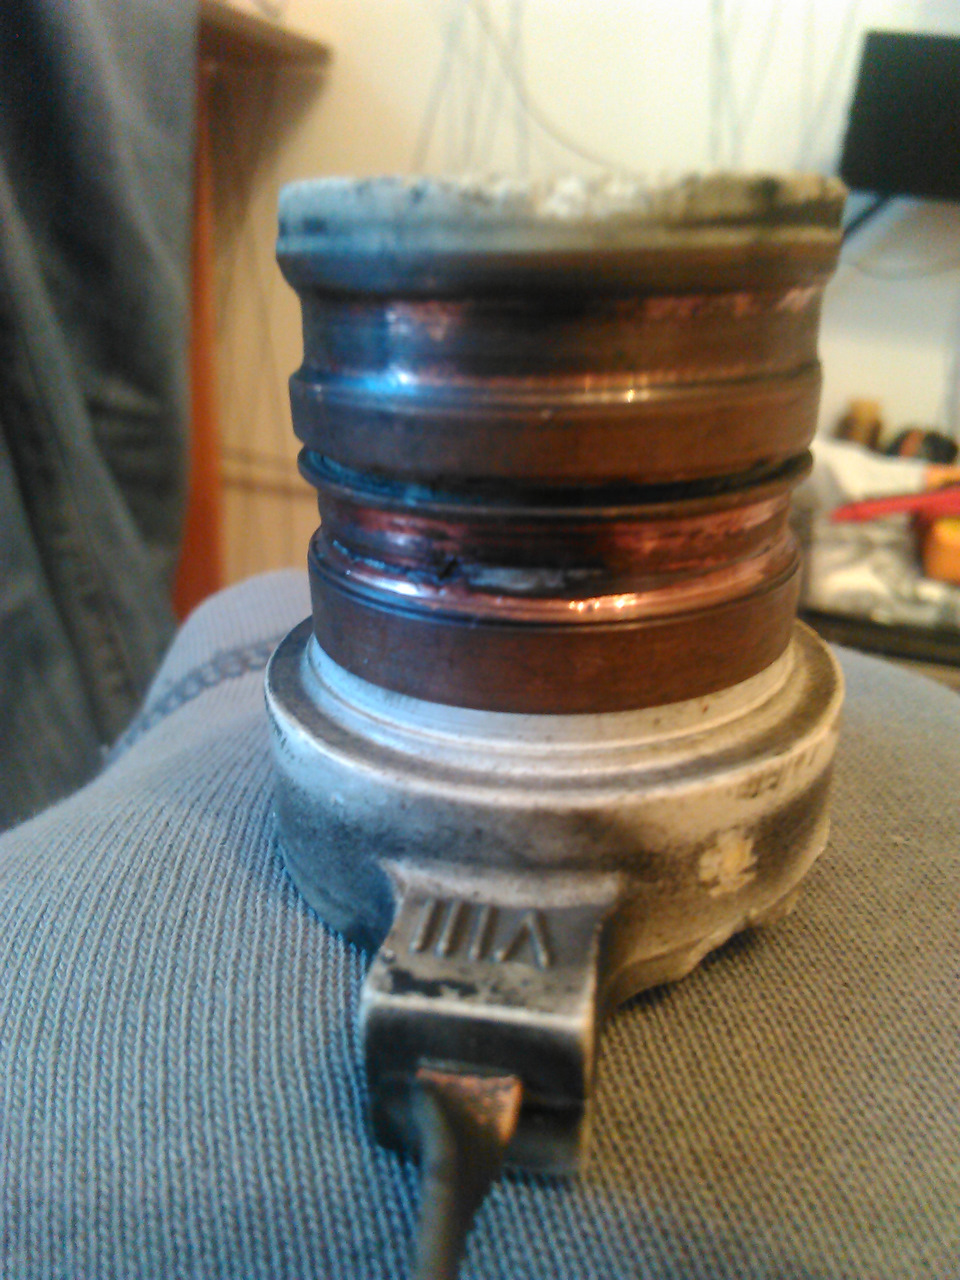
Diode bridge
Structurally, the bridge consists of 6 diodes - 3 of them are considered negative, the remaining positive. In fact, they are deployed in the circuit in opposite directions, passing current in only one direction.
There are two options for checking a car generator for the integrity of a diode rectifier bridge:
- without removing the unit - diagnostics are performed after disconnecting the "mass" of the battery, the wires from the voltage regulator and the diode bridge, the tester is switched to ohmmeter mode, its plus (red wire) is connected to the 30th terminal of the generator, the minus (black wire) is closed to the body of the electrical appliance, all the diodes are intact, if infinity appears on the multimeter scale, punched - if some value in ohms is displayed
- after dismantling and partial disassembly - positive diodes are checked in a similar way, negative - on the contrary, in both cases, a specific resistance value on the tester indicator becomes a sign of breakdown
Attention: If you make a mistake with the polarity when connecting the battery, it is the diode bridge that goes out of standing.
Rotor and stator
If the check of the mechanical part did not reveal any problems, the operation of the generator is checked further after its disassembly:
- stator - you need to check the generator winding for each turn, the resistance is about 0.2 Ohm, so you need an accurate device, you can use the non-hardware methods discussed above
- rotor - if a permanent magnet modification is used, you just need to re-install them inside the cage, conventional rotors have only 2 windings, the resistance of each of which is 2 - 5 ohms, if the tester shows infinity, then an insulation breakdown or wire breakage has occurred
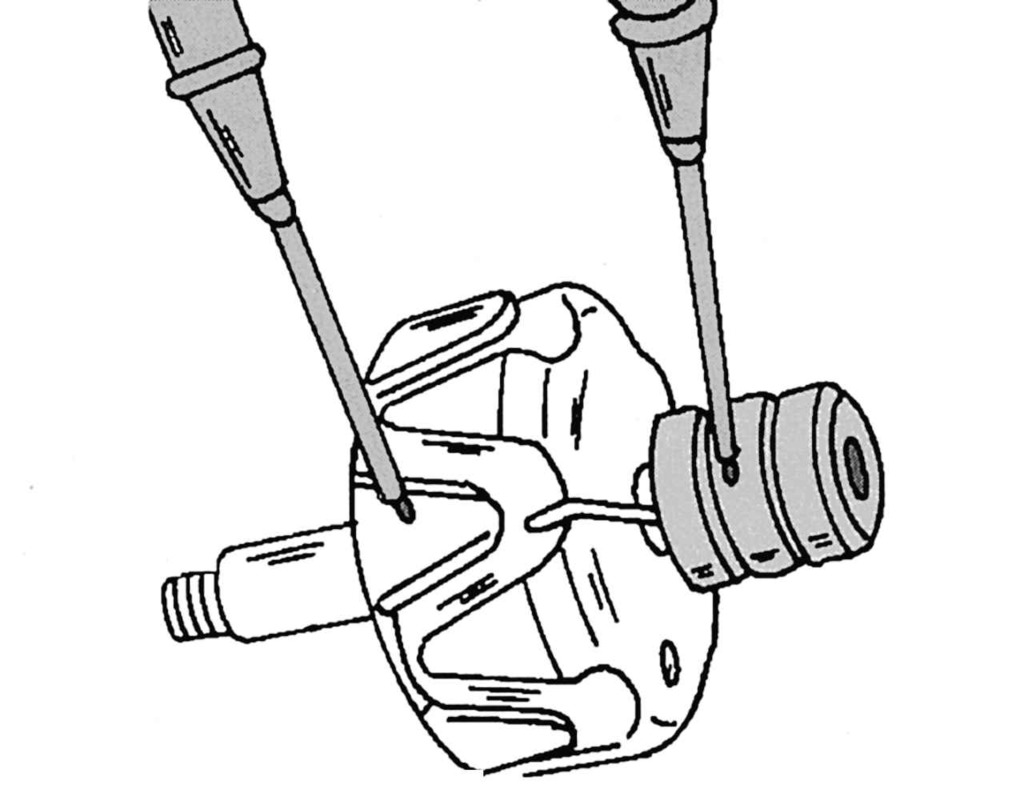
For a more detailed diagnosis of whether the generator is working, the starter must be checked additionally, but already in the kit. To do this, the resistance is measured between the output of any winding and their common "zero", it should be 0.3 ohms.
Battery charging voltage regulator relay
In order to avoid errors, before checking the charging of the machine's generator, the following nuances should be taken into account:
- normal for a car battery is a voltage of 12.5 - 12.7 V at its terminals, that is, in the entire on-board network with the engine turned off
- at idle with the internal combustion engine on, it reaches a value of 13.5 - 14.5 V, for some foreign cars, 14.8 V is considered normal
- at high speeds, the generator voltage drops to 13.7 V
- if the device shows 13 V when the internal combustion engine is running under load, the generator definitely needs to be repaired
- recharging 15 V is dangerous because the electrolyte boils, acid battery plates begin to crumble
- undercharging of 13 V will not allow accumulating in the battery the electricity spent when scrolling the flywheel at the time of start-up, the next train will be in doubt
Diagnostic operations must be performed sequentially:
- the engine is started with the starter key
- the headlights turn on for 15 minutes, the average speed is set for the whole time
- the voltage is measured between the terminal B + (30) of the generator and its "ground", it should be in the range of 13.5 - 14.5 V
After installing high-quality car audio, for which voltage drops in the on-board network are critical, many owners solve the problem radically:
- a compact voltmeter is purchased and mounted on the dashboard
- generator voltage is easily fixed, both at idle and at any engine speed
Readings are taken taking into account the characteristics of the generator and the voltage of the battery.
Thus, in case of generator malfunctions, an external inspection of the nodes and a hearing breakdown are first performed. Then diagnostics is used with a tester or multimeter to identify the most complex defects.