There are situations when it is necessary to paint your car. The reasons for this for each car owner may be different - to renew the surface of a used car (painting the whole car) or to paint over scratches, defects and damage on the surface.
Painting a car at a service station by qualified specialists will cost a very decent amount, so many car owners decide to paint it themselves. But how to do this if there is no experience in such a matter? To make self-painting a car look neat and beautiful, you will have to work hard for more than one week, and you will also need step-by-step instructions: how to paint the surface of a car body at home.
Here are some videos on how to paint a car with your own hands:
Full painting of a car with your own hands consists of several stages:
- preliminary preparation of the body surface for painting;
- cleaning and processing with auto-filler of defects in the car paintwork before painting;
- the final stage of preparing the surface of the car before painting;
- directly painting the car.
Preparing a car for painting with your own hands
First of all, before you paint the car, you need to prepare the room in which the painting work will be performed. It should be spacious enough (the working area is at least two meters around the entire perimeter of the car that needs to be painted). Before carrying out painting work, wash this room from dirt and dust, moisten the floor with water using a pneumatic sprayer. It is also worth preventing the shedding of dirt, cobwebs and plaster from the ceiling.

When the room is ready, we proceed to prepare the car for painting. First you need to wash it thoroughly. Plain water and detergent will help you clean the car body from road dust and dirt, and to remove stains of fatty and bituminous origin, you will need to use special tools (they can be purchased at any car store) or, in extreme cases, white spirit. On a clean surface, the paint will be easier to lay down, and the exterior of the car will look more neat.
Important! It is strictly forbidden to remove such stains with various solvents and gasoline!

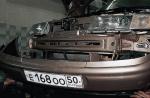
After cleaning the body of dirt, you need to remove the bumpers (rear and front), the decorative radiator grille, the antenna for the radio receiver, headlights and sidelights, all external lighting equipment, if any, shock protection in the wheel arches, from the car. After dismantling all parts, it is necessary to remove dirt on the flanged surface of the wings in the wheel openings. Thoroughly wash all dismantled auto parts, remove rust, dry them and put them in a separate place until painting is completed.
In order not to dismantle auto parts, you can paint over them with a paste, which is then easy to wash off: mix glycerin, chalk, dextrin and water in proportions 3:4:2:1. It is undesirable to use such a paste, so if it is possible to remove all the details, remove it.
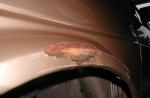
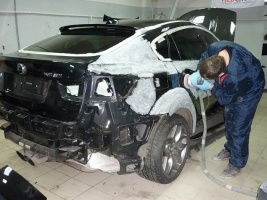
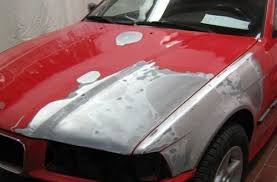
This completes the preliminary work on preparing the car body for painting, and you need to move on to cleaning up the defects. To do this, park the car in a well-lit area. On a sunny day, you can just put it on the street. Then very carefully and carefully study the paintwork of your car.
With colored chalk or acrylic paint (choose quick-dry paint in an aerosol can, you can buy it at an auto shop) mark dents, cracks, chipped paint and other large defects. Re-inspect your vehicle for missing defective areas, mark them in the same way.
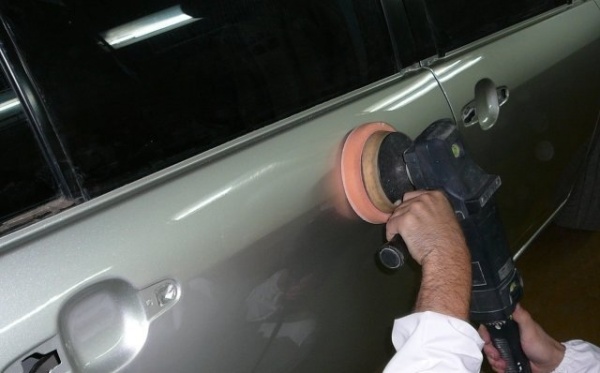
After all the defects have been identified, it is necessary to clean the defective areas to a clean metal surface, a chisel or a sharpened screwdriver (with a “sting” 3-5 mm wide) and sandpaper (No. 60-80) will help you in this process. Try so that the cleared area matches the area of the defective area as much as possible, this will help to avoid overspending of materials in the future and additional labor and time costs.
Pay attention to transitions from a defective surface to a non-defective one. It should be as smooth as possible, not have protrusions and overhanging edges of the old coating. To evaluate the smoothness of the transition, run your hand over the surface of the car body, because the hand is the most sensitive and accessible device, with its help you can determine the surface roughness within 0.03 millimeters.
To make it easier to remove the paintwork, use a cleaning solution: mix paraffin and xylene in a ratio of 10:45. Dissolve them at a temperature of eighty degrees, then cool to fifty degrees and add 45 parts of acetone to the composition. Using a spatula, apply the finished composition to the defective area, leave for half an hour, then check whether the coating peels off or not, if it is poorly removed, leave for another ten minutes.

After completing these steps, you need to thoroughly clean the car body from dust again, then wipe the places that you cleaned with a clean cotton rag, after wetting it in white spirit. After wiping, let them dry. The degree of degreasing of the surface of the car body is checked with filtered paper, swipe it over the body - if traces remain, wipe again with white spirit. Repeat the procedure until the paper stops leaving marks on the surface of the car.
In rare cases, when a car is being overhauled, it is necessary to completely clean the body of the paintwork. Of course, this is a very time-consuming process, especially if you are trying to paint a car for the first time on your own, but with great desire and stubborn
labor it is quite realistic to implement.
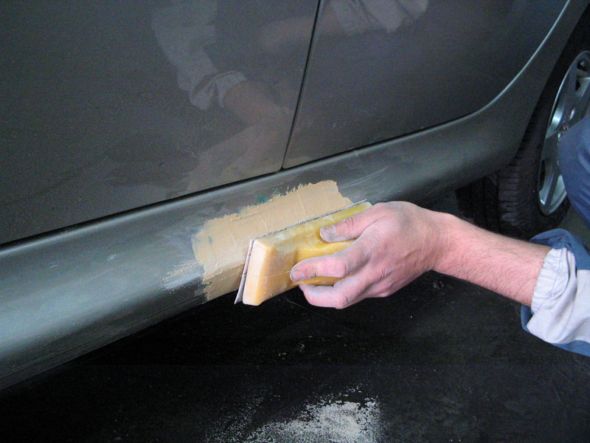
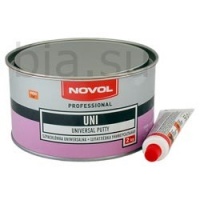
After all the defective places are cleaned, you can start puttingtying them. For this you will need:
- polyester synthetic putty;
- metal spatula;
- rubber spatula (with a width corresponding to the size of the area for putty);
- finishing auto-putty (its fine-grained consistency will facilitate the work when sanding).
Advice! It will be more convenient to mix the auto-filler with the hardener sold with the can with a metal spatula. You can make it yourself from a metal plate 1 mm thick and 150 by 150 mm in size.
In what proportions to mix putty and hardener, the instructions on the can will tell you, but the experience of specialists shows that you need to take two tablespoons of putty and a forty-millimeter "sausage" of hardener. Thoroughly mix the composition for a minute and you can start applying it to the protected defective areas. It is necessary to apply autofiller vigorously with cross movements with alternate turns of the hand by 90 degrees.
It is necessary to perform auto-putty quickly and accurately, since when stirred, chemical reactions occur in it, in which a certain amount of heat is released, and the composition quickly hardens.
As a result, you should get a flat, smooth surface that protrudes slightly above the main surface of the body. Complete hardening of the puttied place occurs approximately 45 minutes after application (at a temperature not lower than twenty degrees Celsius). How to check the readiness of the surface? To do this, there is a simple and proven way - run sandpaper over the putty place with sandpaper (grain No. 80), if the putty does not stick to the paper grains, but is poured with fine powder, then it has already completely hardened.
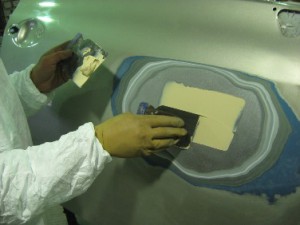
Next, you need to clean the surface that was putty. This is done manually using emery skins, changing their grain size from No. 120 to No. 600, bring the surface roughness to the level that will be identical to the roughness of the car body. The cleaning process is carried out in several stages, sometimes it is necessary to use prepared putty.
It is recommended to carry out grinding (cleaning the surface) dry, that is, it is not worth moistening the defective place with water. This is due to the fact that water degrades the quality of the putty; specialists use it only to avoid dust in the workplace.
Control puttied places by stroking the palm of your hand. At the final stage of filling the defective surface, once again carefully clean it of dust, wipe it with a clean cotton cloth moistened with white spirit, and let it dry. Then apply a thin layer of light gray primer from a spray can to the sanded areas, while going a little beyond the cleaned areas, this will help to control the quality of the surface treatment of the car. If you find more defects - fix them as described above.
The final stage of preparation for painting a car with your own hands
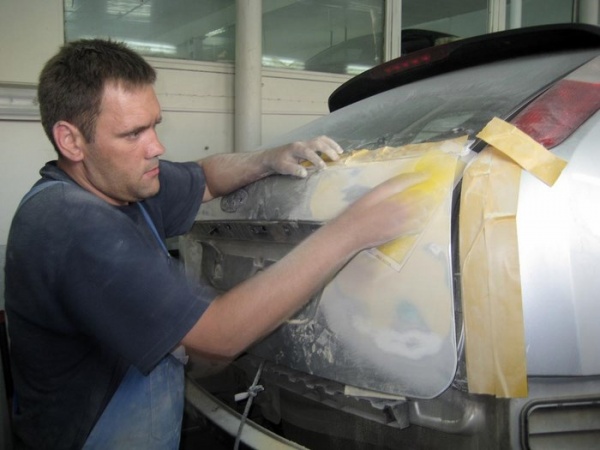
After thoroughly cleaning the car body from dust and dirt, it is necessary to paste over with masking tape or newspapers those places of the body that cannot be painted, in addition, you need to close the wheels.
Important! Between the painted and unpainted part of the body surface, a ledge will be visible, which is approximately 0.02 millimeters, so the painting borders should be located along the bends or borders of individual body parts.
Next, you need to bring the paint surface of the car to a matte state. To do this, sand it with sandpaper No. 1200. After that, again you need to clean the entire car body from dust and wipe it with a rag moistened with white spirit, then let the car dry. As a result, you should get a perfectly clean surface of the body.
Do-it-yourself car painting. Step-by-step instruction
All the preparatory work has been completed, and you can proceed to painting the car with your own hands.
Instructions for painting a car with your own hands:
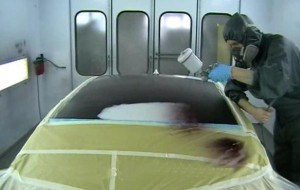
- paint gun, setting and application;
- painting a car with an aerosol can;
- how to check the varnish for painting a car for folding;
- do-it-yourself spray painting of a car.
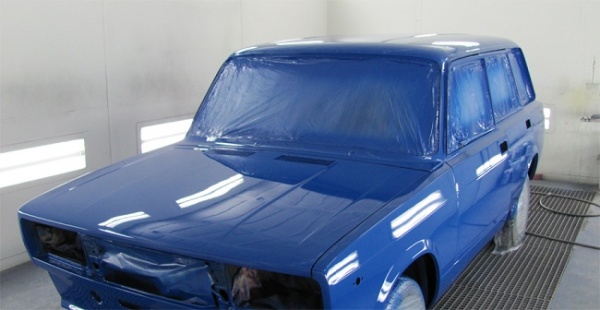
The depth and color of the enamel will show itself only after the second layer of car painting. The time required for the complete drying of the car is a day and a half (if the temperature is not lower than twenty degrees Celsius above zero).
If you follow the instructions, then it is quite possible to paint the car with your own hands. The main zeal and desire!