Radio-controlled models (cars, ships, aircraft or military equipment) need a source of electricity - a battery. If your model is powered by an electric motor, you will need a power battery, but if your model is driven by an internal combustion engine, you will still need a battery to power the radio, servos, gyroscope, or other electronics.
For radio-controlled models, nickel-cadmium (NiCd), nickel-metal hydride (NiMh), lithium polymer (LiPo), lithium iron phosphate (LiFePO4) batteries are used.
The main characteristics of batteries:
1.Capacity - measured in milliamp-hours, (mAh). The capacity of on-board batteries for equipment and servos can range from 200-300 mAh to 2000 mAh. Power batteries for electric motors can have a capacity of over 5000 mAh.

2. Cell voltage - it depends on the type of battery, for NiCd and NiMh it is 1.2 V. LiPo cells have a voltage of 3.6 V.
3. Battery voltage - the total voltage of the cells (the cells in the battery are connected in series). Is there a linear relationship? The higher the battery output voltage, the higher the maximum current that the battery can deliver.
4.Battery mass - depends on the type of battery and its capacity. One of the most important indicators of batteries is the ratio of capacity to mass (specific capacity). The higher this indicator, the greater the battery power reserve.
5. Current output - the ability of a battery to give a certain current under load. This value has a type designation "*C", where * is a numerical value, multiplying which by the battery capacity we get the current that the battery can deliver. Power batteries for radio-controlled models can have a current output of 10C or more.

6.Internal resistance - its value determines the current output of the battery. The smaller its value, the higher the current output.
Nickel-cadmium batteries
These batteries are often put on radio-controlled models as power (running) ones. NiCd battery cells are cylindrical in shape, for which they are nicknamed "banks". Nickel-cadmium batteries are not cheap, but they also “work off” their cost: such batteries are capable of delivering significant currents for a long time, have a long service life, and a significant number of cycles (charge-discharge).
Metal hydride batteries
NiMh batteries have similar shape and characteristics to nickel-cadmium batteries, but have more "elastic" performance and lower cost. Power NiMh batteries can last from 500 to 1000 charge-discharge cycles and from three to five years. With such batteries, the so-called "memory effect" is less pronounced than with NiCd batteries.
Lithium polymer batteries
LiPo batteries are a fairly recent development in the field of power supplies. Externally, these are rectangular plates with a nominal voltage of each element of 3.6 V (when fully charged - 4.2 V).

Their capacity can be very high (an indicator of specific capacity is almost three times greater than that of NiMh batteries). LiPo-batteries are more efficient, they are successfully used in modeling. These batteries require careful and careful handling.
Lithium iron phosphate batteries
This is the "youngest" type of batteries used in modeling. Such batteries have a capacity comparable to LiPo batteries, while at the same time being unpretentious and reliable batteries like NiCd. The cost of such batteries is high and they are not widely used in modeling.
When choosing a battery for a radio-controlled model, one should take into account its capacity (the capacity should be enough to ensure the full operation of the model for a certain time), voltage, dimensions, and the possibility of charging with existing chargers. The shape of the battery is also important: it must be suitable for your model. The shape is determined by the layout of the battery elements.
Charging batteries
Rechargeable batteries for radio-controlled models must be charged. To do this, there are various chargers: from the simplest, designed for "their" type and capacity of the battery, to universal chargers that work with all types of batteries and provide any charge, discharge modes that balance each battery element.
Simple chargers are not expensive, but the "quality" of the charge they provide is not the highest.

Simply put, these are “fixed” charges, for batteries of a certain type and capacity. Such chargers do not adapt to the changing characteristics of used batteries and are not recommended for use with batteries of different types, different capacities. And increasing the number of charges, having its own charger for each battery, is not the best move. Therefore, modellers sooner or later come to the need to purchase a high-quality multifunctional charger, for example or . Of course, such a R/C costs a lot of money, but it is a reasonable and even necessary investment.

The main thing that should be understood by the modeler is that each battery lasts longer and is more productive if it is provided with full charge and discharge cycles.
Greetings to all who looked at the light. The review will focus, as you probably already guessed, on the competent alteration of the power supply of a radio-controlled car from nickel to lithium, taking into account all the previous crutches. This method is quite simple and quite budgetary, so if you are interested, you are welcome under the cut…
Upd, added several options for protecting the electronics of the RC model
Previous version of the prefix aka prehistory:
A few months ago, I posted a little about reworking a model switchgear (Cop machine) based on an MT3608 boost converter, a TP4056 charging board with built-in protection, and one Li-Ion battery. The bottom line was simple: using the MT3608 converter, the voltage was raised from the battery to the required level, and the “folk” TP4056 scarf allowed the battery to be charged from any source with a USB output. The wiring diagram was very simple: 
When soldered and fixed with hot glue, it looked like this: 
Charging the machine was simple and convenient: 
But during the operation, some shortcomings were revealed, namely, when the current consumption of the switchgear model was more than 1.5A, the protection worked out and the power was lost for a short time. This concerned mainly serious RC models with more or less powerful engines. In my version, the machine at the maximum consumed about 0.9A and there were no malfunctions. But with a significant decrease in battery voltage, I experienced exactly the same situation - at the peak of the load, the machine twitched. Since the machine was used infrequently, the capacity of the built-in battery was decent, and it was commonplace to be too lazy to deal with this topic, everything was left as it is. At the first symptoms of "twitching", the machine was simply put on charge. More recently, free time has appeared and another way of reworking has been invented. In terms of costs, it is slightly more expensive than the previous one, but it has some advantages, which will be discussed below.
To begin with, let me remind you of the advantages of lithium power supplies (Li-Ion / Li-Pol) over nickel (NiCd). In our case, the comparison is only with NiCd, because only they can deliver high current. For example, let's compare the native battery of the machine and the version after the alteration:
- high energy density. The machine has one cadmium battery 5S 6V 700mah stored energy 6 * 0.7 = 4.2Wh, and in the version after the alteration there will be two lithium batteries 18650 3.7V 3350mah connected in series. The stored energy will be equal to 7.4 * 3.35 = 24.8Wh, respectively. As we can see, the stored energy is several times higher, which allows the machine to work much longer. If we compare face to face one NiCd and one Li-Ion / Li-Pol battery, then the difference is simply huge
- no memory effect, i.e. you can charge them at any time without waiting for a full discharge
- smaller dimensions with the same parameters as NiCd (compared to nickel assembly)
- fast charge time (not afraid of high charge currents) and clear indication
- low self-discharge
Of the minuses of Li-Ion, only:
- low frost resistance of batteries (they are afraid of negative temperatures)
- balancing of cans is required when charging (in the case of 2S or more) and the presence of overdischarge protection
As you can see, the advantages of lithium are obvious, especially for home use, so there is a sense of alteration.
Briefly about the converted RU model:
So take two
I did not step on the same rake, so I immediately decided on a diagram of two series-connected Li-Ion batteries using a 2S BMS protection board. The main disadvantages of this scheme are the uneven discharge of batteries depending on their condition and the low prevalence of chargers for such a connection, as well as possible damage to the electronics of the switchgear model from an overestimated supply voltage. The BMS fee is obligatory here, because protects batteries from overdischarge, so I recommend not to neglect it. But the situation with the charge to this day has improved somewhat. There are two simple budget ways to charge a lithium 2S battery:
1) A wild collective farm in the form of two TP4056 charge scarves for each battery and two network adapters / PSUs for charging them. If the farm has two more or less normal adapters with an output of 0.5-1A, then the option is quite suitable. You will need to spend a little money on TP4056 scarves, but again, charging will not be very convenient. If there are no network adapters / PSUs, then, as they say, the skin is not worth the candle and it is better to abandon this method
2) We use specialized memory for 2S-3S assemblies. There are plenty of them on the sites now, they cost around $ 5. At the same time, they can be useful in the future, for example, for simultaneously charging various Li-Ion / Li-Pol batteries, for altering power tools, etc.
Necessary components for refinement:
As you can see, no expensive components are required: 
The main brain of the system is the 2S BMS protection board XWS8232FR4, costing about one dollar: 
It is not difficult to guess that it is based on the same Seiko S8232U controller and a power mosfet: 
The most expensive of all components is the 2S-3S ImaxRC B3 charger, which costs about $5: 
It is a copy of the famous SkyRC e3 charger, but with more modest charging characteristics: 
I have the original and another version, but on 4S, which I will talk about and compare head to head in future articles. By the way, there are a lot of these copies, at least I saw 3 things, but in my opinion, the circuitry is similar there.
Batteries are the next important element. I used Panasonic NCR18650BF Li-Ion batteries from Xiaomi PB 10000mah, each with a capacity of 3350mah: 
In this implementation, it is desirable to use modern high-capacity banks with an underestimated discharge threshold of 2.5V. There are a lot of models (high-capacity Sanyo / Panasonic / Samsung / LG banks), everything above 2800mah usually comes with a discharge threshold of 2.5V. Folk Sanyo/Samsung 2600mah are not very suitable for this scarf, because. have a somewhat "overestimated" discharge threshold in the region of 2.75V. A small difficulty is soldering the power wires to the battery contacts. If there is no desire to bother with soldering, then you can attach a one / two-slot holder / holder under f / f 18650, for example.
To charge the future RC model, you will need one USB connector (male and female), as well as a 3-pin connector for connecting to the charger. It is often found in CPU coolers. I found these components in my stash, the USB “dad” bit off the worst twisted charging cable: 
All these components cost a penny and may be found in the closet.
Handkerchief testing:
A few words about the protection scarf. The connection is very simple, the only difficulty is that its dimensions are small, so you need to solder the wires carefully. The connection diagram is as follows: 
Let me briefly explain: green indicates the connections responsible for the operation of the board, and blue indicates the connection points to the charger. It is advisable to solder the outputs from the memory precisely to the battery contacts, in order to avoid additional losses, but if this is not possible, the option of connecting to the protection board will also do.
This scarf is the simplest, so if you need an analogue, then look on the Internet sites by the name "2S bms" or "2S Li-ion Lithium Battery Protection Board": 
The most important thing for me in the handkerchief was the battery shutdown threshold. To do this, I bungled a small stand. Here, the Gophert CPS-3010 PSU acts as one battery, for which I recently made a regular Li-Ion battery. By changing the voltage on the adjustable power supply, you can find out the exact threshold for triggering the handkerchief. Voltage of the second battery 3.8V: 
If you set the output voltage to 4.2V on the PSU, then the output will be 8V (4.2V + 3.8V), which can be seen on the left screen. The multimeter here measures the output voltage from the 2S BMS board. If you set 3.8V to the PSU, then the output will be 7.6V (right screen): 
Everything is working normally. Now we look at the protection threshold. When 2.41V is installed, the scarf continues to work and the total voltage from both cans is output (left screen), but as soon as we reduce it to 2.4V, the protection is triggered and the scarf turns off the output voltage (right screen): 
In total, the protection threshold for any of the two batteries is 2.4V. That's why I wrote that "folk" 2600mah batteries are not very suitable here. There is a blocking, i.e. The handkerchief does not "repair" itself. Unfortunately, I did not measure the protection current, but it should be around 3A.
Direct assembly:
When all the necessary components are available, you can proceed. First of all, we assemble a 2S assembly of Li-Ion batteries. This is an option for those who do not like the option with holders for 18650 cans, for example, because of the dimensions. To do this, stick two strips of electrical tape on each battery. This is necessary to insure against short circuit protection, since the heat shrinkage of the batteries is quite thin and can be damaged. Given the fact that RC models are usually subject to shock, shaking, etc. - There will be no extra reinsurance. After that, we connect the batteries with stripes to each other and wrap them with a layer of electrical tape (other insulators can be used): 
Next, you can start soldering the contacts. I have repeatedly described how to do this, so I will not repeat myself (there will be a detailed video in the review of altering the screwdriver). Soldering does not bring much harm, the main thing is not to hold the soldering iron tip for a long time, and to use an active flux, such as soldering or phosphoric acid. After it, do not forget to wipe the place of soldering with alcohol!
Next, we take the wire, if desired, we clean it as in the photo on the left (you can do it with two wires) and solder together the connection of the batteries and the input of the handkerchiefs. It should roughly look like this: 
I won't go into detail here as there are many options. The option is closer to me when the batteries and the protection scarf are together, since the losses in the wires are minimal. Next, solder the remaining wiring according to the same scheme (see above): 
This completes the assembly of the 2S battery, but it still needs to be charged somehow. To do this, we will use a ready-made inexpensive charger, which is an analogue of three linear charging controllers with independent power supply for each arm. Since the charger can charge both 2S and 3S assemblies (optimal for Shurik), it can be useful in the future not only for charging RC models. To charge the 2S assembly, we need the left connector: 
To confirm polarity measurements: 
At idle, the voltage jumps a little, but when charging the battery, the limit is exactly 4.2V per bank.
For convenient connection to the charger, I soldered the adapter from the USB “male” connector and the three-pin connector, insulated the soldering place with heat shrink: 
Since the wiring is frail, I wrapped everything with electrical tape to increase mechanical strength: 
The USB female connector is for the RC model. To do this, we make a corresponding hole and insert the USB connector until it stops (the connector has stops at the end): 
For a more reliable fixation, we solder three wires of sufficient length and fix with hot glue: 
Next, one of the important steps is the connection of the resulting 2S battery assembly with the charger contacts according to the diagram from the “Testing the scarf” section. Here we follow the proverb - measure seven times, cut once. We check the pinout of all connectors and solder the wires. I will not confuse you with my "snot", because they will all be different for everyone. Once again, we check everything and connect. If all is well, we put the whole household and assemble the RU model. The battery itself is left in the battery compartment. To prevent the battery from floundering, we put a bubble or isolon next to it. I got it like this: 
Open the door of the machine and connect the charger. If the batteries are discharged, then the charger starts charging, while the indicators are red. If there is an imbalance and one of the two cans is charged faster, its charge stops and the indicator changes to green (right screen): 
Once both batteries are charged, all indicators will be green: 
Based on operating experience, I can say the following that this budget charger is not bad, the charge current per shoulder is about 900mA (at 2S), plus it is possible to charge both 2S and 3S assemblies. For more detailed specifications and comparisons with other models, see future reviews.
The implementation of charging the machine turned out to be the same as in the previous version. To charge, we move the door and connect it, you don’t need to disassemble anything: 
Now about the consumed currents.
In standby mode, the machine board eats 56ma: 
Normal driving - around 300ma: 
The maximum current consumption is about 900mA: 
We launch - everything flies. This option is not at all more complicated than the previous one, but the characteristics of the RC model will increase. The only danger is whether the electronics of the toy can digest 8.4V.
This is all I have...
Addition 1:
Since not all switchgear models are designed for high supply voltage, if desired, you can reduce the voltage with an excellent step-down DC-DC converter: 
The only remark is that the tuning resistor after adjustment must be fixed with varnish or glue. This converter has a compact size, high efficiency and a decent operating current of about 3A. On the sites you can also find other options for converters. Google for "DC-DC step down".
The second option, as correctly noted in the comments, is to limit the operating current with a simple current-limiting resistor. This is necessary to protect the motors from excessive current. Since it seems to work fine for me, I didn’t change anything. For those who need it, I offer a small calculation of the resistor for my version. To do this, you need to decide on the denominations:
- U (pit) - supply voltage from the assembly. In our case, let it be 8V (two batteries)
- U (electric) - the supply voltage of the electronics of the machine (RC model). In our case, the standard was 6V (5 consecutive NiCd batteries)
- U (extinguishing) - the difference between the "new" power supply and the "standard" power before rework
- I (slave) - limiting current, i.e. maximum for the machine. In my version, at the maximum, the machine eats 0.9A. To protect the engines, you can set, say, 0.5A
- R (extinguishing) - resistance of the current-limiting resistor (see calculation)
- P (extinguishing) - resistor power (see calculation)
So, we calculate everything according to Ohm's law: I \u003d U / R
U (quenching) \u003d U (pit) - U (electric) \u003d 8 - 6 \u003d 2V
R (quenching) \u003d U (quenching) / I (slave) \u003d 2 / 0.5 \u003d 4 Ohm
P (quenching) \u003d I (slave) * I (slave) * R (quenching) \u003d 0.5 * 0.5 * 4 \u003d 1 W
Based on the calculations, we need a 4 Ohm resistor with a power of at least 1 W. It is better to take it with a margin of 5 W so as not to overheat: 
Good afternoon
I bought a r / y car for a child. But I ran into one problem. Good batteries cost decently, and given that there are 5 of them in a car, replacing them during an active game is comparable to the cost of refueling a real car. It was decided to find a suitable size Li-Ion or Li-Po battery for installation in the battery compartment of the machine.
I already had a charger for such batteries (IMAX B6) and there will be no problems with charging. Having searched on Aliexpress, I settled on the Dualsky XP08002ECO, its size was ideal for installation in a typewriter. I only had to make two simple adjustments. The first is to bite out the rather high partitions between the AA elements. The second is to solder a tail with a JST connector to connect a Li-Po battery. Tail with JST connector ordered.
photo cars 
Battery compartment with batteries (the tail for Li-Po has already been soldered) 
Battery compartment with cut-out partitions 
Li-Po connection using a temporary tail (there is no standard connector, there is a possibility of polarity reversal) 
Li-Po battery in the battery compartment 
The machine works great.
The battery capacity is as advertised.
I bought two batteries at once for quick replacement during a walk.
The package with the battery contained 4 stickers with the logo of the battery manufacturer. The child did not want to stick them on a new typewriter. I pasted two on an old Toyota Corolla. 
Until I put a regular tail with the original JST connector, I will change the battery myself, otherwise the child may confuse the polarity. When discharged to 7V, this machine becomes sluggish and therefore the probability of overdischarging the battery is small.
I don’t give technical specifications, they are on the product page. Battery life as well. It will depend both on the implementation of the electronics of a particular r / a model, and the underlying surface on which you drive. And the weather has not been happy lately, but this model is too big for the house.
This is my first review do not kick much. I welcome criticism.
The item was purchased with my own money.
Greetings to all who looked at the light. The review will focus, as you probably already guessed, on the competent alteration of the power supply of a radio-controlled car from nickel to lithium, taking into account all the previous crutches. This method is quite simple and quite budgetary, so if you are interested, you are welcome under the cut…
Upd, added several options for protecting the electronics of the RC model
Previous version of the prefix aka prehistory:
A few months ago, I posted a little about reworking a model switchgear (Cop machine) based on an MT3608 boost converter, a TP4056 charging board with built-in protection, and one Li-Ion battery. The bottom line was simple: using the MT3608 converter, the voltage was raised from the battery to the required level, and the “folk” TP4056 scarf allowed the battery to be charged from any source with a USB output. The wiring diagram was very simple: 
When soldered and fixed with hot glue, it looked like this: 
Charging the machine was simple and convenient: 
But during the operation, some shortcomings were revealed, namely, when the current consumption of the switchgear model was more than 1.5A, the protection worked out and the power was lost for a short time. This concerned mainly serious RC models with more or less powerful engines. In my version, the machine at the maximum consumed about 0.9A and there were no malfunctions. But with a significant decrease in battery voltage, I experienced exactly the same situation - at the peak of the load, the machine twitched. Since the machine was used infrequently, the capacity of the built-in battery was decent, and it was commonplace to be too lazy to deal with this topic, everything was left as it is. At the first symptoms of "twitching", the machine was simply put on charge. More recently, free time has appeared and another way of reworking has been invented. In terms of costs, it is slightly more expensive than the previous one, but it has some advantages, which will be discussed below.
To begin with, let me remind you of the advantages of lithium power supplies (Li-Ion / Li-Pol) over nickel (NiCd). In our case, the comparison is only with NiCd, because only they can deliver high current. For example, let's compare the native battery of the machine and the version after the alteration:
- high energy density. The machine has one cadmium battery 5S 6V 700mah stored energy 6 * 0.7 = 4.2Wh, and in the version after the alteration there will be two lithium batteries 18650 3.7V 3350mah connected in series. The stored energy will be equal to 7.4 * 3.35 = 24.8Wh, respectively. As we can see, the stored energy is several times higher, which allows the machine to work much longer. If we compare face to face one NiCd and one Li-Ion / Li-Pol battery, then the difference is simply huge
- no memory effect, i.e. you can charge them at any time without waiting for a full discharge
- smaller dimensions with the same parameters as NiCd (compared to nickel assembly)
- fast charge time (not afraid of high charge currents) and clear indication
- low self-discharge
Of the minuses of Li-Ion, only:
- low frost resistance of batteries (they are afraid of negative temperatures)
- balancing of cans is required when charging (in the case of 2S or more) and the presence of overdischarge protection
As you can see, the advantages of lithium are obvious, especially for home use, so there is a sense of alteration.
Briefly about the converted RU model:
So take two
I did not step on the same rake, so I immediately decided on a diagram of two series-connected Li-Ion batteries using a 2S BMS protection board. The main disadvantages of this scheme are the uneven discharge of batteries depending on their condition and the low prevalence of chargers for such a connection, as well as possible damage to the electronics of the switchgear model from an overestimated supply voltage. The BMS fee is obligatory here, because protects batteries from overdischarge, so I recommend not to neglect it. But the situation with the charge to this day has improved somewhat. There are two simple budget ways to charge a lithium 2S battery:
1) A wild collective farm in the form of two TP4056 charge scarves for each battery and two network adapters / PSUs for charging them. If the farm has two more or less normal adapters with an output of 0.5-1A, then the option is quite suitable. You will need to spend a little money on TP4056 scarves, but again, charging will not be very convenient. If there are no network adapters / PSUs, then, as they say, the skin is not worth the candle and it is better to abandon this method
2) We use specialized memory for 2S-3S assemblies. There are plenty of them on the sites now, they cost around $ 5. At the same time, they can be useful in the future, for example, for simultaneously charging various Li-Ion / Li-Pol batteries, for altering power tools, etc.
Necessary components for refinement:
As you can see, no expensive components are required: 
The main brain of the system is the 2S BMS protection board XWS8232FR4, costing about one dollar: 
It is not difficult to guess that it is based on the same Seiko S8232U controller and a power mosfet: 
The most expensive of all components is the 2S-3S ImaxRC B3 charger, which costs about $5: 
It is a copy of the famous SkyRC e3 charger, but with more modest charging characteristics: 
I have the original and another version, but on 4S, which I will talk about and compare head to head in future articles. By the way, there are a lot of these copies, at least I saw 3 things, but in my opinion, the circuitry is similar there.
Batteries are the next important element. I used Panasonic NCR18650BF Li-Ion batteries from Xiaomi PB 10000mah, each with a capacity of 3350mah: 
In this implementation, it is desirable to use modern high-capacity banks with an underestimated discharge threshold of 2.5V. There are a lot of models (high-capacity Sanyo / Panasonic / Samsung / LG banks), everything above 2800mah usually comes with a discharge threshold of 2.5V. Folk Sanyo/Samsung 2600mah are not very suitable for this scarf, because. have a somewhat "overestimated" discharge threshold in the region of 2.75V. A small difficulty is soldering the power wires to the battery contacts. If there is no desire to bother with soldering, then you can attach a one / two-slot holder / holder under f / f 18650, for example.
To charge the future RC model, you will need one USB connector (male and female), as well as a 3-pin connector for connecting to the charger. It is often found in CPU coolers. I found these components in my stash, the USB “dad” bit off the worst twisted charging cable: 
All these components cost a penny and may be found in the closet.
Handkerchief testing:
A few words about the protection scarf. The connection is very simple, the only difficulty is that its dimensions are small, so you need to solder the wires carefully. The connection diagram is as follows: 
Let me briefly explain: green indicates the connections responsible for the operation of the board, and blue indicates the connection points to the charger. It is advisable to solder the outputs from the memory precisely to the battery contacts, in order to avoid additional losses, but if this is not possible, the option of connecting to the protection board will also do.
This scarf is the simplest, so if you need an analogue, then look on the Internet sites by the name "2S bms" or "2S Li-ion Lithium Battery Protection Board": 
The most important thing for me in the handkerchief was the battery shutdown threshold. To do this, I bungled a small stand. Here, the Gophert CPS-3010 PSU acts as one battery, for which I recently made a regular Li-Ion battery. By changing the voltage on the adjustable power supply, you can find out the exact threshold for triggering the handkerchief. Voltage of the second battery 3.8V: 
If you set the output voltage to 4.2V on the PSU, then the output will be 8V (4.2V + 3.8V), which can be seen on the left screen. The multimeter here measures the output voltage from the 2S BMS board. If you set 3.8V to the PSU, then the output will be 7.6V (right screen): 
Everything is working normally. Now we look at the protection threshold. When 2.41V is installed, the scarf continues to work and the total voltage from both cans is output (left screen), but as soon as we reduce it to 2.4V, the protection is triggered and the scarf turns off the output voltage (right screen): 
In total, the protection threshold for any of the two batteries is 2.4V. That's why I wrote that "folk" 2600mah batteries are not very suitable here. There is a blocking, i.e. The handkerchief does not "repair" itself. Unfortunately, I did not measure the protection current, but it should be around 3A.
Direct assembly:
When all the necessary components are available, you can proceed. First of all, we assemble a 2S assembly of Li-Ion batteries. This is an option for those who do not like the option with holders for 18650 cans, for example, because of the dimensions. To do this, stick two strips of electrical tape on each battery. This is necessary to insure against short circuit protection, since the heat shrinkage of the batteries is quite thin and can be damaged. Given the fact that RC models are usually subject to shock, shaking, etc. - There will be no extra reinsurance. After that, we connect the batteries with stripes to each other and wrap them with a layer of electrical tape (other insulators can be used): 
Next, you can start soldering the contacts. I have repeatedly described how to do this, so I will not repeat myself (there will be a detailed video in the review of altering the screwdriver). Soldering does not bring much harm, the main thing is not to hold the soldering iron tip for a long time, and to use an active flux, such as soldering or phosphoric acid. After it, do not forget to wipe the place of soldering with alcohol!
Next, we take the wire, if desired, we clean it as in the photo on the left (you can do it with two wires) and solder together the connection of the batteries and the input of the handkerchiefs. It should roughly look like this: 
I won't go into detail here as there are many options. The option is closer to me when the batteries and the protection scarf are together, since the losses in the wires are minimal. Next, solder the remaining wiring according to the same scheme (see above): 
This completes the assembly of the 2S battery, but it still needs to be charged somehow. To do this, we will use a ready-made inexpensive charger, which is an analogue of three linear charging controllers with independent power supply for each arm. Since the charger can charge both 2S and 3S assemblies (optimal for Shurik), it can be useful in the future not only for charging RC models. To charge the 2S assembly, we need the left connector: 
To confirm polarity measurements: 
At idle, the voltage jumps a little, but when charging the battery, the limit is exactly 4.2V per bank.
For convenient connection to the charger, I soldered the adapter from the USB “male” connector and the three-pin connector, insulated the soldering place with heat shrink: 
Since the wiring is frail, I wrapped everything with electrical tape to increase mechanical strength: 
The USB female connector is for the RC model. To do this, we make a corresponding hole and insert the USB connector until it stops (the connector has stops at the end): 
For a more reliable fixation, we solder three wires of sufficient length and fix with hot glue: 
Next, one of the important steps is the connection of the resulting 2S battery assembly with the charger contacts according to the diagram from the “Testing the scarf” section. Here we follow the proverb - measure seven times, cut once. We check the pinout of all connectors and solder the wires. I will not confuse you with my "snot", because they will all be different for everyone. Once again, we check everything and connect. If all is well, we put the whole household and assemble the RU model. The battery itself is left in the battery compartment. To prevent the battery from floundering, we put a bubble or isolon next to it. I got it like this: 
Open the door of the machine and connect the charger. If the batteries are discharged, then the charger starts charging, while the indicators are red. If there is an imbalance and one of the two cans is charged faster, its charge stops and the indicator changes to green (right screen): 
Once both batteries are charged, all indicators will be green: 
Based on operating experience, I can say the following that this budget charger is not bad, the charge current per shoulder is about 900mA (at 2S), plus it is possible to charge both 2S and 3S assemblies. For more detailed specifications and comparisons with other models, see future reviews.
The implementation of charging the machine turned out to be the same as in the previous version. To charge, we move the door and connect it, you don’t need to disassemble anything: 
Now about the consumed currents.
In standby mode, the machine board eats 56ma: 
Normal driving - around 300ma: 
The maximum current consumption is about 900mA: 
We launch - everything flies. This option is not at all more complicated than the previous one, but the characteristics of the RC model will increase. The only danger is whether the electronics of the toy can digest 8.4V.
This is all I have...
Addition 1:
Since not all switchgear models are designed for high supply voltage, if desired, you can reduce the voltage with an excellent step-down DC-DC converter: 
The only remark is that the tuning resistor after adjustment must be fixed with varnish or glue. This converter has a compact size, high efficiency and a decent operating current of about 3A. On the sites you can also find other options for converters. Google for "DC-DC step down".
The second option, as correctly noted in the comments, is to limit the operating current with a simple current-limiting resistor. This is necessary to protect the motors from excessive current. Since it seems to work fine for me, I didn’t change anything. For those who need it, I offer a small calculation of the resistor for my version. To do this, you need to decide on the denominations:
- U (pit) - supply voltage from the assembly. In our case, let it be 8V (two batteries)
- U (electric) - the supply voltage of the electronics of the machine (RC model). In our case, the standard was 6V (5 consecutive NiCd batteries)
- U (extinguishing) - the difference between the "new" power supply and the "standard" power before rework
- I (slave) - limiting current, i.e. maximum for the machine. In my version, at the maximum, the machine eats 0.9A. To protect the engines, you can set, say, 0.5A
- R (extinguishing) - resistance of the current-limiting resistor (see calculation)
- P (extinguishing) - resistor power (see calculation)
So, we calculate everything according to Ohm's law: I \u003d U / R
U (quenching) \u003d U (pit) - U (electric) \u003d 8 - 6 \u003d 2V
R (quenching) \u003d U (quenching) / I (slave) \u003d 2 / 0.5 \u003d 4 Ohm
P (quenching) \u003d I (slave) * I (slave) * R (quenching) \u003d 0.5 * 0.5 * 4 \u003d 1 W
Based on the calculations, we need a 4 Ohm resistor with a power of at least 1 W. It is better to take it with a margin of 5 W so as not to overheat: 

Finally, after many months of waiting, refunds and repeated orders, a radio-controlled car with a little-known name Feyon 05 was bought. The first time they paid 120 dollars for it, the second time they found it cheaper - for only 70 (feel the difference) and a week later a huge 4, The 5 kg box was on the table.
Everything worked perfectly, the car is beyond praise, but it's not about her, but about an additional 2S LiPo battery, which we assembled ourselves in addition to the main one, charged by a 7.4 V to 800 mA adapter.

A powerful motor + servo draws a current of several amperes, and the 1500 mA battery from the kit sits down after 15 minutes - this is not enough. Longer to drag the car to the racing range.

I had to look for an additional block of 2S lithium batteries, that is, to buy another powerful set.


Here the designation "2S" is the number of cells in the battery. In this case, there are two of them with a total voltage of 7.4V (for 3S, respectively, 3X3.7 = 11.1 volts).
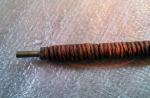
After a short search, such a picture was drawn that it is more profitable to take a pair of ordinary 18650s with a good current and solder the battery yourself using standard connectors. Just in the household there were several such cans of 3500 mA lying around, though with built-in protection boards (against overdischarge and overload).

The battery was soldered according to the usual scheme, using a "T" type plug for the power line and a second smaller one for the charger.

It’s not a matter of ordering them on the Internet or looking for them on the radio bazaar - it’s a long wait, so the power one was taken from a set of cables from the Imax B6 charger (there are 3 of them), and the second one was found from the board of some kind of washer.

After assembling and wrapping with electrical tape, I had to disassemble everything again, without this there was no way)) It turned out that the protection board constantly works and turns off the battery, because the starting current of the machine exceeds 5-6 amperes.

We'll have to open the battery and tear off the scarf. It was fastened on 2 metal tapes.


We assemble again, already without unnecessary electronics. Soldering without chemistry will not work, no matter how much you clean the metal with a needle file, you will have to use soldering acid. With her luditsya "with a bang."

Now it's a different matter - it works great and charges, however, compared to the standard 1500 mA battery, the new 3500 milliamp did not give much time gain. Obviously there is not quite 3.5 A (more precisely, not at all).
In this way, you can make any blocks of LiPo (or LI-Ion) batteries - for any number of cells (2S, 3S, 4S, 5S, 6S ...) and any current. In all radio-controlled models of this class, their wiring is standard.
And a few more words about the jeep itself: it drives just fine due to the wide soft wheels, the powerful 380 engine, smooth steering and speed control. You can slowly crawl up the hills like a rock crawler, you can drive under 50 km along the highway. It is not positioned as waterproof, but 3 crazy rides in wet snow, as a result of which the car was covered with snow from and to, and everything inside was wet (including the motor, regulator and servo) - did not affect the operation of the electronics. In general, the tachila is just super!
Discuss the article HOMEMADE BATTERY FOR RC MODELS