Scheme of winding the speedometer "GAZ"
If you have a need to change the speedometer of a GAZ car, you can easily and simply do this with the help of special devices. Perhaps their main advantage is that you can wind the speedometer yourself, without the cost of paying for the work of specialists.
When is it necessary to rewind the GAZ speedometer?
Today, do-it-yourself winding of the GAZ speedometer is in demand among many motorists. The main reasons for the need to rewind the speedometer include:
premature passage of maintenance;
failure of one or more electronic devices;
purchase of a new car engine;
installation of non-standard wheels;
purchase of a new dashboard.
compensation of fuel expenses by drivers (an artificial increase in the distance traveled allows the driver to write off “extra” gasoline quite legally).
How to wind the speedometer on GAZ?
Very often, the owners of the Gazelle have the question: “Is it possible to tweak the mileage of the GAZ on your own? If so, what does the winding scheme of the Gazelle speedometer look like? Let's figure it out together.
In order to change the speedometer readings on the GAZ, you will need a lot of time. For this you need:
1. Remove the speedometer box
2. Get to the electric motor
3. Twist it with a cable
4. Remove and disassemble the speedometer glass shield
5. Manually rotate the rollers showing the mileage of the car to the desired readings.
But believe me, this is a very long and painstaking task. Well, if you only need to wind a few kilometers. How about a few hundred? That is why the owners of "GAS" increasingly began to give preference to special devices designed to increase the mileage.
How to use the winding of the speedometer on the "GAZ"?
How to wind a speedometer on a gazelle using a device? Easily! The principle of winding is very simple:
the device imitates pulses of the speed sensor;
the car receives information about the movement from the on-board computer;
odometer readings change upwards.
Thus, in just an hour you can "drive" about 200-300 kilometers!
Do not be afraid that the device will create a serious load on the battery - in fact, winding consumes very little energy at all, and its use will not affect the battery charge in any way.
To make it easier for you to understand the principle of operation of the winder, we will provide a scheme for winding the GAZ speedometer:
In order for the winder to start working, you must:
connect it to the Gazelle speed sensor (located under the steering column in the block);
wind up kilometers to the desired number.
And that's it! You can safely go to THAT. Due to the fact that the mileage information changes in all electronic units at once, no one will suspect you of artificially increasing the mileage of your Gazelle, no matter what diagnostic equipment is used for this?
Where to buy a speedometer winder for GAZ?
The Avtopribor company suggests that you do not waste your precious time searching for a GAZ speedometer winder scheme on the Internet and increasing the car's mileage manually. It is better to contact us and buy an inexpensive and reliable speedometer winder. This device will help you quickly and safely increase the mileage of the Gazelle. Our experts will clearly explain how to connect and use the device, as well as advise you in detail on all the features of its operation.
Speedometer readings are often one of the criteria by which the quality and timing of car maintenance are evaluated. More precisely, this refers to the odometer, which is an integral part of the device that measures the distance traveled. In order not to violate the generally accepted name of the device, it will continue to be called that way. Often, for a number of reasons, sometimes subjective, it is necessary to rewind the speedometer, changing the path traveled by the car.
About types of speedometers
Before you figure out how you can change the readings of such a device with your own hands, you need to consider its possible options. There are several fundamentally different types of speedometers:
- mechanical;
- electromechanical;
- electronic.
mechanical speedometer
Gearbox revolutions are transmitted by cable directly to the device. There, the number of revolutions is measured and converted into the distance traveled. To do this, a gearbox with a pre-selected conversion factor is used. How this is done, the photo will help to understand.
In fact, it turns out that one revolution at the output of the gearbox corresponds to a certain number of meters of the distance traveled. This rotation of the output shaft is perceived by special discs (display device) with printed numbers showing the measured distance.
Electromechanical speedometer
This type of device is a further development of the previously described device. In many cases, the cable has been the source of the increased error and has been replaced. The speed sensor installed at the checkpoint was introduced into the device. Impulses from it came to a motor with appropriate control, rotating the gearbox. Otherwise, the operation of such a speedometer was no different from a mechanical one, resembling it in appearance.
Electronic speedometer
This type is installed on modern cars. In this case, the number of revolutions of the wheel is measured. Knowing the length of its circumference, it is easy to translate the number of revolutions into the distance traveled. The result is displayed on the LCD. 
Why change the speedometer readings?
As already noted, drivers sometimes have to change the speedometer. In this case, the mileage is made both less and more. And if in the first case everything is clear - a decrease in the distance traveled when selling a car increases its price, then a few explanations need to be made about the second.
Winding up the speedometer is possible for several reasons, for example:
- To increase fuel costs. More mileage allows you to write off more fuel. And this is not necessarily due to fraud and postscripts. The fact is that in an old, worn-out car, fuel consumption sometimes exceeds the established norms. This is how you make up for the increased costs.
- When replacing the engine or instrument panel. In this case, it is necessary to bring the speedometer readings in line with the new conditions.
- When using discs other than those recommended by the manufacturer. Their diameter can be either larger or smaller than that specified for a standard wheel, respectively, when calculating the distance traveled, a constant error will occur. Here is the winding of the speedometer and allows you to eliminate it, including the one made by yourself.
How is the speedometer winding done?
This is a rather complex and ambiguous question. It all depends on the type of speedometer (each can use its own methodology), as well as on the date of manufacture of the car. Some possible approaches to accomplish this task will be considered below.

How to rewind a mechanical speedometer?
Similar devices are found on old cars, for example, the VAZ or UAZ families of early years of production. In this case, you can act in several ways. The simplest thing is to disconnect the cable from the speed sensor, connect a drill to it, and put it into reverse mode, change the readings. Another approach is to disassemble the instrument panel, remove the counter, and use the necessary tools to change its readings.
This work can be done by hand. However, this is only available on cars of older years of production (until 2005), and its brand does not really matter - VAZ, KAMAZ, UAZ, MAZ or Gazelle. The type of speedometer will be decisive.
How to correct an electromechanical speedometer
Despite the fact that these types of devices remained only on older machines, working with them is much more difficult than with purely mechanical ones. Here, as in other situations considered below, it is necessary to separate two tasks:
- winding the speedometer ̶ increasing its readings;
- twisting the speedometer ̶ reducing the readings of the device.
In principle, both of them can be done by hand, only the approach in each of the cases under consideration should be different. Reduction of readings is possible only when disassembling the panel, removing the counter and manually rearranging its values. But the task - how to wind up a speedometer of this type, is solved using a generator. It generates pulses that arrive at the control input, and according to their number, the readings of the device change. As in the previous case, this also does not depend on the brand of the car - VAZ, KAMAZ, UAZ, MAZ or Gazelle.
How to rewind an electronic speedometer
Such devices are installed on modern machines and are often an integral part of other electronic systems on board. Specific methods for adjusting the speedometer readings are determined primarily by the period of manufacture of the car. The fact is that an electronic speedometer can be implemented in different ways and interact with several independent devices.
Therefore, to change its readings, it may be necessary not only to supply additional pulses from speed sensors, but also to reprogram some blocks. And besides, again, depending on the characteristics of the car, for different models of UAZ, VAZ, Gazelle, etc., as well as the year of manufacture, the method of access to the speedometer will be determined.


Therefore, it is rather difficult to do such work with your own hands, although no one says that this is impossible. But this will require the use of special electronic devices.
What devices are used to wind up electronic speedometers?
Considering the existing variety of machines and methods for processing data from the speedometer, several different options have been created that allow you to correct the readings of the distance traveled. The circuit of such a device can be made both on discrete elements and on microprocessor systems, but all finished products are divided into the following types:
CAN twist
This device is designed for use on modern machines. Here you need to know that CAN is a special bus through which data is exchanged between the electronics of the car. And its scheme implies the presence of a diagnostic connector through which, knowing the exchange protocol, you can access individual devices. 
Accordingly, thanks to this, it is possible to adjust the content of the desired memory cells, achieving the desired result. It is impossible to detect by diagnostic equipment that a change in memory cells has occurred.
You can buy a quality twister on the website https://can-podmotka.ru
Pulse twist to OBDII
This device is intended for use with foreign cars that do not have a CAN bus. This device is connected via a special diagnostic connector OBDII. In this case, the speedometer receives a sequence of pulses that imitate signals from the speed sensor, as a result of which the readings of the distance traveled change.
Speed generator
This circuit simulates a speed sensor. Instead, the generator turns on and produces a sequence of pulses that enter the speedometer and cause a change in its readings. It is more suitable for electromechanical devices and domestic cars - VAZ, UAZ and others manufactured before 2006.
Suitable for cars equipped with ABS. Its work is based on controlling the speed of movement and rotation of the wheel. The spinner connected to the corresponding connector imitates the operation of the wheels, and the controller, receiving this information, begins to change the speedometer readings.
In addition, it is worth noting that the model of the car and the date of its release are decisive when choosing a device for winding the speedometer. In some cases, changes in the speedometer readings on a VAZ or UAZ will take place in a completely different way than on KAMAZ or MAZ.
You can make a winding device yourself or buy it ready-made, but the most important thing is to determine whether it can be used on this machine. In case of improper use, you can simply burn the electronics.
Strange as it may seem, but sometimes it is not the twisting of the speedometer that becomes more relevant, but, on the contrary, its winding. There are a number of reasons, both objective and subjective, forcing to do this. More than one device has been created that allows you to solve the problem, and you can choose a device that takes into account the date of manufacture of a particular car and allows you to carry out this procedure without consequences.
The need to twist the odometer readings can occur for various reasons, in particular, when it comes to Gazelle cars. The principle of operation, malfunctions, as well as the question of how the Gazelle is wound up, will be discussed in the article.
[ Hide ]
The principle of operation of the speedometer
Before we tell you how to twist or wind the odometer readings, let's figure out what the principle of the speedometer on the Gazelle is. The principle of operation of the mechanism is to measure the speed of the vehicle through the mechanical connection of its arrow with the output pulley of the gearbox. The latter receives wheel drive.
The shaft can give a true measure of the speed of the ride, more accurate readings will give the wheels of the car. This is because the gear pulley is located farther from the gearbox and closer to the wheels, and the speed at which it rotates is set in accordance with the final speed after the gearbox. The pulley speed may be identical in both first and fourth gear, but the difference in machine speed can be enormous.
In a transmission, the output pulley contains a gear that rotates with the pulley. The gear is connected to the speedometer drive cable. In the circuit, the cable is a strong wire located inside a protective rubberized casing. One end of the cable is installed in a special hole and fixed on the drive gear. When the gear rotates, the cable rotates with it.
The other end of the cable is connected to the device on the control panel. At the end is a magnet in the form of a shaft, which is mounted close to the steel drum, but not in contact with it. The drum is fixed on the needle and transmits the readings to the appropriate scale. When the vehicle is stationary, the needle from the cable is kept at zero level by a small coil spring.
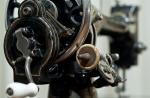
 Scheme for the manufacture of twists
 Possible device malfunctions
Why is the speedometer not working?
There are many reasons, let's look at the main ones:
- The device does not work. The problem lies in unscrewing the nuts that connect the flexible pulley to the device and transmission, if so, then they just need to be tightened. A broken device may be the result of a broken cable, if so, then it will have to be replaced. In some cases, in Gazelle, the device roller jams, then there is nothing left but to replace the entire device.
- The arrow on the scale began to fluctuate, extraneous sounds may appear. Initially install the shaft of the device, while the radius of bending of the cable must be at least 1.5 cm. If there is no grease on the cable, it must be added. If there is dirt at the cable installation site on the transmission, this may cause the needle to oscillate, so the dirt should be removed.
- Adjustment of the arrow of the device is broken is another type of error. If the cable is installed incorrectly in the shell of the flexible shaft, it must be mounted there again. Please note that the thrust sleeve in must be located on the side of the transmission.
- The arrow of the device rested on the limiter and does not rise higher, this may be due to a broken coil spring, the only option would be a complete replacement.

Winding up the device
So how to twist the speedometer on the Gazelle yourself? You can rewind and rewind readings according to several schemes, we will consider each of them separately.
Homemade ways
If you don’t know how, then you can use a simple method, which consists in interfering with the operation of the odometer. Before winding the odometer, prepare an awl with tweezers. It is necessary to dismantle the dashboard and partially disassemble it by opening the glass and dismantling the odometer. With the help of an awl and tweezers, the mileage in the car is twisted. The twisted odometer is installed in place in the control panel and the tidy is connected to the on-board network.
There is another way, which is referred to as "collective farm". How to wind up readings in this way? Very easy - the winding scheme involves disconnecting the cable from the device and connecting a construction drill with a reverse function through it. The drill turns on and the readings are rewound, everything is simple here.
Ready options
If you are the owner of a new model, then a ready-made Gazelle Business speedometer twister equipped with an electronic odometer can be used for winding. How to wind a speedometer with such a device? There is nothing difficult in this.
Before winding up the indicators, you need to find the OBD-2 connector on the car to which you need to connect the twist:
- First, connect the device to the connector, the ignition must be turned off.
- After activating the required mode, turn on the ignition, the indicator light should light up on the knob, thanks to which you can adjust the speed of winding the readings. If the speed is low or absent, you need to use submodes.
- After the rewinding work is completed, the speedometer made can be left, to do this, turn off the ignition and disconnect the twist. The nuances of operating the device may differ depending on the manufacturer and device, so follow the instructions when using it.
“No matter how much you steal from the state, you still won’t get yours back!”
With the development of injection systems on domestic cars, there has been a steady demand for devices that “wind up” electronic odometers. Why is this necessary, you ask? The answer is obvious: for drivers of state (official) cars, this is a way to write off gasoline. And, as you know, now it has become expensive ... Previously, when there were only mechanical odometers, this problem was solved in different, also mechanical ways. Then the first electronic odometers appeared, and the "advanced electricians" of various car depots found a simple and effective way to wind odometers by stretching the wire from the additional terminal of the generator to the instrument panel. But the electronics did not stand still, and when, having once connected the magical wiring in the manner described above, the electrician discovered that the car would not start, there was nothing left to do but send the suffering driver to look for other ways to solve the problem.
And it all started with the usual Gazelles and Sables with 405 engines, of which there were enough divorced at our city-forming enterprise. It was they who began to stall when using the above method.
The fighting technique is very simple and effective. The Combiloader PAK is connected to the ECU of the experimental car and the serial engine control program is read. Further, it opens in the CTPro program and the flag of the speed sensor is removed from the configuration. And with such a small change, an already modified engine control program is written to the ECU. In principle, after that, you can call an “advanced electrician from the car depot”, who will throw a magical wiring from the generator and the process, as they say, will go ... But this is not our method.
The simplest three-piece generator is made using the bulk mounting method (see the diagram below).
Toggle switch S1 switches the signal going to the panel either from our generator or from a standard speed sensor. The generator is powered from the plus of the ignition switch. Thus, the main advantage of this solution is that you can wind up the mileage without starting the car (just turn on the ignition), as well as right on the move of the car “moving at a speed of 200 km / h” to the envy of colleagues in the fleet.
A few notes on the diagram. Of course, a fastidious electronics engineer will definitely recommend putting another resistor in series with a trimmer so that the generation does not break down in the extreme left position of its engine. And also necessarily a protective diode against reverse polarity of the circuit. But you and I do not need it, we are neat, attentive and unhurried. With the values of the resistor and capacitor indicated on the diagram, the circuit generates rectangular pulses with an amplitude of 12 volts in the frequency range from ≈ 180 Hz to ≈ 1.5 kHz, which has so far covered the need for using this device on different cars.
If you need to quickly change the range of generated frequencies, you need to replace the capacitor. When it decreases, the frequency increases and vice versa.
Another generator schema provided for publication by Yvm.
Below is a table that describes the car, with our personally modified odometers.
| car model | Year | Brief description of the installation |
| Gazelle | since 2002 | Connector X3 instrument cluster: Pin 11 green wire - signal DS. Yellow wire - + ignition. Black wire ground. |
| Kia Magentis Hyindai Sonata |
2004 | There is a speed sensor, the usual three-wire, large instrument cluster connector, view from the side of the contacts, brown wire.  |
| There are three connectors on the instrument cluster: yellow big; white big; white small. In the white large connector with an arrow in the figure DS wire is indicated, view from the side of the contacts, gray wire with a brown stripe.  |
||
|
Forg Tourneo Connect |
There is a speed sensor, the usual three-wire, but its signal goes to the computer, and already from the computer via a digital bus is transmitted to the control panel. Therefore, I had to tear white wires with a blue stripe to pin No. 3 of the ECU. |
|
| Volvo S70 | 1997 |
There is no speed sensor, the signal to the tidy comes from ABS, it is a 6-volt sine. Therefore, our device was powered from the simplest stabilizer with an output voltage of 6 Volts, such as KR142EN5B (or any low-power imported analogue) and it already had 6-volt rectangular pulses at the output, which the device easily “digested”. On the panel, connector A is top-right. 3 pin - blue wire - speed input signal 15 pin - brown wire - ground 18 pin - blue with a red stripe - + ignition. |
| Toyota Camry | 2003 | Large instrument cluster connector, pin 35 - wire with ABS and speed information. If you look closely, there is a numbering on the wires. (Many thanks to Coldun for help) |
KAMAZ  |
|
|
|
|
||
| MAZ |
|
|
| UAZ Patriot |
|
|
UAZ Hunter  |
|
|
Renault Logan"  |
2005 |
7 - black, ground |
| Mitsubishi - Pangero diesel | 2005 |
There are three connectors on the panel - one black (the first to the left of the driver's door) and two white ones. On the black connector, the rightmost wire (yellow-white with silver rings) is DC. Any winding device at the output with an open collector (for example, a device for checking the DC circuit, given in the article by Oleg Bratkov). Of course you still need a switch. |
| RenaultKANGOO | Behind the dashboard there are two connectors - gray (two rows) and red (single row), pay attention to red: 15 pins, 6 are involved: 2 - lilac Pinout from left to right; from the center of the panel (gray connector) to the edge. We are interested in the 13th - brown (2), he is responsible for the speedometer readings and the odometer score. He gave a rectangle ~ 500 hertz, a duty cycle of 50%, a classic generator circuit for the 561 series, turns over 200. |
|
| Mazda Tribute (aka Ford Maverick, Escape), American. | Connected directly to DC. DS is two-wire, stands on the automatic transmission closer to the engine shield. The generator is ordinary at 561le5, only a capacitor (0.1 μF, ceramics) must be placed in the output gap of the speed signal, apparently a sinusoid signal is required there. Calmly shakes at a speed of 250 km / h, then there is a breakdown. The check does not light up. | |
|
HYUNDAI Santa Fe |
2007 |
|


In conclusion, we denote an approximate algorithm for searching for one single, necessary wiring through which information about the mileage is sent to the instrument panel odometer.
1. Inspection of the gearbox, drives, rear axles in order to detect a speed sensor.
2. If the speed sensor (or something similar to it) is detected, then you need to make sure that it is it. Remove the connector from it and make a small test drive. The speedometer or odometer should stop working.
3. If the detected speed sensor is three-wire, then it is necessary to measure the voltage at its connector and determine the signal wire. Next, ring this signal wire to the instrument panel in order to connect the winder in the cabin. If the sensor is two-wire, then it is necessary to determine the shape of the signal that comes to the panel. This can be done by hanging the drive wheels and making them spin, control the signals coming to the panel with an oscilloscope.
4. If the speed sensor is not found in point 1, then it is very possible that the panel receives a speed signal from the ABS. Then, using the method described in paragraph 3, it is necessary to search for this signal with an oscilloscope, on the instrument panel connectors.
Of course, if you have detailed information materials on the car model that you are going to subject to such “tuning”, then the task is greatly simplified. But in any case, do not forget that you are acting at your own peril and risk, and therefore double-check yourself three times before thoughtlessly “strapping something to something”. I would also like to note that this brief review highlights the general principles for solving this problem, and the specific implementation on a specific car can vary greatly in the direction of complication. If you have information on connecting to other types of cars, send us, we will gladly fill up the table of "applicability"
Some notes on creating winders for Ford Mondeo & Ford Focus, 2006 release, Toyota Camry
These vehicles use signals from the ABS sensors as a speed signal. On these models, these sensors are current, which means that when the wheel rotates, the current in the circuit changes. The changes are approximately 7/14 mA, that is, if you connect the oscilloscope in parallel to the sensor until the wheel rotates, we should see a square wave of approximately 0.5 Volts against a background of 12 Volts. The circuit below simulates the complete operation of such a sensor.

The positive wire can be determined by removing the connector from the sensor and measuring the voltage on the wiring with a tester with the ignition on. We used full manual reconnection, that is, to carry out winding, the client opens the hood, removes the plugs from the connectors, and puts the winder in place of the plugs. Turns on the ignition, produces the necessary winding. After the end, he removes the winder from the connectors, and plugs the plugs into the connectors, which restore the factory connection of the ABS control unit with the sensors. Of course, it was possible to switch all this on the relay, but there were a lot of extra wires under the hood, and disguise was put at the forefront. It is imperative to use two wheels, since with one the speed does not rise above 30 km / h.

Now consider the car TOYOTA CAMRY, 2006 model year. The panel of this car is called Optitron, and has a neon backlight. Machine 3.5 liters on the machine. The speed signal is also taken from the ABS sensors, but is a sine wave with an amplitude of about 1 Volt and a frequency directly proportional to the rotation speed. That is, the ABS sensor is applied inductive type. In this case, the following scheme was applied. The transistor is applied to any type of KT3102. A resistive divider reduces the amplitude of the output signal, and a capacitor with a capacitance of 0.1 μF to 0.47 μF removes the constant component of the signal. As a result, of course, a clumsy signal was formed at the output, but the ABS control unit swallowed it perfectly and the desired result was obtained. It should also be noted that such a signal must be applied to the two front wheels. True, in this case, complex switching was not required, and the necessary signal wires were tied directly to the standard wiring.
In conclusion, I would like to remind you that ABS is one of the important systems that affect safety, and if you have already decided to intervene in it, you must clearly understand the consequences and, in accordance with this, perform work at the proper quality level.
A small addition to the "KAMAZ" odometers. This device can easily be adjusted to "incorrect" readings using
DEVICES CAR GAZ-53-12
Car speedometer GAZ-53-12
The SP135 speedometer consists of a pointer speed indicator and a total distance meter.
The speed indicator has a scale from 0 to 120 km/h with a division value of 5 km/h. Its mechanism consists of a permanent magnet mounted on a drive shaft and an aluminum coil mounted on an axle. An arrow is mounted on one end of the axle, and a sleeve with a spiral spring-hair is pressed in the middle part. The inner end of the hair is fixed on the sleeve, and the outer end is fixed on a plate that serves to regulate the tension of the hair during factory adjustment of the speed indicator. The axle rotates freely in two bearings.
The screen around the coil is designed to increase the magnetic flux passing through the coil. When the magnet rotates, the magnetic lines of force, crossing the coil, excite an electromotive force in it and create their own magnetic field. The interaction of the field of a rotating magnet with the field of the coil creates a torque that drags the coil in the direction of rotation of the magnet. This moment is balanced by a spiral hairspring.
Thus, the coil, together with the axis and the arrow, rotates through an angle proportional to the number of revolutions of the speedometer roller, i.e., through an angle
corresponding to the vehicle speed.
The total distance meter consists of a system of worm gears and drums associated with it. The drums have teeth on the inside of the rim and are interconnected by pins placed between each pair of drums on brackets. On the outer side of the rim of the drums, numbers from 0 to 9 are applied at regular intervals. The total counter has six drums, and the daily counter has four, of which the rightmost one shows tenths of a kilometer and differs in color from the other five drums.
The maximum reading of the total counter is 99999.9 km, after which the readings start again from zero.
For 1 km of the distance traveled, the axis of the magnet and, accordingly, the magnet make 624 revolutions. The direction of rotation of the magnet axis on the drive side is left.
Rice. 225. The scheme of the fuel gauge:
1 - rheostat; 2, 8 - resistors; 3, 5, 6 - windings; 4 - arrow; 7 - permanent magnet arrows; 9 - battery; 10- fuse; 11 - current indicator; 12 - ignition switch; 13 - float;

Rice. 226. Scheme of switching on the emergency oil pressure indicator: a - the lamp is on; 6 - the lamp is off; 1 - sensor; 2 - lamp; 3 - fuse; 4 - ignition switch; 5 - current indicator; 6 - battery

Rice. 227. Coolant temperature indicator in the radiator:
1 - sensor; 2 - lamp; 3 - fuse; 4 - ignition switch; 5 - current indicator; c - battery; 7 - sensor balloon; 8 - bimetallic plate; 9 - base; 10 - contact plate; 11 - insulator; 12 - conclusion;
13 - contacts
Movement to the speedometer is transmitted by a flexible shaft GV20-D1 from the gearbox. The flexible shaft is of a non-separable type, i.e. its flexible cable cannot be removed from the sheath.
The control lamp for turning on the main beam of the headlights is installed in the speedometer housing.
Caring for the speedometer and the flexible shaft of the speedometer in operation consists in a number of operations, which are:
Checking the reliability of tightening the nuts connecting the flexible shaft to the speedometer and to the gearbox. The nuts must be hand-tightened to failure, and the slack in the fastening of the tips of the flexible shaft shell should not be felt when they are rocked by hand;
Checking the correct installation of the flexible shaft. The flexible shaft of the speedometer on the car is mounted so that the radius of the bends is at least 150 mm.
It should be taken into account, especially when changing the flexible shaft, that the presence of sharp bends leads to a reduction in the service life of the shaft and, in addition, can cause the speedometer to fluctuate and knock. Therefore, when inspecting the car, you should check the correct installation of the shaft. The shaft must always be secured with brackets and must not have sharp bends, especially near its ends.
Steep bends of the speedometer shaft near its ends are the result of excessive tension on the shaft.
In the event of a cable break, before installing a new flexible shaft on the vehicle, make sure that the cause of the cable break was not a jam in the speedometer. To do this, attach the end of the flexible shaft to the speedometer and slowly turn the free end of the cable by hand. In this case, no jamming should be felt, and the speedometer needle should not deviate from the zero division. When the cable is turned sharply in the direction of its rotation when working on a car, the arrow should sharply move away from zero, and then easily return back.
If the speedometer roller is stuck, the device must be replaced with a new one.
The fluctuation of the arrow of the speed indicator over a wide range during the operation of the speedometer occurs most often due to:
Incorrect installation of the flexible shaft (bends having a radius of less than 150 mm, the flexible shaft is not attached to the proper place);
Insufficient amount of lubricant inside the flexible shaft shell. In this case, the shaft must be lubricated as indicated below;
The absence of longitudinal movement of the cable inside the shell with the nut fastening the flexible shaft to the speedometer tightened to failure. If there is no longitudinal movement, the speedometer drive shaft is pressed by the cable into the device. During prolonged operation in such conditions, the adjustment of the speed indicator is violated, and then the device itself fails, if by that time the cable has not broken.
If the speedometer (both counting and speed units) stops working, you should check if the cable is broken.
The longitudinal movement of the cable is checked by swinging the free (not fixed) end of the cable from the side of the gearbox. The disappearance of the longitudinal movement of the shaft cable, which worked for a long time, is explained by the ingress of dirt into the hole in the speedometer roller.
This dirt must be removed. It is also necessary to clean the junction of the other end of the cable from dirt and only after that attach the shaft.