A well-groomed car should be not only outside, but also inside, and in some places worn upholstery or scratched plastic can be restored independently. To return a decent appearance to damaged plastic, you do not need to arrange a complete repair of the car interior, it is enough to put some problem areas in order.
Sometimes you don't even have to remove the plastic panels to do this. Self-restoration work will cost significantly less than replacing a damaged interior area. But the quality depends on your own diligence and desire to transform the salon.
Experienced motorists know several popular plastic resuscitation methods. In each case, you will get a decent result, but you need to choose which of the options to use for you personally. High-quality restoration of the plastic of the car interior with your own hands and envy from the materials used.
The more expensive method does not always bring the expected result. It happens that the skill and diligence of the performer plays a decisive role in bringing the salon in order.
Popular plastic recovery methods:
- staining of the damaged area;
- sticking a masking film;
- dragging the area with leatherette or genuine leather;
- manual polishing with heating.
Let's deal with each method in detail.
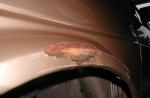
Coloring of the deformed zone
The first thing that comes to mind for most car owners when there is a desire to do do-it-yourself plastic car interior repair is the desire to paint over an unsightly place. This operation will require the following equipment:
- a piece of fine-grained sandpaper;
- special paint and primer for plastic of the corresponding color;
- varnish for plastics;
- set of tools for dismantling panels.
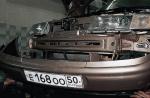
It is preferable to carry out restoration work on a dismantled element. During removal, you need to use a special tool that will ensure dismantling without additional damage to the surface. After that, we clean the outside of dirt and carry out degreasing with substances allowed for plastic. You can check the reaction of the liquid to the plastic from the back, and then wait 15-20 minutes. If the liquid did not harm, then it is used on the front surface.
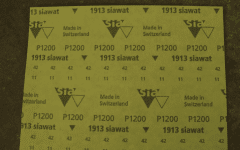
We putty the deeper grooves, let the surface dry and process the top with sandpaper (zero). Paper marking should be P 1200.
You need to know that manual grinding is carried out in a circular motion.
We apply 1-2 coats of primer to all areas for better fixation of the paint. When the primer dries, you can blow out the paint. It can be both in cylinders of 200 or 500 ml under pressure, and bulk for a spray gun or airbrush.
It is desirable to dry the workpiece in a horizontal position so as not to get streaks. We apply a layer or two varnishes on the layers of paint. Additional heating means for quick drying can be omitted.
Plastic hauling
In some cars, plastic elements are decorated with leather or leatherette. If this surface is damaged, the entire outer layer of the element must be replaced.

Removing damaged plastic
Required attributes:
- hauling material;
- special glue;
- construction knife;
- set for removing plastic decor elements.
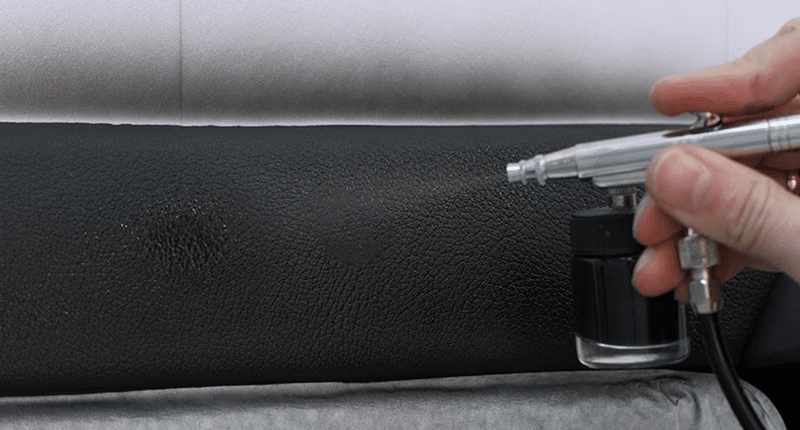
We dismantle the damaged element. We get rid of the damaged area by removing all or part of the upholstery with a clerical knife. From the prepared piece of upholstery material, we cut out the patch for updating. We clean the debris and degrease the surface. We apply glue and level the material with a rubber roller. Let dry and mount in place.
Application of decorative film
Scratched or worn areas of the plastic can be hidden with a colored film. Vinyl base will update the interior of your car. Such a film is often used as a means for restoring plastic in a car interior.

Decorative film
With this method of resuscitation of the plastic parts of the cabin, you will need:
- a roll of vinyl film;
- industrial hair dryer with adjustable heat;
- construction knife;
- roller with a rubberized surface;
- a set of spatulas with metal or plastic tips.
The entire interior of the car will be updated. All plastic elements that need to be processed are pre-dismantled. Next, we cut the film according to the selected plastic parts, which are previously cleaned and degreased.
We process each plastic piece in turn. To do this, we separate the lower protective layer from the vinyl film and glue it to the selected part. Sizing begins on one side, maintaining the tightness. After fixing, we heat the outer side with a hairdryer and straighten the film from the middle to the edges, getting rid of random air bubbles and wrapped “waves”.
In places inaccessible to the roller, use spatulas. We work with them carefully so as not to tear the plastic film. The part must be fixed with the film after processing. This takes 20-30 minutes. We fix the processed element in its place. The procedure is repeated with the rest of the plastic.
Hand grinding
Minor surface damage can be hidden more easily. To do this, you need a minimum of material and tools:
- a piece of sandpaper (zero);
- clean old terry towel;
- household or building hair dryer;
- degreasing agent.
To carry out such work, you can not disassemble the plastic. However, the treatment area must be easily accessible and open to close blowing warm air. If this is not provided, then it is better to dismantle the element and process it separately.
 Step 1. We select sandpaper
 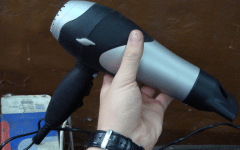 Step 2. Cooking hair dryer
 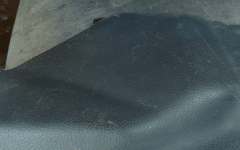 Step 3. Dismantle the damaged part
 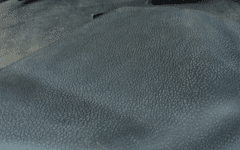 Step 4. Cleaning with sandpaper
 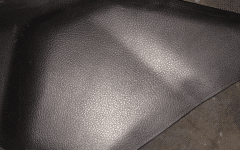 Step 5: Heat Up and Finish
Processing begins with cleaning and degreasing. Next, sand the damage with sandpaper in a circular motion. It is not worth pressing the paper strongly against the surface, so as not to leave visible furrows.
You need to know that large grooves from deformation can be hidden by rubbing the surface with paper with a slightly larger grain size.
Now you can warm the surface with the warm air of a hair dryer and immediately rub the pattern with a terry towel in a circular motion. It is not worth overheating the plastic, nor is it necessary to aggressively press on the towel.
Conclusion
Do-it-yourself plastic car interior repair can be done even in garage conditions with minimal tools. For deep scratches, putty will be needed, and minor defects can be rubbed on a heated surface with a terry cloth. For gluing the film, it is necessary to choose high-quality material so that it does not lag behind in the cold season and does not “float” in the heat. It is advisable to buy consumables not in the market, but in a reliable car shop.