1. We take cellophane so that it is transparent and dense (i.e. not old-cloudy and not easily torn / stretching from packages).
2. Cut out the pieces of the c-fan so that they are 5 cm larger than the parts of the siduhi. - this is to make it easier to draw patterns, otherwise it will be extremely difficult to turn large pieces on a seat.
3. We apply cellophane to the bottom of the seat and circle all, so to speak, "modules" of the seat through the c-fan AT THE SEAMS, using a marker, while the c-fan MUST BE KEEP TIGHT, i.e. to be without wrinkles.
There is 1 example in the photo, but I only put a large piece, because there was no small one, and those on which I made disappeared somewhere.
4. Next, we cut out the c-background patterns, compare them with the "original", then cut out new ones from thick paper using these patterns, because. it will be easier to transfer to the fabric.
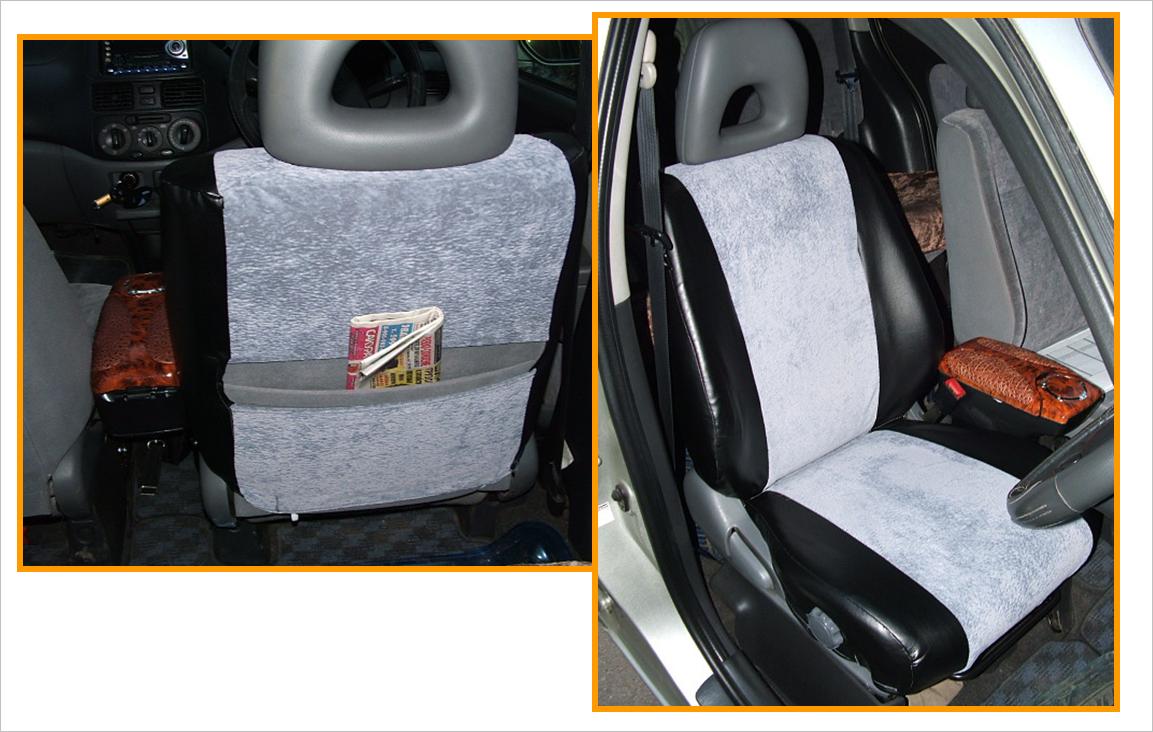
Below in the figure is an example of what patterns you should get and the layout. See the rubber bands with the hooks? With the help of them we attract the covers to the chair. The lower part and the upper part go separately and are not attached to each other. I indicated the letters A-B-C-D so that it was clear where this part was attached.
5. We transfer the patterns to the fabric. At the same time, remember that you MUST LEAVE an allowance for seams of about 0.5 - 1 cm. And more! Make the covers a little larger than the chair, by 3-5 mm. Because easier to dress, insurance in case of a wrong pattern, and more - if the velor on the chair is too tight, it can start to wrinkle!
Choose a fabric that is practical so that it does not stretch and is easy to clean. We sew the patterns together, we adjust along the way - we fix it.
Fig.3 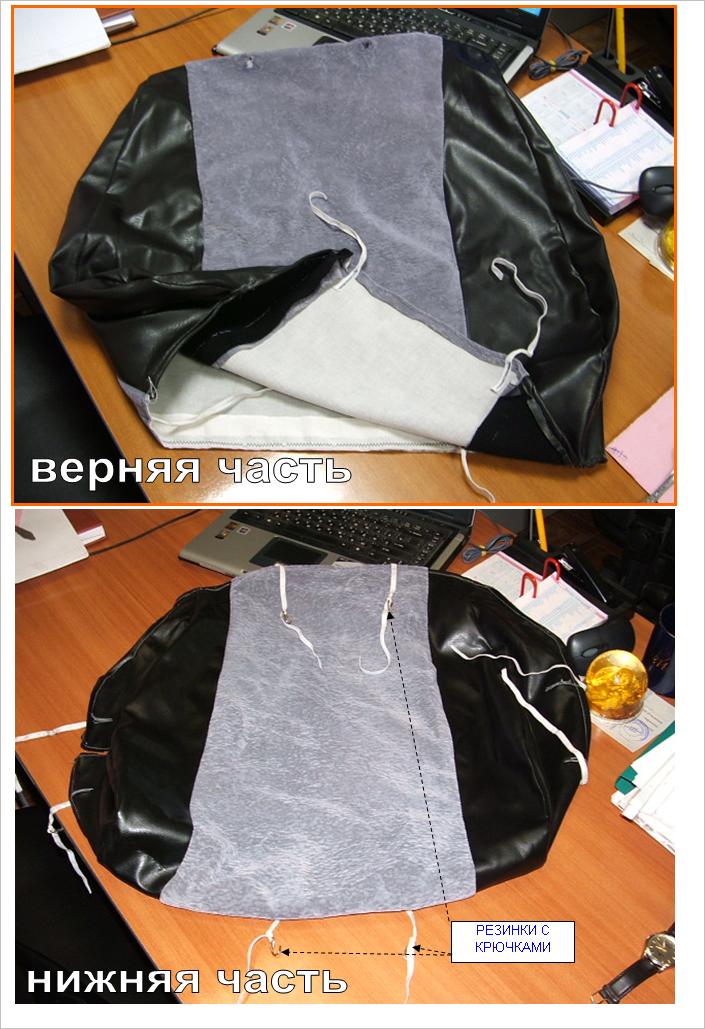
fig.4