Does your washing machine make a lot of noise during operation? Do you hear extraneous sounds and squeaks? Such signs may indicate bearing wear. In most cases, they need replacement, but even when installing new parts, they are thoroughly lubricated.
What kind of grease is used in bearings and what properties it has, you will learn in this article.
Before you start work, you need to find out what kind of grease to lubricate the bearings. There are only a few types of lubricant that meet these requirements:
- They are moisture resistant. Since the CM shaft parts are constantly in contact with water, you need a water-repellent bearing grease. If the water washes out the agent by which the bearing slides without wear, it will soon wear out.
- They have heat resistant properties. Hot water in the tank and heating of the shaft during rotation can deprive cheap grease of its properties. Then water will get on the parts and corrosion will begin.
- Should not aggressively affect the rubber. Otherwise, the seal may become hardened, resulting in water leakage.
- Bearing grease should be thick. Otherwise, it will simply leak out during operation.
Many users are interested in whether bearings can be lubricated with Litol and other automotive lubricants. It is undesirable to use such means. They serve as poor protection, so soon you will have to repair the washer again.

What means to choose?
AMPLIFON is offered by Italian manufacturers MERLONI. This is a moisture resistant lubricant that does not wash out with water.

Anderol is known for its convenient dosage of 100 grams in jars or syringes for two applications. Manufacturers of washing machines Indesit release the product.

STABURAGS NBU 12 is a waterproof, regenerating bearing grease that will provide a high level of wear protection. Heat-resistant and resistant to aggressive environments (washing solutions).

LIQUI MOLY "Silicon-Fett". Silicone grease for washing machine bearings. It has a thick texture, heat resistance (withstands from -40°С to +200°С). Adheres well, providing a high lubricating effect.

Huskey Lube-O-Seal PTFE Grease. Sticky, homogeneous texture, not washed out even with a water jet. It is heat-resistant, withstands from -18°С to +117°С. High corrosion protection.

What is better to lubricate
Some people think that the oil seal is processed first, while the thrust bearing does not need to be lubricated. This is true only if you bought the original part.
Note! When processing the seal and bearing, never mix lubricants, as they may not be compatible with each other.
Stages of work
You need to start by disassembling the washer and dismantling the bearings. For any brand and model, the disassembly principle is almost the same.

Remove the top cover: remove the screws on the back that hold it in place. Then push forward and out of the way.
Remove all screws around the perimeter of the back panel that hold it in place. Now move on to the front of the case.
- Pull out the detergent drawer by pressing the latch in the center.

- Unscrew the bolts that are behind the tray, as well as on the opposite side of the control panel.
- Release the plastic clips and remove the control panel. If you decide to unfasten all connections, take a picture of their location in advance.

- Open the hatch door. Bend the cuff and remove the clamp. Fill the sealing rubber inside the tank.
- Remove the two screws holding the sunroof lock. Unfasten the wiring from the lock.
- Remove all screws holding the front panel.

Remove the upper counterweight by unscrewing the mounting bolts.

Now you need to get the powder receiver. Use pliers to open the clamp that secures the nozzle to the cuvette. Disconnect the tube. The fill valve hoses are also attached to the powder receiver. You can detach them, but it's easier to remove them with the valve. For this:
- Unscrew the bolt on the back wall holding the valve.
- Disconnect the wiring from the valve and pull it out of the body along with the cuvette.

Also unfasten the pressure switch hose that is attached to the tank.
Remove the front counterweights of the tank by unscrewing the bolts.
If the heating element of your washing machine is located in front under the tank, disconnect its connectors. Then, using wire cutters, remove the wire clamps and remove it from the tank. Loosen the drain hose clamp screw. Remove it from the tank.

Be careful, water may spill out of the nozzle.
Disassemble from behind
Remove the drive belt by pulling it to the side and turning the pulley.

If the heater is located at the back of the car, unfasten its wiring, as well as the engine connectors. Now unscrew the motor bolts and pull it out of the housing.

Release the plastic clip and unfasten the pressure chamber that is attached to the tank. Loosen the shock absorber bolts. Raising the tank, remove it from the hooks, pulling it out of the body.
Lay the tank on a flat surface. Remove the sunroof seal by removing the inner clamp. Turn the tank over and remove the pulley by unscrewing the central bolt. Pre-lock it with a wooden plank.
Separate the two parts of the tank by unscrewing the screws around the perimeter. Take out the drum. Now you have reached the bearings. Now you will learn how to properly lubricate the bearing in the washing machine.
Finish the job
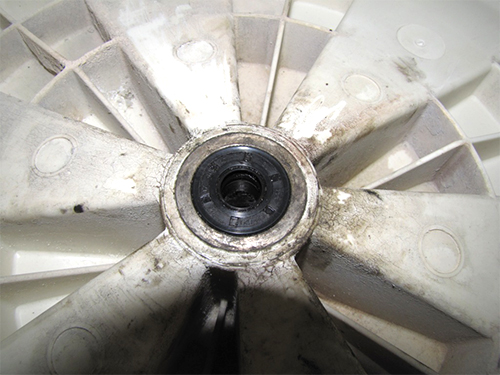
Remove bearings from tank. To do this, pry the gland with a screwdriver and pull it out. Install a chisel on the outer race of the bearing and, tapping with a hammer, knock it out of the tank. Do the same with the second element.

If you have decided which bearing grease to choose, then after cleaning you need to remove the protective cover of the part. A tool is laid inside.
But how is a non-separable, sealed bearing lubricated?
- Take WD-40, spray it on the parts and wipe it well with a rag.
- After cleaning, you need to open the lid, but it does not lend itself.
- Fill the inner ring of the part with a plastic bag.
- Take a tube of grease, cut off the neck so that it is equal to the diameter of the inner ring of the bearing.
- Install the tube on the inner race and squeeze out the grease until it starts to come out from the opposite side.
- Then start swirling the inside of the bag to distribute the lube. If you have been wondering if sealed bearings need to be lubricated, now you know what is necessary and possible.
- Remove excess. Install the item in place.

How to lubricate the oil seal
Now about how to restore the oil seal with your own hands. Of course, a worn oil seal cannot be repaired. Remember a simple rule: if you decide to replace one element, you need to change the entire set if you want to make a quality repair.
The noise coming from the washing machine after some time of operation may be the result of worn bearings. Perhaps there is no breakdown yet, but you should not delay with lubrication of such an important part. Timely lubrication of bearings, and mainly seals, will extend their service life. However, you need to know how to lubricate them and how to do it.
Choosing a lubricant
There are several types of grease that are used for bearings and seals. All of them have different properties, and therefore you need to choose carefully. The lubricant must meet the following requirements:
- must be moisture resistant. An oil seal is a sealing ring worn on a bearing that rotates on a shaft, due to which water does not penetrate into the bearing. Therefore, the grease on the stuffing box must not be washed out with water during operation.;
- be heat resistant. When water is heated to a high temperature and the shaft is heated during the rapid rotation of the drum, the stuffing box and bearing also heat up, the lubricant should not lose its properties, otherwise water will get inside the bearing;
- must be suitable for rubber and not be aggressive. From poor-quality lubrication, oil seals can “suffocate” or, on the contrary, become very soft, as a result, the tightness will be broken;
- should be thick. Grease will not leak out during operation of the machine.
Important! Automotive lubricants such as Litol-24, Azmol and others are best not to use. They are extremely inefficient and very soon you will have to change the bearings in the washing machine.
In service centers for lubricating oil seals, they most often use:
Bearings or seals?
The question of how to lubricate the bearing in the washing machine is asked by few, believing that this is not necessary. Most people buy a new set of bearings and seals, and only lubricate the seal and bushing during installation. As for the bearings, they are usually already lubricated.
If the bearings are bought in a store that orders original spare parts from the manufacturer, then you can safely put such bearings in the washing machine. In bearings of dubious quality, it is better to renew the lubricant; in most cases, they are loaded with cheap, low-performance grease.
Therefore, the answer to the question of what needs to be lubricated, bearings or seals, is this - that's it. The main thing is that it should be one lubricant, mixing different lubricants is unacceptable. In this case, it is better to lubricate only the oil seal and bushing.
Removing the tank
Now let's talk about how to lubricate such important parts of the washing machine. We will warn you right away that this process is very laborious, since it will require almost complete disassembly of the machine in order to remove the tank with the drum from it. Before starting work, disconnect the machine from the water supply, drain and electricity, and then place it so that it is accessible from all sides. Prepare screwdrivers and pliers, then follow the instructions:

In the course of this work, you can capture the stages on the camera. The pictures will help to assemble the washing machine correctly, without confusing the connection of wires and pipes.
We complete
After pulling the tank out of the washing machine, inspect it. It can be collapsible or solid. Non-separable tanks are found on Hotpoint-Ariston washing machines and others. To get to the bearings in such a tank, you will have to cut it along the joint seam. If you do this very carefully, you can connect the halves back with bolts and sealant.
The halves of the collapsible tank are connected with bolts and special latches. After the tank is disassembled, you need to knock the bearing out of the seat, detailed instructions on this are offered by us in the article.
After removing the bearings, inspect them for damage. Usually the washing machine is disassembled when the bearings are already failing, it is unlikely that anyone will disassemble the equipment to check the lubrication and lubricate the part. So, if the bearing is damaged, then you need to purchase a set of new bearings and an oil seal, which is reasonable to replace immediately.
If the bearing can still be used, then it must be lubricated. First, it is cleaned of dirt with a penetrating lubricant WD-40 and wiped with a clean cloth, and then lubricated. In a collapsible bearing, use a scalpel to remove the protective cover and apply grease. Lubrication of a non-separable bearing is somewhat more difficult, but it is possible, the video below shows how to do it.
If the new bearing does not need to be lubricated, then the oil seal must be lubricated. The grease is applied in an even layer along the inner ring, which is in direct contact with the bushing. After installing the bearings, the oil seal is installed. All components of the washing machine are assembled in the reverse order.
As you can see, the process of lubricating bearings and seals is not difficult, but to get to the parts themselves, you will have to do a lot of work. That is why most often with such work they turn to a professional master. But if you have the time and desire to work, do the repair yourself, good luck!
Today, you won’t surprise anyone with automatic washing machines, like any other household appliances, which greatly facilitate a person’s life. And yet, it is the SMA that amazes with the ability to combine the seemingly incompatible - a container with soapy water and electrical components and mechanical parts that are afraid of moisture. And it is clear that the designers took care of this contradiction by creating special protection for metal parts - cuffs (oil seals).
So what are seals?
Oil seals are a sealing material, which is also called a rubber shaped cuff. Cuffs are used in any washing machines, and play the same role, they only have a difference in size and profile. The difference between oil seals for SMA is that they have different points of attachment to the rotating axis and additional edges.
In addition, it will be useful to know that the characteristics of the cuffs are also dependent on the type of rubber that was used during production. So cuffs can be made of nitrile butadiene, fluoroelastomer and silicone rubber.
If we touch on the manufacturing method, then there are 2 options: a reinforced gland with a molded edge and with a machined edge.
In all existing types of cuffs there is a metal reinforcing insert, which is very sensitive. That is why, when replacing the oil seal, the craftsmen must take all precautions so as not to inadvertently injure the insert and nullify the useful properties of all important parts of the washing machine.
In addition to the above presented oil seals, there is another type of them - in-ring (V-RING). Cuffs with a V-shaped profile are used together with a reflective disk, which is rigidly attached to the tank. Its uniqueness lies in the fact that the oil seal during its installation on the axle fits very tightly with its V-shaped edges to the disk.
The wisdom of installing oil seals in automatic washing machines
To make it more clear what the stuffing box is used for, let's take a closer look at the example of the now popular front-loading automatic machines. So…
 The drums of these automatic washing machines are fixed on a special support (bracket), which has 3 or 4 "paws". Sometimes it is also called "spider". In the middle of the caliper is a steel semi-axle, which is needed for mounting in the tank on the bearing assembly. This property allows the reels to be movable while spinning. And the axle shaft is set in motion from the electric drive of the machine.
As you understand, the stuffing box is not attached directly to the shaft itself, but to the bronze bushing - bushing + stuffing box = paired parts of the sealing assembly. And they are entrusted with the main mission of protecting the entire bearing assembly and axle.
That is why, as soon as the oil seal wears out, the entire system of the washing machine will instantly fail. And the owners will only have to turn to the repair service as soon as possible, where highly qualified specialists can easily cope with the malfunctions that have arisen not only of the SMA, but also of any other household appliances.
What are the differences in the installation of the gland according to the type of material of the SMA tank?
If the tank of the washing machine is plastic, then a metal sleeve is pressed into its center. In it, during assembly / repair, a cuff is pressed in together with bearings, then a “spider” with a drum device is inserted into them, and the gland falls into its rightful place in the middle of the sleeve. And at the opposite end of the axis there is a thread needed for the drive belt (pulley). But it also happens that in a plastic tank or its lid there are sometimes pre-made marks for a bearing with a seal.
In an automatic machine with an iron tank, the bearings and the cuff are embedded in a caliper or in a silumin base.
You need to know that there are also ready-made rotational units in which there are sealing inserts (annular) made of graphitized plastic.
Ready-made rotation units for washing machines
Such knots are very convenient application. And all because the ring inserts contain graphite, which has a self-lubricating property. This is what helps the inserts to get used to each other as best as possible during the working period, which helps to achieve high efficiency.
Rotary finished units are attached to the tank capacity on both sides of the drum device or directly to its lid using annular rubber cuffs. The semi-axis of each finished assembly has a faceted recess and a threaded place for a drive belt. The base on which the nodes are attached is a silumin support. But in this case there is a drawback - its interaction with the washing solution, which is not a sign of durability.
A few words about special lubrication of seals of washing machines
Many specialists sometimes use lubricants to install oil seals. Specialist. the lubricant is designed to give the best water-repellent properties to both the cuff with the sleeve itself and the axis on which they are located. And here ATTENTION! In no case should you use machine lubricant - it has a bad effect on the rubber of the cuffs, making it less resistant to water-washing solutions. And it is clear that its warranty period is significantly reduced.
As can be seen from the above, self-repair of oil seals is undesirable, in order to avoid disrupting the correct operation of all the main AGR units. Therefore, it is best to contact the repair masters. Well, you can purchase installation fittings, spare parts and accessories for all large and small household appliances from us - in a company that has 13 years of experience with such goods. Our stores offer goods and spare parts for them only from recognized world manufacturers.
The oil seal is perhaps the only part that is in direct contact with the motor shaft, and therefore, grease for oil seals is vital in the full sense. Otherwise, in the process of friction, this part will fail very quickly.
The price of an oil seal is mere pennies, but when it is destroyed, a sad fate will very soon befall the bearing, the price of which in the store is quite high.
The stuffing box is a rubber ring that serves to seal possible leaks between static and moving parts of rotating mechanisms.
Bearing replacement is an operation that will happen one way or another if your CMA has been in operation long enough. In principle, this procedure is not difficult, it can be said to be quite routine. But there is one significant "but". If you replace the bearing, but ignore such a stage as lubrication, then all the work will go down the drain and, alas, you will have to pay twice in the store.
A dry-running seal will wear out very soon and begin to leak water. She, in turn, will quickly destroy the bearing. Thus, there is no doubt that lubrication for washing machines is a necessary operation, and neglecting it, as they say, is more expensive for yourself.
So, we agree that lubrication for oil seals is necessary. Now, in order to solve the problem formulated above, we will try to answer the question of which lubricant for the seals of washing machines is best suited.
Analysis of materials

To solve the question of how to lubricate a bearing in a washing machine, you need to understand what we want to get.
- moisture resistance. A necessary requirement that needs no comment - waterproof processing is a priority;
- the lubricant must be neutral with respect to rubber, otherwise the oil seal will quickly fail;
- The oil seal is constantly subject to friction, and therefore to high temperatures. Therefore, one of the requirements for the stuffing box should be its heat resistance;
- in order for the agent not to flow out, the consistency must be viscous.
Lubricant selection
Immediately remove the following message: you cannot save on the processing of lubricants for oil seals. Go to the store and choose. Good material in the store is expensive and you have to agree with this. Another thing is how to choose reliable and durable from the abundance of expensive products.
Let's try to conduct a small review of the materials. When visiting a store, you need to remember that some funds can be replaced, and some can be completely removed from the agenda. The top five best CMA oil seal impregnations include a class of silicone lubricants.
Advantages of silicone lubricants, what to replace?

Wherever silicone-based materials are used! In dentistry, plumbing, printing, etc. Since the temperature tolerance range of silicone materials ranges from -45 to +300 °C, they are also used in precision electronics. Silicone material forms a saturated layer of polymeric material on the treated surface, consisting of monotonous silicone molecules. He is:
- slippery and water-repellent;
- adhesive (ability to adhere to any surface) to metal, rubber, plastic;
- effectively resist friction.
Experts recommend using specialized products for washing machines without resorting to such proven products as Ciatim, Litol or Azmol. For advice, contact any specialized store. The effect of the use of these funds, of course, will be, but, alas, not long-term. Very soon, bearings, under the influence of an aggressive environment, will begin to “creak” and “crumble”.
What lubricants are best?
Litol-24. Production: mineral oils are thickened with a mixture of lithium technical soaps with the addition of antioxidant additives. Pros: waterproof, high chemical and thermal resistance. If you remove the temperature range, it will be from -45 to +139 ° C. Adequate replacement for SHELL.
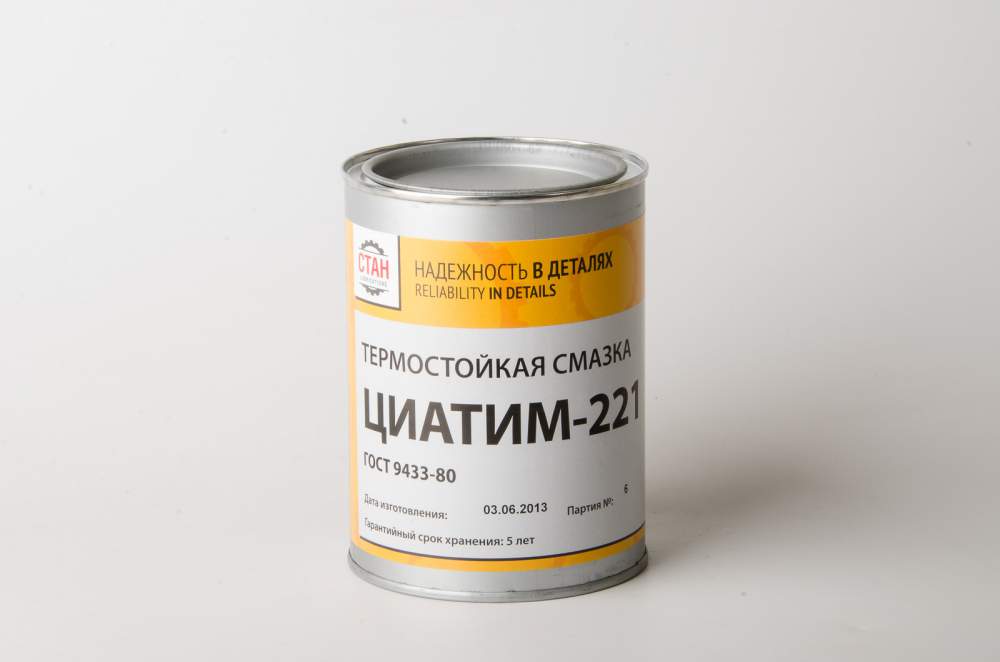
CIATIM-221. The advantages include resistance to high temperatures and stability during prolonged friction, which has a positive effect on the operation of the bearing seal; waterproof. The downside is weak hygroscopicity, i.e. with constant exposure to a humid environment, the material becomes unusable, however, this process can take years. A good replacement is the SHELL series.
LITIN 2. In this case, we are dealing with a highly specialized tool designed for use in extreme conditions on car units, which means that it has a multiple margin of safety and “survivability”. This tool has established itself as a worthy replacement for products from a brand such as SHELL, which in itself is a high indicator.
CIATIM-201. This tool has found its application in the friction points of aviation equipment, where it is necessary to relieve high thermal stress. Lubrication remains operational for more than 600 hours of flight time.
SHRUS-4M. Used in extreme motorsports to lubricate ball joints and joints of racing cars. It has unique antioxidant and extreme pressure additives, extremely water resistant.
It should be understood that any material can be removed and replaced with an analogue. Thus, when choosing a lubricant in a store, you should first of all focus on the price according to the principle “good cannot be cheap”, and the use of the product is designed for at least years to come.
How to lubricate?

Now let's take a step-by-step look at the algorithm of how to lubricate the bearing in the washing machine.
In this article, we consider the process of disassembling the SMA in a purely concise way. Our task is to apply the necessary funds to the stuffing box. Our actions: unscrew 4 bolts and remove the back cover, then remove the belt. Remove the bearing block cover and unscrew the main bolt. Remove the bearing. Unscrew and remove the holders of the agent, then release the stuffing box.
Questions such as removing this or that block, then replacing the part are the topic of other articles. So, remove everything that needs to be removed, unscrew and disconnect the required parts. Before us is a bearing and an oil seal. Then the seal must be lubricated. Unscrew and remove the cap, disconnect the feeder - the product is ready for use.
As a rule, the product is packaged in a tube, which simplifies the process of use: unscrew and remove the cap and it is ready to use. So, unscrew and remove the cap, and then apply the product. First you need to apply the product to the outer contour of the gland, trying to do it evenly, without leaving dry areas. To do this, remove the cover, unscrew the bearing from the oil seal, then remove the cover and place the oil seal in its niche, then remove everything else.
Despite the fact that the washing machine is constantly in contact with water, there are parts in it that should not get wet. To a large extent, this applies to drum bearings, which wear out quickly when grease is washed out. The bearing is protected from water penetration by an oil seal - a hermetic seal.
Some users are wondering: do I need to lubricate the oil seal of the washing machine? Let's figure it out.
To begin with, consider the device and the principle of operation of the stuffing box. Not a single washer is complete without this detail.
This sealing rubber ring serves to protect the bearing at the joints from water. For high-quality sealing, the gland of the washing machine tank should sit as tightly as possible. That is why it is recommended to replace it at the same time as the bearings.
A metal sleeve passes through the central axis of the tank, which, when rotated, contributes to the wear of the stuffing box. To prevent this from happening, it is necessary to use a water-repellent grease for oil seals.
Some users use folk remedies such as oil or fat. Of course, this seems to be more cost-effective, since grease that meets all standards is expensive.
Dear users! Don't forget: saving on lubrication, you reduce the life of the oil seal. Subsequently, you will have to spend money on new parts and replace them.

Before replacing the oil seal, let's figure out which lubricant to choose.
Properties that a lubricant should have:
- Moisture repellent.
- Without aggressive chemical components. Otherwise, under their influence, machine parts will be destroyed.
- Resistant to temperature extremes.
- Viscosity - for long service life.
Experts recommend using LIQUI MOLY "Silicon-Fett" silicone water-repellent grease for oil seals. It is able to withstand temperatures from -40°C to +200°C. It is considered the most effective of all presented.

Other means are also popular. What else can lubricate the oil seal in the washing machine, read below.
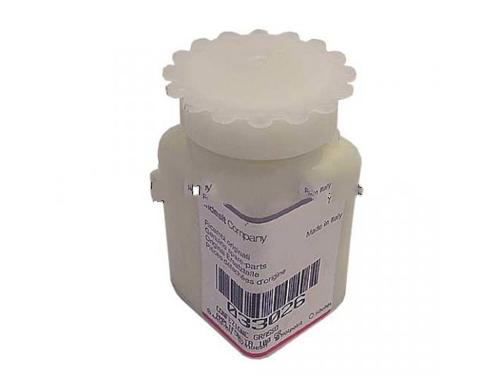
Italian-made grease has a neutral chemical composition, water-repellent properties. Withstands temperatures up to +190°C. Perfectly retains its properties when heated. Suitable for all types of seals.

Ambligon - grease for oil seals from an Italian manufacturer. The product perfectly retains its properties when exposed to temperatures from -28 to +192°C. It is water repellent and chemically inert. It is packaged both in portions in syringes of 2 ml, and in packs of 100 g.

Multi-purpose grease resistant to water. Unlike non-professional products, it does not harden when heated. Able to withstand temperatures from -40°C to +120°C. Chemically and mechanically stable.

The agent has a moisture-repellent effect, reliably protecting components from corrosion. Maintains temperatures in the range from -40 °C to +120 °C. Compatible with other lubricants, does not compact in water, mechanically stable.
Homogeneous multipurpose grease.
Replacing the oil seal in a washing machine provides that the lubricant must withstand temperature extremes. CIATIM-221 is able to withstand from -60°С to +150°С. It is successfully used in friction units, does not lose its properties during boiling.
However, there are also disadvantages: the lubricant is hygroscopic, therefore, by absorbing moisture, it becomes denser and loses its properties. In addition, it cannot be used together with other means. Chemically inert.
Make your choice and purchase the right lubricant.
Now consider how to change the oil seal.
Let's see how you can get to the gland. Here are the step by step steps.
- After disconnecting the machine from the network and communications, drain the remaining water from the drain filter. It is located under the front panel, behind a small hatch.

- Remove the two screws on the back to remove the top panel. Now unscrew the screws around the perimeter of the back panel, set it aside.

- Remove the drive belt from the drum. Having locked the pulley with the hammer handle, unscrew its central bolt and remove it from the tank.

- Disconnect any wiring that may be attached to the drum. It is usually secured with plastic ties, so use wire cutters.
- After disconnecting the motor wiring, unscrew the fixing bolts and pull the electric motor out of the housing. Also unfasten the wires from the heating element.

- Loosen the tank top counterweight bolts. Take it aside.
- Pull out the detergent dispenser by pressing the central latch. Remove all screws holding the control panel. Opening the plastic latches, remove it and place it on top of the case.

- Loosen the clamp on the filling valve and disconnect it from the tank. Pull out the powder hopper with filling valve. To do this, unfasten the wires from the valve and unscrew the fastening bolts from behind.
- Remove the pressure switch hose, which is usually attached to the tank.
- Open the hatch door by bending the sealing rubber, remove the outer clamp. Tuck the cuff inside the tank. Unscrew the screws of the UBL lock by running your hand behind the SMA body, pull out the lock and unfasten the wiring.


- Unscrew the screws around the perimeter of the front panel, pull it up and set it aside.
- Remove the counterweights from the tank by unscrewing the bolts.
- After unscrewing the shock absorbers, remove the tank from the hooks and pull it out.
You've done a good job of dismantling the tank. Now let's figure out how to properly get and put the oil seal in the washing machine.


Before properly installing the oil seal, apply grease. Start lubricating the outer surface with a thin layer. After installing the seal in place, use a syringe to apply lubricant to the inner surface.


