You can make your car look attractive on your own. All you need is imagination and, of course, desire. You can change or update interior elements or some parts under the hood. In this article I will tell you how to sheathe an old steering wheel. Do-it-yourself leather steering wheel wrapping is the first step to updating and improving the interior of a car. Do not think that only specialists can do it. Do-it-yourself steering wheel hauling is not only instructive, but also quite an interesting process.
Considering the fact that the steering wheel is a part of the car, the contact of a person with which is made along the entire route, therefore, it is necessary to choose only high-quality material for the waist and it is desirable that it should be genuine leather. Since any other fabric will deteriorate from constant rubbing of hands on the steering wheel after a month of using the car. The intended skin should not be very thick, but it should not be thin either. If it is too thick, then you will not pierce it with a needle, and if its thickness is small, then the new steering wheel cover can deteriorate very quickly. The optimal thickness of the material for the tight steering wheel is 1.3 mm. Such an ability as extensibility should be with an average. This is a very important criterion that must be considered before buying. Its elasticity should allow the material to lie tightly on the steering wheel, otherwise, you should not even think about quality.
You can consider the option with the presence of perforation. This is a rather unusual and attractive look, and working with him is also a pleasure. But, having such positive qualities, I can also highlight its negative side - wear and tear. The only optimal solution for you is natural smooth leather. 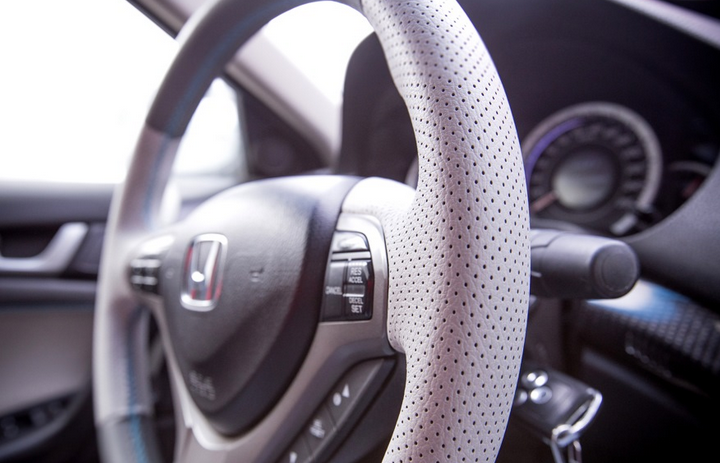
Before buying, make sure that the material offered to you really has the necessary qualities, and you are not slipped a substitute. You also need to pay special attention to the additional materials that will be used in this case. The thread should be as strong as possible, because it will tighten the edges, so it should not break easily. Choose a strong needle, check that it does not bend. My advice is to buy several.
What will be needed?
For the waist, you will need the following materials and tools:
- Skin (it must meet all the necessary criteria);
- Stitching needle (the needle must be strong). If possible, use Soviet-made needles, as they are really high quality;
- Strong thread (kapron is used);
- Two thimbles (it is almost impossible to work without them). They will keep your fingers from being punctured.
- Masking tape, drawing paper sheets (it is better to use thick cardboard);
- Pencil or felt-tip pen;
- Film;
- Knife (better to use stationery).
After preparing all the material, you can do the rest of the processes: cutting and hauling.
We make a pattern
In order to properly drag the steering wheel, and so that the result of your work has a spectacular look, you need to make a pattern. To do this, you need to make a preliminary layout (template).
It is made of adhesive tape and film, which need to be wrapped around the steering wheel. But, before that, you need to remove the steering wheel, as this will facilitate the work.  The first step is to remove the cover from the signal and unscrew the fixing nut that holds the steering wheel to the shaft. After that, with loosening movements in different directions, remove the steering wheel from the slots. Now that the steering wheel has been dismantled, we can start with the preliminary layout. To create it, you need to wrap a film on the steering wheel, and apply masking tape on top of it. Do not spare the material, wind it in several layers.
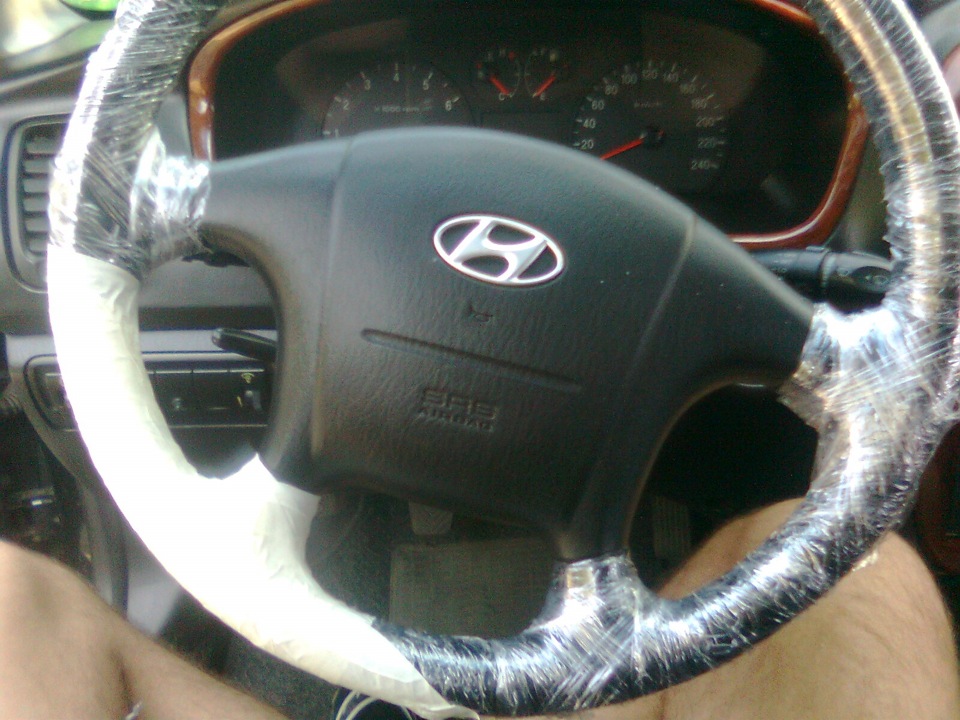
After the entire rim is covered, you need to use a marker to make marks in the place where the seam will pass (the junction of the parts). This is done for the reason that it is very difficult to make a one-piece case, so it will be made of four parts. And those places where the parts will be connected to each other are marked with a marker. We also draw a marker along the inside of the steering wheel. It is desirable to draw all lines as evenly as possible. This will allow you to make more even original parts when cutting. After all the lines are drawn, the layout must be cut with a clerical knife along these lines.
After cutting, you should get four separate elements. Now they need to be leveled and attached to the cardboard to create patterns for the pattern. 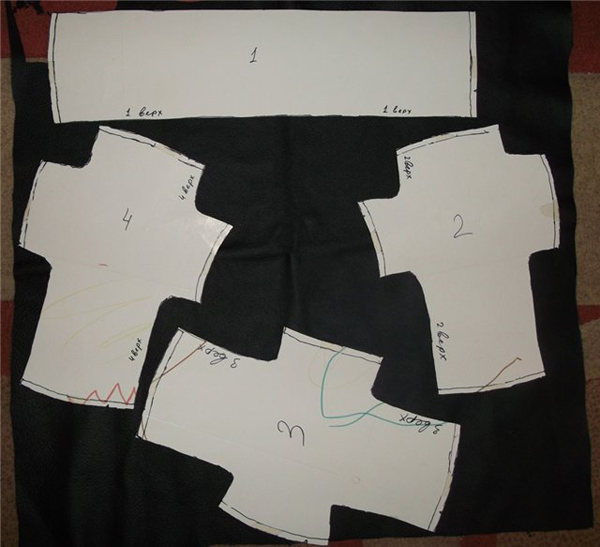 After the patterns are ready, they need to be applied to the base material in order to make the final version of the cover. But, it is important to remember that you do not need to cut exactly to size, but give some allowances for each edge of the part and then bend it. This is necessary in order to qualitatively sew them together, and so that the thread does not tear the skin during tightening.
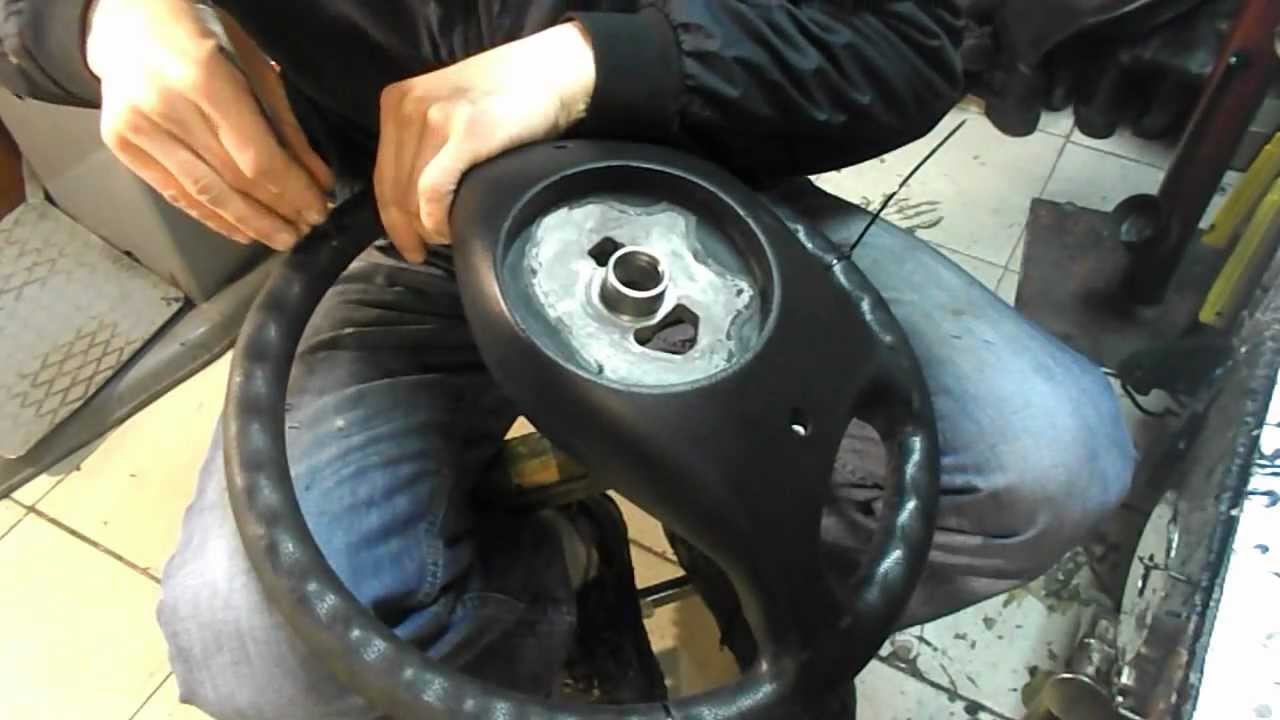
That is, the seam will turn out to be strong enough and the skin will not tear when stitched together. In addition, the folds give the new steering wheel a more aesthetic appearance. Allowances can be given immediately, while you are circling the pattern. You can also circle first, and then use a ruler to add one centimeter to each edge. This way you will maintain an even retreat on each side.
After that, you can check how correctly the cutting of the elements is done. It is necessary to attach each of the patterns to the intended place and see how they are located: their edges should be joined to each other. If the left margin is too large, then you can trim the edges. If everything is fine, nothing bothers you, you can proceed to the final process - stitching the parts together.
Step-by-step instructions for tightening
So, everything is ready, you can start. At this stage, it is important to follow the order of the work so as not to confuse anything.
- The first step is to overcast all the edges that will be sewn together. The fact is that each edge will be bent (we left indents specifically for this), and since the thickness will double at the bend, it will not look beautiful and it is very difficult to pierce such a thickness with a needle. That's why the wrapping is necessary. It will allow you to maintain the required thickness of the skin at the edges and thereby make the edges strong.
- We spread our (4) details of the future steering wheel cover on some surface. You need to lay them out exactly in the order in which they will be located on the steering wheel.
- We prepare a needle (we draw a thread into it).
- Now you need to sew sequentially all the individual elements together.
As a result, you should get a hoop. - Now you need to pull it on the steering wheel. Position it so that the seams match the cuts.
- Next, you can fix the cover on the steering wheel with glue or epoxy. Everyone makes this decision personally, you can not stick it.
- Now try to stretch the skin (flatten) to determine how much you need to fold the edges before the final step.
The last stage is the most difficult, since here it is important to maintain uniform skin tension on the entire steering wheel. It is not only difficult, but also difficult. It is much better if you ask someone to help you (one tightens and the other stitches). 
So, the first step is to decide where to start. In principle, it depends only on convenience. It is necessary to stretch the skin to make a joint, if the joint does not converge - it's not scary, thanks to elasticity, the joint will be pulled together with a thread. Thus, the entire cover is sewn together.
In those places where the cover can go under the signal cover, you need to do without a thread, but use glue. After completion, you need to straighten a brand new cover on the steering wheel, if there are any folds - it's not scary. After a few days, they will smooth out and the surface will be absolutely smooth. Now you can install the steering wheel in its original place, securing it with a fixing nut and cover the cover on the signal.
Leather upholstery of the steering wheel will significantly change the appearance of not only this element, but also emphasize the general appearance of the car interior. In addition, by doing it yourself, you not only saved your money, but also gained good experience in hauling, and also became more familiar with the steering device of your car.