Adjustment is carried out from the rear side of the headlights using an optical device. It is better to adjust the headlights at the service station. For self-adjustment, there are ways of varying accuracy. Therefore, when making adjustments, the method described below should be used only if absolutely necessary, taking into account the following conditions:
The car is not loaded;
Tire pressure is correct;
The fuel tank is filled completely, otherwise put the ballast of the appropriate mass into the body;
There must be a person on the driver's seat, otherwise put a ballast weighing 75 kg on the seat;
The vehicle is parked on a level surface.
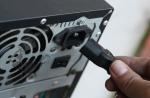
To adjust the light in the headlights, adjusting screws are installed on the left and right. Screw 2 () is for setting the light in height, screw 1 is for lateral adjustment.
To adjust the headlights, you must perform the following operations:
Start the engine briefly and set the headlight range control (if fitted) to position 0;
Position the vehicle about 10 m from a light-colored wall or garage door. If it is necessary to adjust only one headlight, set its light beam at the same height as the light beam of the other (adjusted) headlight;
If it is necessary to adjust both headlights, make the appropriate markings on the wall or garage door, shown in.
Headlight adjustment must be carried out as follows:
Position the vehicle exactly 10 m from the wall. At a height d (height from the ground to the middle of the headlights), draw a horizontal line F;
Draw a second line A parallel to the first 5 cm below. This line is for low beam adjustment;
From the central center line M, mark the distances a (to the center of the high beam headlights) and f (to the center of the low beam headlights) with crosses;
It is well known that the headlights on right-hand drive vehicles are designed in such a way that part of the light beam is directed to the left and up. It is impossible to eliminate this problem by simply adjusting the headlights, and without this it is impossible to pass instrumental control. In addition, driving with such headlights is not safe in itself, since the headlights, when adjusted in this way, dazzle oncoming drivers.
If "crystal" headlights are installed on your car, then it is easiest to replace them with similar European headlights. To date, there is only one known way to successfully remake such headlights. This is how sopka describes it in the Japanese Cars conference:
“You can easily convert it to roadside lighting and maintenance. The fact is that in such headlights a special mask sets the shape of the distribution of the light beam. It is easy to make it yourself from an aluminum sheet like the one in the headlight. The most difficult thing is to get to this mask. To do this, heat the headlight in the oven until the sealant becomes very pliable.Then very carefully separate the plastic from the glass.When adjusting the light beam, it is useful to use a 6-8 volt power supply: the distribution of the beam is visible and does not burn your fingers.Let me remind you of the shape of the beam : horizontal border on the left and 15 degrees up - on the right. I did everything myself and for the third year without any problems I go through official maintenance. I just don’t advise everyone to shout about an independent design change to everyone in a row - this is prohibited by the rules. Although, you can do everything so that the expert does not dig under And it will shine no worse than the factory headlight."
If your car has ordinary, not "crystal" headlights, then it is much easier to solve the problem of a light beam. This can be done in three main ways.
The first way, as in the case of "crystal" headlights, is to purchase and install European-style headlights. This method is not always possible, extremely simple and quite expensive, so we will not describe it.
The other two methods do not have a simple and understandable explanation for everyone, but they allow achieving positive results, which has been repeatedly tested in practice.
The first of these is to seal a certain part of the headlight glass with an opaque film, thereby covering that part of the light beam that shines to the left and up. The photos show how it was done on a Toyota RAV4.

However, this method, to put it mildly, does not improve the appearance of the car, not to mention the fact that these pieces of film can fall off or be torn off by the pioneers.
Therefore, the most practical is the method in which the change in the light beam is achieved by rotating the H4 type bulbs around its axis. If you look at the headlight from the reverse side, it is easy to see that in all right-hand drive cars the bulb is fixed in the headlight not strictly vertically, but is turned clockwise at a small angle. In practice, it has been repeatedly verified that turning the light bulb at the same angle, but in the opposite direction, allows you to achieve the desired result, i.e. eliminate that part of the light beam that shines upwards to the left and blinds oncoming drivers.
Since the light bulb is fixed in the headlight with the help of three antennae, to turn it, it is easiest to cut off these antennae with ordinary scissors, and then insert the bulb into the headlight, turning it in the opposite direction at a similar angle. Due to the friction force, the light bulb is held in the headlight quite reliably, however, if you are still afraid that it may turn during operation, when cutting off the antennae, do not cut them off completely, but leave about 0.5 mm from each antennae. These remnants, pointed with scissors, will cling very well to the plastic housing of the headlight and will not allow the bulb to turn.
The following photos show how the bulb is located in the headlight before turning it, and after cutting off the antennae and installing it in a new position. For clarity, the antennae on the base of the light bulb are painted over with a red marker.


However, on some Toyota models, the light bulb mount in the headlight is designed in such a way that there is no support flange in the headlight housing, and the light bulb is held only on the antennae themselves. Accordingly, if they are cut off, then the light bulb will simply fall into the headlight.
This problem can also be solved in several ways. The first is to make new recesses for the antennae in the headlight housing, allowing you to fix the bulb in the correct position. This method is very time consuming and requires special tools and equipment, such as a drill. But on the other hand, it does not require alteration of the light bulb itself and makes it easy to change it in the future.
Another way is to solder new light bulbs to the base instead of the cut off antennae. It is also quite laborious, since the base is made of metal, which is not so easy to solder, in addition, you can not always be sure that this soldering will hold on for a long time and reliably.
The third way is to make a simple strip with antennae on the base of the light bulb. To do this, you need to prepare a piece of tin, for example from an old tin can, no less than 6x6 centimeters in size. And you will also need a two-ruble coin, nail scissors, pliers, and some kind of scriber or marker.
Having attached a two-ruble coin to the center of a piece of tin, we circle it with a marker. We pierce the tin with scissors and cut out a round hole according to the circled line. We put a piece of tin on the back of the base of the light bulb and circle the outer contour of the base along with the antennae. We remove the tin from the base and next to each antenna we add exactly the same, but shorter by one third.
Unadjusted light from the headlights is a serious hindrance for both the driver of the vehicle and the surrounding motorists. The main problems are related to:
- dazzle surrounding drivers. This also applies to oncoming vehicles and vehicles moving in front (light hits the rear-view mirror);
- poor road lighting at night, which causes severe discomfort for the driver, while increasing the chance of an accident.
In order to prevent an accident, as well as to increase comfort when driving at night, it is necessary to correctly adjust the headlights. You can do this in a garage. You just need to follow the adjustment algorithm exactly.
Headlight adjustment on Toyota Camry has its own characteristics: the car is equipped with an electric corrector, but its functionality is often not enough for a comfortable ride. It refers to the light. To the far drivers rarely have any complaints.
Headlight adjustment
The headlight adjustment process on the Camry 40 and 50 is very similar, so it makes no sense to go into the technical features of each model.
Preparation and necessary tools
The first step is to check the settings and performance of the pre-installed electric corrector. On new cars, most likely, there will be no problems with it, but cars over 6 years old may not pass this test. In case of failure of the electric corrector, its replacement should be the first stage of work.
The next step is to find the necessary site for customization. Location requirements:
- the absence of holes and irregularities that can interfere with tuning;
- a fairly large length in length (about 10 meters);
- the platform must necessarily rest against a perfectly flat wall, by which you will evaluate the headlights.
To adjust the Camry headlights, you only need one tool - an 8 wrench. For convenience, you can grab several heads with specially curved tips.
How to adjust the headlights on the Camry 40 and 50: the main steps
To adjust the headlights on the Toyota Camry, use the following algorithm:
- Measure the distance over which the corrector adjusts the light beam.
- Mark its level of increase twice the maximum (corresponds to unity on the adjustment of the device).
- After completing these steps, of course, open the hood of the car, and then find a special plastic adjustment plug in the engine compartment. You can find it right behind the headlight housing.
- Start marking the wall. To do this, drive the car 5 meters away from it. Park the machine in a strictly horizontal position. Turn on your headlights.
- The first two vertical lines are located in the center of the light beam from each headlight. The third is held strictly between them.
- The first horizontal line corresponds to the distance from the center of the headlight to the ground (measured directly on the vehicle). The second is held 5 cm below it.
Now you can proceed directly to the adjustment. To do this, close each headlight, and then check the equivalence of their settings. Light from a separate source should be located along the lower horizontal line, while being limited to the extreme vertical one on the opposite side. If you find a discrepancy, then you can adjust the headlight both in horizontal and vertical projection using the appropriate bolts.
The beam of light from the dipped headlights is raised upwards only after they have been checked in the lateral directions. To raise the light, simply set the knob to the desired position.
Fog light setting

Toyota Camry headlight adjustment also includes foglight adjustment. The key to the correct operation of these light sources is their correct installation. There are certain recommendations for installing fog lights:
- level above the ground - 250 mm;
- fog lights should not protrude beyond the main optics of the car. It is advisable to fix them 400-600 mm from the headlights;
- The efficiency of the fog lights will be noticeably reduced if not properly adjusted.
The steps for setting up foglights are as follows:
- The mobile screen is moved 7 meters from the car. If you are using a wall, then just drive the car to the desired distance.
- Mark the centers of the headlights, step back from them 10 cm and draw a horizontal line.
- Drive the car another 6-7 meters away from the wall (or move the screen) and turn on the fog lights again.
- If the light is set correctly, then its upper border should pass along the horizontal line drawn earlier. The optimal distance between the centers of the beams is 120 cm.
Checking the settings
After adjusting the headlights, they must be tested. To do this, wait for the dark time of the day (when testing fog lights, foggy weather will be an ideal test), and then evaluate the comfort of using optics. If before that you had problems with this system of the car, then you will immediately feel positive changes. It will be more convenient for you to drive the car, and the surrounding drivers will not feel discomfort from your appearance on the road.