Changing the Lacetti brake fluid is a very necessary procedure. Moreover, changing the brake fluid yourself is not particularly difficult.
It is also worth noting that the hydraulic brake drive and the hydraulic clutch drive on the Chevrolet Lacetti are powered from the same tank, so when changing the fluid in the hydraulic brake drive, it is advisable to change the brake fluid in the clutch release drive.
The working brake system of the Chevrolet Lacetti is double-circuit, diagonal. Each of the Lacetti brake circuits includes the brake mechanisms of two wheels: one front and one rear, located diagonally on the car. If one of the circuits fails, the second circuit, although with less efficiency, will ensure the car stops.
Why change brake fluid
Brake fluid is advised to change every 2-3 years, depending on the age of the car and the condition of the brake system as a whole. Those. the older the car, the more often it is desirable to change the brake fluid. Also, if the liquid has changed color prematurely, then it must be changed without waiting for a certain period.
The most important answer to the question - why change the brake fluid, is that the brake fluid is hygroscopic. In other words, it absorbs moisture. And this is very, very bad for two main reasons.
Firstly, it leads to increased corrosion of the elements of the brake system.
Secondly, the boiling point of the brake fluid is sharply reduced. On the brake fluid container you can read the following:
It can be seen that in just one year the boiling point decreases by 30-40%!
I think it makes no sense to give further arguments in favor of regular replacement of the brake fluid.
Step by step replacement of Lacetti brake fluid
For work, you will need an assistant, a 10 mm ring wrench, as well as:
Rubber pear or syringe;
- a transparent vinyl tube with an inner diameter of 4-5 mm, suitable for a dropper;
- a container for draining used brake fluid;
- fresh DOT4 brake fluid. The Lacetti brake system is filled with 0.5 liters of fluid. But you buy at least 1 liter for replacement;
- viewing hole or overpass (desirable).
1. We unscrew the reservoir cap of the main brake cylinder of the Chevrolet Lacetti and select all the old brake fluid with a syringe or rubber bulb


2. Pour fresh liquid into the tank up to the top edge.
Important:
To prevent air from entering the hydraulic drive of the brake system during the replacement of the brake fluid, make sure that its level in the reservoir does not fall below the “min” mark.
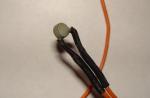
3. On the rear right wheel we find a bleeder fitting, clean it of dirt and put a transparent tube on it. It is advisable to apply WD-40 to it, otherwise these fittings have the properties of “sticking”. The other end of the tube is lowered into the container for the waste liquid.


4. The assistant slowly presses the brake pedal (approximately 5 presses with an interval of 1-2 seconds) and holds the pedal depressed. At this point, you unscrew the fitting 3/4 turn. Fluid should begin to drain from the fitting through the tube until the brake pedal reaches the floor. After that, tighten the fitting. The assistant should not release the pedal until you tighten the fitting!
Note! It happens that when unscrewing the fitting, the liquid does not go through the tube. Especially if you overdue the brake fluid replacement period. This means that the inner hole of the fitting is clogged. It is necessary to unscrew the fitting completely and clean the hole. Then screw the fitting back into place and continue bleeding the brake system.
Do this sequence again until fresh liquid begins to come out of the tube (you will determine it by color).
5. Then we carry out this procedure in sequence - left rear, right front, left front. And keep an eye on the brake fluid level!
I will say a few words about the sequence of pumping calipers. Who pumps diagonally, who from far to near ... I think that there is not much difference. I tried this and that. The result is always the same. Therefore, I do it the way I feel comfortable and used to in the old fashioned way — right rear, left rear, right front, left front.
Therefore, decide for yourself in what order to do it.
Here is the bleeding of the last caliper

After fresh and clean brake fluid comes out of all fittings, add it to the level in the reservoir, close the reservoir lid and make a test drive, paying attention to the operation of the brakes. After the trip, take a control measurement of the level in the tank.
Here's a video on how to change brake fluid.
Possible problems with calipers and their solutions
That's all. Take care of yourself and good luck on the road!
The Chevrolet Lacetti hydraulic brake system has two circuits, including the one with the ABS system. Each of these circuits of the car ensures the braking of the wheels of two mechanisms located diagonally on the car.
The car also has one reservoir responsible for supplying the working fluid, both for the clutch system and for the vehicle. The correct performance of the brakes is supported not only by the need to change the pads, but also to replace the brake fluid (TF) in time, in accordance with the Lacetti regulations. How to do it - look at the photo.
According to the manual for the use of operating fluids for the Chevrolet Lacetti, the hydraulic brake and clutch system should be filled with 0.5 liters brake fluid.
The manufacturer allows the use of brake fluid that meets the requirements of the specification FMVSS116 and DOT4.
Some manuals talk about the application of DOT5 on a Chevrolet Lacetti. It should be mentioned that these same instructions indicate which TJ should be used, the name of which is indicated on the reservoir of the main brake cylinder (GTZ). Secondly, DOT5 brake fluid is not compatible with either DOT3, or DOT4 +, or DOT4, and besides, it is not used in cars with an ABS system.
The original brake fluid of General Motors has the article 93160363. A similar replacement will be brake fluid "BRAKE FLUID" from Opel, catalog number - 1942421, manufactured by GMotors for Opel cars. The price of this working fluid 450 rubles.
A wide range of TJs is also available from other manufacturers Fenox "SBrake" SBF4005, Miles "BRAKE FLUID" EBF455, Hella-Pagid "BRAKE FLUID" 8DF355360011, Miles "BRAKE FLUID" EBF910. The price of these liquids varies from 100 to 200 rubles.
Prices are valid for the fall of 2017 for Moscow and the region.
How to change the brake fluid on a Chevrolet Lacetti
To do this, you will have to pump out the old fluid from the tank, fill in fresh fluid, create pressure in the system (by shaking the pedal or a special device), put a hose on the fitting (one end of which will be in a transparent bottle with liquid), unscrew the bleed fitting on the wheel caliper, wait until it goes fresh brake fluid without air. It is very important to follow the flow chart.
We extract air from the system with the engine turned off, from the beginning from one circuit, and then from the other, observing the sequence of bleeding the brakes: the right rear wheel; left front wheel; left rear wheel; right front wheel.
Replacement instructions DIY TJ:
- We unscrew the cap of the GTZ tank.
- Using a syringe, we pump out the working fluid from the tank.
- We pour a new TJ to the lower crown in the neck of the tank.
It is important to prevent air from entering the hydraulic system of the car. To do this, it is necessary to ensure that its level in the tank does not fall below the “MIN” mark.
- Bleeding the brakes must be carried out with a helper. We clean the fitting of the brake cylinder of the wheel from dirt and take out the protective cap.
- Using the “10” wrench, loosen the bleeder screw.
- We put on a vinyl hose at one end, and lower the other into a bottle half filled with brake fluid.
- The helper must depress the pedal 4-5 times, swinging the TJ and holding it in the lower position.
- We continue to unscrew the fitting ½-¾ turn with a wrench. At the same time, the old TJ and air bubbles should come out of the end of the tube, and in the meantime the pedal is pressed to the stop.
- As soon as the TJ stops flowing, we wrap the fitting and release the pedal.
- We carry out the above actions until a new brake is poured from the hose. In this case, the pedal stroke should not exceed half the distance to the floor.
- We carry out similar actions on another wheel of the same circuit (according to the diagram).
- In the same way, we pump the brake mechanisms of the wheels of another circuit (according to the diagram).
For work you will need the following:
- assistant;
- transparent tube with a diameter of 4-5 mm;
- transparent bottle;
- special key "10 mm";
- container for draining TJ;
- syringe;
- new brake fluid class DOT4.
We replace the brake fluid in a Chevrolet Lacetti car.

Unscrew the cap of the brake fluid reservoir.

We pump out the brake fluid with a syringe, but not all of it, it is advisable to leave a little at the bottom so as not to air the system.

We take a new liquid and fill it up to the MAX mark.

We go down and remove the wheel.

Remove the rubber protective cover. We put a hose on the bleeder valve to drain the brake fluid.
Brake fluid, like other lubricants, requires periodic replacement. This is due to the loss of qualities that are lost during operation. So, the process of replacing brake fluid on a Chevrolet Lacetti is quite simple.
Video footage
The video will tell you how to quickly and correctly change the brake fluid in a car, as well as tell you about the nuances and tricks of the process
Replacement process
The process of changing the brake fluid in the brake system is quite simple. To carry out the work, you will need another pair of legs, a key for 10 and a pear syringe. Changing the fluid in all four cylinders can take from 30 minutes to 1 hour, depending on how aware the motorist is in the technique of carrying out this work.
We replace the brake fluid in a Chevrolet Lacetti car.
So, changing the fluid also involves bleeding the brake system, so let's consider two questions at once in one topic. The sequence of actions aimed at changing the brake fluid in a Chevrolet Lacetti, regardless of the year of manufacture and body model:
- For every "fireman", it is recommended to dismantle the negative terminal from the battery.

Unscrew the cap of the brake fluid reservoir.
- Using a pear, we pump out the old liquid from the tank.

We pump out the brake fluid with a syringe, but not all of it, it is advisable to leave a little at the bottom so as not to air the system.
- After that, pour new fluid into the tank, and proceed to pumping the brake system.

We take a new liquid and fill it up to the MAX mark.
- Since the contours of the brake system are located diagonally, the bleeding scheme is as follows:

We go down and remove the wheel.
- Rear left.
- Front right.
- Rear right.
- Front left.
- Now, it is necessary to clean the fitting for bleeding the brake system from dirt and other unwanted objects. And then, dismantle the rubber protective cap of the fitting.

Remove the rubber protective cover. We put a hose on the bleeder valve to drain the brake fluid.
- Attention! Do not clean the fitting with a wire brush or the like to avoid damaging the cap. It is best to use a wet cloth.
- We take the key for 10 and loosen the tightening of the fitting.

- We put a tube on the fitting, and send the other end into a container where the old brake fluid will flow out.

We drain the liquid together with air bubbles into a previously prepared container and tighten the bleeder fitting.
- We pump the brake pedal 3-4 times with an interval of 1-2 seconds. At the same time, air can also escape with the liquid. After pumping, tighten the fitting and then release. We do this several times until the old fluid comes out of the circuit.

When draining the fluid, pay attention to the color and lower it until clean brake fluid comes out. Thus, we pump all the wheels. Then remove the hose, install the wheel back.
- Important! In the process, it is worth monitoring the level of brake fluid in the reservoir. If the liquid drops below the minimum mark, there is a possibility of "airing" the system.

Then we check the level of brake fluid in the tank, if necessary, then top up to the MAX mark. And proceed to another wheel, according to the pumping scheme.
- We carry out this procedure with each cylinder.

After completing the procedure for pumping and topping up the TJ on all wheels, we once again check the level in the tank (top up if necessary). Then we twist the cap on the brake fluid reservoir. Replacement completed.
After carrying out the work, it is necessary to tighten the fitting and put on the rubber protective cap.
Fluid selection
In addition to the original brake fluid, domestic DotRos-4 can also be filled in the Chevrolet Lacetti. It has a lower cost and is slightly worse in composition, but for the mileage for which it is recommended to fill it, for the brake system it is tolerable.
According to the manual for the operation and repair of the Chevrolet Lacetti issued by the manufacturer, the brake fluid should be changed every 30,000 km. If the car is operated in a period of frost or rain, then the fluid must be replaced every 20,000 km.
There is a lot of debate about how much fluid is needed for a complete replacement in the brake system. According to the manuals of the GM plant, 0.5 liters of brake fluid fit into both circuits. When replacing, part of the lubricant is lost, so it is recommended to take 1 liter to be sure.
Conclusion
On the one hand, replacing brake fluid in a Chevrolet Lacetti is simple, especially for those who have already carried out such a process. For a beginner, this procedure may seem quite difficult to understand, and even more so to execute, therefore, in this case, it is recommended to contact a car service.
Many owners of Chevrolet Lacetti or Cruz cars are interested in the question - which brand of brake fluid GM 93160363 or 1942421 should be poured into the braking system?
Currently, in order to top up the brake fluid, you do not need to go to the dealer at all. Instead, purchase brake fluid from a store or reliable supplier by part number. Remember labeling:
93160363
- GM brake fluid marking
1942421
- marking brake fluid opel
The brake fluid of both types is absolutely the same, but is produced for different conveyors by Adam Opel AG, Russelsheim Germany. The fluid for the brake system of a Chevrolet Lacetti or Cruz car has a DOT-4 class, light orange color and is packaged in white sealed plastic containers of 0.25/0.5/1 liters. The canister has a transparent scale by which you can determine the color and amount of liquid in the canister. The cork is tearable, which allows you to control whether the canister has been opened before. The front side is marked: month and year, indicating the last opportunity to open and use this brake fluid canister.
Many motorists are a little worried about the marking of the canister. Remember again - brake fluid marked 93160363 is absolutely identical to marking 1942421. They can be interchanged and mixed with each other!
The average price of a canister of 0.5 liters of brake fluid GM 93160363 or 1942421 in retail is from 410 to 523 rubles. Its cost in an online store (for example, EMEX) is from 280-300 rubles with a delivery time of 2 days. The closest recommended equivalents are FEBI 21754, Seiken BF405L, SWAG 10921754 and AD LFS1. Do not fill in the brake fluid of domestic manufacturers.
24 ..Chevrolet Lacetti. Diagnostics of malfunctions of the engine crank mechanism
The working qualities of the crank mechanism can be assessed by measuring oil pressure, determining the characteristics of knocks and measuring gaps in certain mates of the crankshaft.
Oil pressure measurement
The oil pressure is checked using a device consisting of a pressure gauge, a connecting sleeve with a union nut and a nipple, and a damper that smooths out the oil pulsation during pressure measurement. To take pressure readings in the main line, the device is connected to the oil filter housing, having previously disconnected it from the standard pressure gauge tube. To check the pressure, follow the following steps in sequence:
connect a measuring device to the oil filter housing;
start and warm up the engine to the standard thermal state;
fix the oil pressure in the main line at idle, at the moment of stable and nominal frequency rotation of the crankshaft.
Listening to knocks in the crankshaft mates
Knocks in the KShM are listened to in certain pairings using an electronic autostethoscope. This method of diagnosing KShM requires forcing rarefied pressure into the over-piston space by means of a special compressor-vacuum unit. It is required to listen to the pairing between the piston pin and the piston boss, also between the connecting rod mechanism and the crankshaft journal, and then between the connecting rod upper head bushing and the piston pin.
In the event that low oil pressure and knocks in the crankshaft are recorded, it will be necessary to check the clearances in the above mates and replace the oil pressure sensor. If the oil pressure is low, but there are no knocks, then the drain valve of the lubrication system should be adjusted. In the event that the actions taken do not lead to the normalization of pressure, then a check of the diagnostics of the lubrication system on the stand will be required.
Diagnosis of KShM by the width of the gaps in its mates
The state of the crank mechanism is also determined by the size of the gaps in its mates. They are measured using a special device and according to the following scheme:
install the cylinder piston in a compressed state;
lock the crankshaft;
instead of the nozzle, fix the device in the cylinder head, loosen the locking screw, and then lift the guide up;
turn on the device and bring the pressure to a discharged state;
to achieve stable indicator readings by the method of two or three feeding cycles;
fix the gap in the connection between the upper head of the connecting rod and the piston pin, and then the total clearance between the connecting rod bearing and the upper head of the connecting rod.
All gaps in the crankshaft are measured three times and take the arithmetic mean. In the case when the gaps of any one connecting rod are greater than the permissible values, engine repair is required.
Malfunctions of the crank mechanism include a decrease in compression in the cylinders and engine power, an increase in fuel and oil consumption, smoke, knocks and noises uncharacteristic for engine operation, oil and coolant leaks.
The compression in the cylinder is measured on a warm engine using a compression gauge.
Before measuring the compression, the spark plugs are unscrewed, the rubber tip of the device is inserted into the spark plug hole and the crankshaft is turned by the starter with the throttle and air dampers fully open for 5-6 s. At the compression gauge, the maximum pressure at the end of the compression stroke in the cylinder is taken on the pressure gauge scale, and at the compression graph, the pressure value is recorded on a paper form. Measurements are repeated 2-3 times in each cylinder and the average value is determined. The pressure difference in the cylinders should not exceed 0.1 MPa.
A decrease in compression in individual cylinders can occur due to coking or breakage of the piston rings, damage to the cylinder head gasket, improper adjustment of clearances in the valve mechanism, or burnt valves. The coking of the piston rings in the piston grooves contributes to an intensive breakthrough of gases into the crankcase, which can lead to an increase in the pressure of the crankcase gases and splashing of oil through the oil dipstick hole. In this case, 20-25 cm3 of engine oil is poured into each cylinder and compression measurements are repeated. An increase in pressure indicates leaks in the cylinder-piston group.
A head gasket failure and a leak in the valve mechanism can be detected using a pneumatic tester by passing compressed air into the cylinder through the spark plug hole. Leakage of air into an adjacent cylinder indicates damage to the head gasket or loose nuts or bolts of the cylinder head. A cylinder head gasket failure can also be detected by coolant getting into the sump. In this case, there will be a constant decrease in the coolant level in the expansion tank or radiator and a simultaneous increase in the oil level in the sump. At the same time, the oil acquires a color from gray to milky white. Leakage of air through the carburetor indicates a malfunction of the inlet valve, and through the muffler - the exhaust valve. Faults found are corrected.
The reason for the decrease in compression in the engine cylinders with a good head gasket and valves is the wear of the cylinder-piston group. The degree of wear of the cylinder-piston group, and hence its technical condition, is determined without disassembling the engine with instruments and a pneumatic tester. The principle of operation of the devices is based on measuring the leakage of air supplied to the engine cylinder. The check is carried out on a warm engine. The spark plugs are removed, the piston of the first cylinder is set to the top dead center of the end of the compression stroke. The crankshaft is inhibited from turning by engaging the gear and setting the car to the parking brake. Press the test tip of the device to the spark plug hole of the first cylinder, open the air supply valve and, according to the indications of the pressure gauge needle on the device, determine the air leakage. By turning the crankshaft, other cylinders are checked in the same way in accordance with the order of their operation. Air leakage should not exceed 28% with serviceable valves and head gasket.
If there are knocks and noises that are uncharacteristic for the operation of the engine, they listen to the engine with a membrane or electronic stethoscope. The stem of the stethoscope is installed perpendicular to the surface of the engine in the place where knocks and noises are heard.
The state of the piston and piston pin is determined with a sharp change in the crankshaft speed, listening to the walls of the cylinder block along the line of movement of the piston in places corresponding to its extreme positions. The sound of the piston pin is distinct and sharp and disappears when the cylinder is turned off from work. When the pairing of the piston ring - piston groove is worn, a slight clicking sound is heard in the bottom dead center zone at an average crankshaft speed. Worn pistons make a clicking, rattling muffled sound when the engine is cold, which decreases as it warms up.
Wear of the main bearings and an increase in the gap between the crankshaft journals and the liners is accompanied by a dull, low-pitched metallic sound with a frequency that increases with increasing crankshaft speed. A knock is heard in the lower part of the cylinder block along the axis of the crankshaft with a sharp opening of the throttle. The reason for this knock may also be too early ignition. A large axial clearance of the crankshaft contributes to the appearance of a knock of a sharper tone with uneven intervals, especially noticeable with a smooth increase and decrease in the crankshaft speed. The tone of this sound changes depending on whether the clutch pedal is depressed or not. The value of the axial clearance is determined on an idle engine by moving the front end of the crankshaft when the clutch pedal is pressed and released and compared with the data from the table.
Connecting rod bearings, when worn, also create a knock in the area of \u200b\u200bthe axis of the crankshaft, but lower or higher by the value of the radius of the crank and when the piston is at the top or bottom dead center. At the same time, a sharper and more sonorous knock is heard, of lesser force in relation to the knock of the main bearings. The knock disappears in each of the cylinders when the corresponding spark plug is turned off.
A sign of wear of the main and connecting rod bearings is also a drop in oil pressure in the engine lubrication system below normal. The oil pressure is checked with a control pressure gauge with a division value of not more than 0.05 MPa.
Engines with the listed faults are sent for repair.