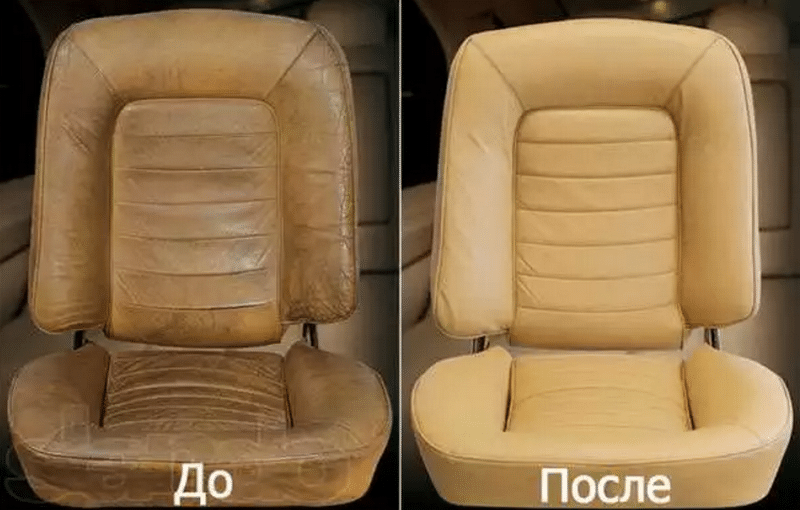
Upholstery in leather emphasizes the dignity of any car. Drivers who love their car strive to take care of such upholstery, because some car owners are sometimes forced to spend several hours a day in a cozy interior.
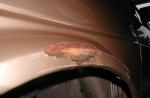
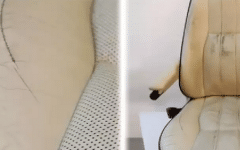
If, for some reason, damage appeared on the surface, then you can do the repair of leather car seats with your own hands, without resorting to expensive specialists. Minor damage can be easily repaired in a couple of hours, without the need to visit the studio and pull all the chairs.
With large defects, which sometimes stretch over several tens of square centimeters, a beginner is unlikely to cope at home. Such situations will be resolved by professionals. But even an inexperienced but careful car owner is quite capable of patching a hole burned with cigarette ash or closing a small tear left by a metal lock.
For repair work, you will need a small set, which is sold in almost every car shop. Without it, the restoration of the leather interior of the car can be problematic. The set consists of materials and tools.
Tools:
- spatula (can be used dental);
- sandpaper square (it is preferable to take “null”) 100x100 mm;
- iron (preferably with a ceramic or Teflon soleplate);
- stand-alone airbrush (the nozzle must be with a minimum spray opening);
- construction knife (sharply sharpened with sufficient blade reach);
- tweezers (capture area is small).
materials:
- “liquid skin” (special composition is sold in car dealerships);
- construction mesh for reinforcement (we select the minimum cell);
- thermal powder (the material must be "taken" at low temperatures);
- Teflon reinforcing pad (if the iron soleplate is metal).
The cost of these materials and tools will be much cheaper than repairing the leather interior of a car in a car workshop.
Repair work
The car owner, carrying out the restoration of his interior, independently determines the need to dismantle the seat from the passenger compartment. More often this is done for more comfortable work with damage.
The edges of the damaged hole can be trimmed with a construction knife. This is important to do if there is material melted from a cigarette around the perimeter of the hole or the edge is noticeably frayed. At the same time, the hole will slightly increase, but it will acquire clear features that allow you to more securely fix the future patch. Using tweezers, we get rid of possible burrs on the material, otherwise they will protrude above the patch.
Using fine sandpaper, if necessary, remove the identified small flaws on the surface. From the reinforced mesh we cut out a patch of the required shape, covering the area by 10-15 mm for the hole.
Such a patch is inserted into the hole and placed evenly between the upholstery and the chair. To do this, use tweezers and a small spatula. This must be done carefully so as not to damage the material.
You need to know that the mesh should be distributed without folds.
The work area can now be degreased with a mild solvent that will not damage the upholstery. Oily fingerprints can interfere with a good fit of the patch.
Shaping the leather patch
After degreasing, a thermal powder is placed on the distributed mesh using a small spatula. Its remnants are swept from the surface of the skin outside the patch. For the next operation, we will use an iron and a Teflon gasket. The latter is placed on the area to be restored.
 Step 1. Determine the work area
 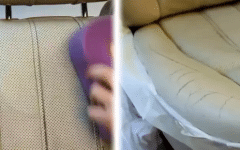 Step 2. Degrease the surface
 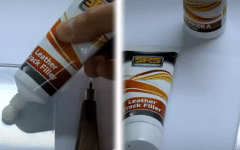 Step 3. We prepare the material
 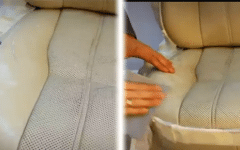 Step 4. We form a patch
 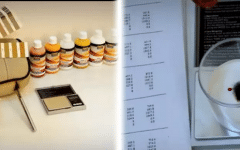 Step 5. We select the paint
  Step 6. Airbrushing
The heating of the iron should be such that it does not burn the skin in open contact with it. Sometimes 120 C is enough for such work. For about 15 seconds, we drive over the surface with an iron to fix the thermal materials.
After processing, any coolant can be distributed over the patch, for example, briquettes from a thermal bag or any other frozen materials. Ice cannot be used directly, moisture in this case will harm. You can protect the patch with a layer of oilcloth. Quick and abrupt cooling will give maximum naturalness and sufficient elasticity.
The Teflon lining can be removed, because the layer on the grid has become homogeneous and fixed with its reinforcement. You can re-get rid of new burrs.
The next layer is formed using a gel-like "liquid skin". The mass is evenly distributed over the repaired surface. It is convenient to do this with a small spatula. For a better result, several thin layers can be applied. Thus, we will increase the strength of the future patch.
Fixation of the material is also carried out using an iron. To do this, we again put a Teflon lining between its sole to be treated. The freezing process is also quite fast. Further, we also sharply cool with the help of refrigerants.
Adding realism to the patch
So that the treated area does not stand out from the rest of the areas, you need to give it a natural texture, like the surrounding material. To do this, we form a matrix from a two-component composition and apply it to a clean area larger than a patch. Then carefully remove the matrix from the surface and apply a thin layer of “liquid skin” to the patch. Before hardening, we apply the matrix with an imprint to the patch.
Having removed the stamp, reapply the Teflon lining and again heat it with an iron. The pattern formed in this way should hide the place of processing. Cool the surface and prepare the airbrush.
We fill the spray can with a specially selected color paint for the skin. Apply spray around the treatment area. It is better to do this in daylight, so the shades and possible inconsistencies will be better visible. But you need to know that wet paint is different from dry, so it’s better to experiment with color in the far places of the cabin. After that, let the paint dry and return the chair to the salon.
Conclusion
To carry out repairs with leather chairs, you need a little material and a small set of simple tools. Anyone can do this job with a little patience. It is better to train first at remote points, after that you can begin to repair areas that are in sight.