The TDC setting is needed when replacing the timing belt and during other repair work on the engine
On the K7J, K7M and K4M engines, the cylinders are counted from the flywheel.
Setting the top dead center (TDC) of the first cylinder of the K7J and K7M engines
When setting marks, it must be taken into account that the camshaft makes one revolution in four engine cycles, and the crankshaft makes two revolutions.
Therefore, when the marks on the crankshaft pulley and the hole on the cylinder block are aligned, both the first cylinder and the fourth can be at TDC.
It is necessary to set the TDC according to the mark on the camshaft pulley (when installed according to the marks on the crankshaft pulley, the piston of either the 1st or 4th cylinder can be in this position).
After that, be sure to check that the marks on the crankshaft toothed pulley match (with the accessory drive pulley removed).
If the marks on the crankshaft pulley do not match, then the installation of the gas distribution phases is violated (the piston of the 1st cylinder is not set to TDC). In this case, it is necessary to remove the camshaft drive belt and turn the crankshaft until the marks are aligned.
The crankshaft is rotated to check the coincidence of the marks for the bolt securing the auxiliary drive pulley to it, removing the upper part of the right engine mudguard to access it.
In addition, you can do this in the following ways (especially when adjusting the clearances in the valve drive, when control by marks on the crankshaft pulley is not needed):
Engage any gear (preferably IV) and slowly roll the car until the marks are aligned;
Take out one front wheel, turn on any gear and then turn the posted wheel until the marks are aligned.
The mark on the camshaft sprocket must match the mark on the cylinder head cover with the Dachia logo.
And the timing belt is also marked with paint, which should also match the marks.

The mark on the crankshaft sprocket must be aligned with the mark on the cylinder block.
This mark can only be seen after removing the accessory drive pulley.
To set the TDC, remove the right front wheel.

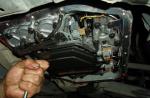
We unscrew the five bolts securing the upper cover of the timing belt

Remove the cover

We scroll the crankshaft clockwise for the bolt securing the auxiliary drive pulley until the marks on the camshaft pulley and the cylinder head cover are aligned

Then we loosen the tightening and finally unscrew the bolt securing the pulley

We remove the pulley

We unscrew the three bolts securing the lower cover of the timing belt

Remove the cover
When checking the installation of the valve timing, it is not necessary to remove the bottom cover.
You only need to remove it if you need to replace the belt or rearrange it.
We check the coincidence of the marks on the camshaft pulley and on the cylinder head cover
Setting the TDC on the K4M engine
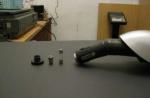
To perform the work, you will need tools: a socket head for 13, 15, 18, a key for 13, screwdrivers, a Torx E14 key;

Clamp for setting TDC;

Camshaft retainer.
If these clamps are not available, you can make them according to the sketches:


Removing the right front wheel
Remove the right suspension bracket of the power unit

With a head of 13, we unscrew the three bolts and two nuts securing the upper timing cover

Remove the top cover of the timing gear

We rotate the crankshaft clockwise for the bolt securing the auxiliary drive pulley

We set the marks on the camshaft pulleys with the Renault logo so that they do not reach the top point a little

Using the Torx E14 key, unscrew the plug of the hole for installing the TDC position lock (Figure 9, shown on the removed engine)
The plug is located to the left of the flywheel in the cylinder block at the level of the 1st cylinder

We screw the TDC position lock into the hole
We turn the crankshaft to the stop

Unfasten the rubber clamp securing the air intake

Disconnect the air intake from the air filter housing

We remove the sleeve

Use a flat screwdriver to pierce the camshaft plugs

Press out the camshaft plugs

With the correct installation of the piston of the 1st cylinder in the TDC position of the compression stroke, the grooves at the ends of the camshafts should occupy a horizontal position and be shifted down relative to the axis of the camshafts.

We fix the camshafts in this position with a camshaft lock.
The gas distribution mechanism is one of the most important components of the car. The average belt replacement interval is 50-60 thousand kilometers. When replacing it, it is necessary to correctly install the timing marks. All the nuances and features of the process are described in this article. And remember: incorrectly set tags will lead to a malfunction of your machine and costly repairs.
For the correct operation of the gas distribution mechanism of the car, it is necessary that the closing and opening of the valves occur in a strictly defined sequence. The slightest inaccuracy in the operation of the camshaft and crankshaft leads to the fact that the gas exchange process in the cylinders is disrupted, and the engine stops working in the correct mode.
The timing belt is a rubber part that can wear out, crack, tear, etc. during operation. Therefore, it is necessary to replace the element in a timely manner.
In the process of installing a new one, you should correctly set the labels. This is necessary in order for the engine to work correctly from the first seconds of starting. If installed incorrectly, serious problems can occur, up to engine failure.
Tools you need to get the job done
Marking is not an easy process, and if done incorrectly, you risk spending a lot of time setting up the part. And this is not the worst. There are times when negligent drivers broke the engine and other mechanisms of the car.
First of all, stock up on the necessary tools:
- End head.
- Jack to raise the car.
- Keys number 17 or 19 - depends on what kind of car you have.
Tip: it's best that you have all the key diameters starting from #10.
Large flat head screwdriver.
Labeling
Before starting work, you need to understand that it is important that during the process of replacing the timing belt, the pre-set risks do not go astray. Otherwise, you will have to delve into the settings and spend more than one hour installing the part.
When installing the timing belt, it is important to set the pistons so that in the first cylinder the piston is at the highest point of the first cylinder. In this position, the piston is at the maximum distance from the crankshaft. It is in this position that the engine is located with the marks correctly set. In this position, it is necessary to change the timing belt.
The number of marks, as well as their location, may differ depending on your engine type.


The following labels can be distinguished:
- flywheel mark.
- Pulley mark.
- Camshaft mark (two on a 16 valve engine).
All of them must match before replacing the timing belt. In order to set the correct position, turn the crankshaft by the bolt securing the pulley to it. Please note: it is forbidden to scroll by the camshaft pulley.
After you set the TDC, replace the belt, tighten the tensioner.
At the end of the belt installation, turn the crankshaft a few turns, check if the risks have gone astray. Repeat the adjustment if necessary.
Timing belt replacement without marks
In some cases, it is necessary to install a belt without labels.
This will require: 
- Calipers.
- Screwdriver
First of all, remove the protective cover of the belt, unscrew the candles.
Let us consider in detail the process of replacing a belt without marks on an 8-valve engine.
- It is necessary to set the camshaft in the overlap, for example, it is convenient to select the second cylinder. To do this, you will need a caliper and a screwdriver. Slowly rotate the camshaft clockwise and observe the position of the overlap. To do this, use the barbell. Put it on compensators and rotate the camshaft to the point where the expansion joints are at the same height. That is, the position of the barbell should be straight, not beveled.
- After determining the overlap, it is necessary to set the TDC (top dead center) of the second cylinder. We insert a screwdriver into the candle channel. Slowly rotate the engine, only in the direction of the engine, so that the piston went up. At some point, you will feel that the flywheel has become easy to rotate. After that, you need to feel the lower and upper points with your hand and set the upper one.
- After adjustments, put on a new belt to match, you may need to turn it a little. Also pull it up.
- The next step is to check the installation of the belt. Rotate the flywheel, look for risk on it. Set it to the top position and check the marks on the camshaft. If the setting is made inaccurately, the risks will leave.
On a 16-valve engine (2 camshafts), installation is carried out according to the same principle.
Consequences of mislabeling
If the timing marks were set incorrectly, there may be serious consequences for the car.
The most common cases:
- Due to the broken timing phases, the valves can be deformed when the engine is running, and damage will accumulate.
- There will be a deformation of the valves - a bend. Although in an 8-valve engine this will not happen.
- Due to deformation of the valves, the cylinder head may be damaged. And as a result, the guide bushings will fail, and cracks may appear on the main power elements.
- The piston mechanism may burn out due to incorrect timing marks.
- An oily residue will appear on the candles. Plus, the incendiary moment of the fuel mixture worsens.
- And there are other side effects as well.
How to understand that the marks are knocked down, symptoms
After replacing the belt, a situation may arise that the markings have not been set correctly. How to determine this is described below.
- Lost traction, throttle response.
- The car starts to accelerate more slowly.
- The engine gets very hot.
At the end of the article, we want to note that not every car owner will be able to set the timing marks correctly. It is necessary to have information about the operation of the engine and its design features. If you do not want to spend a single hour on setting up the mechanisms, we recommend contacting specialists.
An article in which you will find out where the TDC marks are located on VAZ cars. Photo with description and how to align their location.


1. On the engine in a VAZ 2112 car, on the toothed pulleys of the camshafts, the upper dead spots (protrusions "A") are located parallel to the rear cover of the camshaft drive belt (potholes "B").
2. Car models VAZ 21083, 2110 and 2111 (station wagon) have TDC on the camshaft pulley (tubercle) and on the rear cover of the camshaft drive belt (antennae).

3. Here the photo shows the TMV for the rest of the VAZ models, which is on the flywheel - you can see a strip, and on the scale of the clutch housing rear shield (curly cutout). For better visibility, the marks were removed.
4. On the crankshaft pulley, all motors have a tubercle, and on the oil pump cover there is a small cutout. These marks can only be seen if the machine's alternator drive pulley is removed.

5. In the VAZ 2106 engine, the marks are on the camshaft sprocket (dent "A"), and the other on the camshaft bearing housing (protrusion "B"). These marks can only be seen when the cylinder block is removed.
6. Also, the manufacturer on the 2106 model marked with marks on the engine housing. A long line "A" is located on the cover of the camshaft drive chain and a triangular groove "B" on the edge of the crankshaft pulley stream.
How to align the location of the TDC marks on the VAZ 2110 and 2111:
1. First you need to remove the "-" terminal from the battery.

2. Now you should remove the right mud protection from the bottom of the machine. Remove 4 bolts and 1 screw on the right.
3. Next, open the hood and unscrew the 3 screws that hold the front cover of the camshaft drive belt. Before unscrewing the cover, pay attention to the wiring wires, they are also fastened with these bolts. Carefully remove the belt guard.

4. Now you need to align (set) the TDC marks. To do this, use a wrench to turn the crankshaft by the bolt securing the alternator drive pulley until the points on the rear cover and the camshaft pulley match. Warning
The sequence of operations is presented on the assumption that the ignition distributor is installed correctly. If it is necessary to determine the top dead center for the installation of the distributor, then set the piston of the first cylinder to the top dead center in the compression stroke, then set the ignition marks.
Piston top dead center is the point that each piston passes through when cranking the crankshaft. Each piston reaches TDC at the end of the compression stroke, then again at the end of the exhaust stroke. In order to install the engine timing mechanism, the top dead center of the piston of the first cylinder is used.
Positioning the piston exactly at top dead center is extremely important in many jobs such as removing the camshaft, toothed belt and camshaft pulley and ignition distributor.
Before starting work on setting the piston of the first cylinder to top dead center, make sure that the gear lever is in the neutral position and the handbrake is applied. Turn off the ignition system by removing the center wire from the distributor cap and grounding it to ground. Unscrew the spark plugs.
To set either piston to top dead center, rotate the crankshaft using one of the methods described below. At the same time rotate the crankshaft of the engine clockwise.
The most preferred method is to turn the engine crankshaft using the crankshaft pulley bolt.
To save time, you can use a starter to bring the piston to top dead center. The precise setting of the piston to the top dead center is carried out by turning the crankshaft by the crankshaft pulley bolt.
| PROCEDURE | ||||||||||||||
|
||||||||||||||

5 years ago

Welcome!
To begin with, let's analyze the meaning of the abbreviation "TDC" - "Top Dead Center". Below we consider its display on cars of the classic family.
Note!
You will need to stock up on a special key to turn the crankshaft pulley. In the absence of such, use the "36" head.
When should a piston be installed?
Before starting work requiring the removal of the timing chain from the vehicle. Usually, after this, the installation of the valve timing is disturbed, most likely you will encounter unstable operation of the car engine. Therefore, before proceeding with such a procedure, it is necessary to set the piston of the fourth cylinder to the TDC position.
We carry out installation on the VAZ 2101-VAZ 2107
Note!
Start by removing the cylinder head from the car engine! (Described in more detail in the article: "About the gas distribution phases by marks" in paragraphs "1-10").
Method 1
Standing next to the engine compartment, stick your hand deep down and turn the crankshaft pulley nut clockwise with a special wrench. It is shown in red in the photo below.
Note!
In the absence of the above tool, use the “36” head, first removing the crankcase protection (this process is described in detail in the article: “Replacing the crankcase protection”). Now, using the head, turn the crankshaft nut, but not from the top, but from the bottom of the car.
Method 2
Sit in the car, turn on the fourth gear, drive a few meters until all the marks match.
Method 3
You will need a jack. Using it, hang out one of the rear wheels of the car, turn on the 4th gear and turn the car wheel with your hand in the direction of travel.
Note!
In all ways, it is necessary to scroll the wheel until the marks converge!
Question?
Which method suits you and why did you choose it? (Write your answer in the comments)
How to make sure the labels match?
1) After removing the head, use one of the three methods listed above to set marks.
2) Check whether the marks of the gas distribution mechanism are installed relative to the body marks, for this:
Go to the engine compartment of the car and check the coincidence of the camshaft sprocket mark with the mark on the housing.